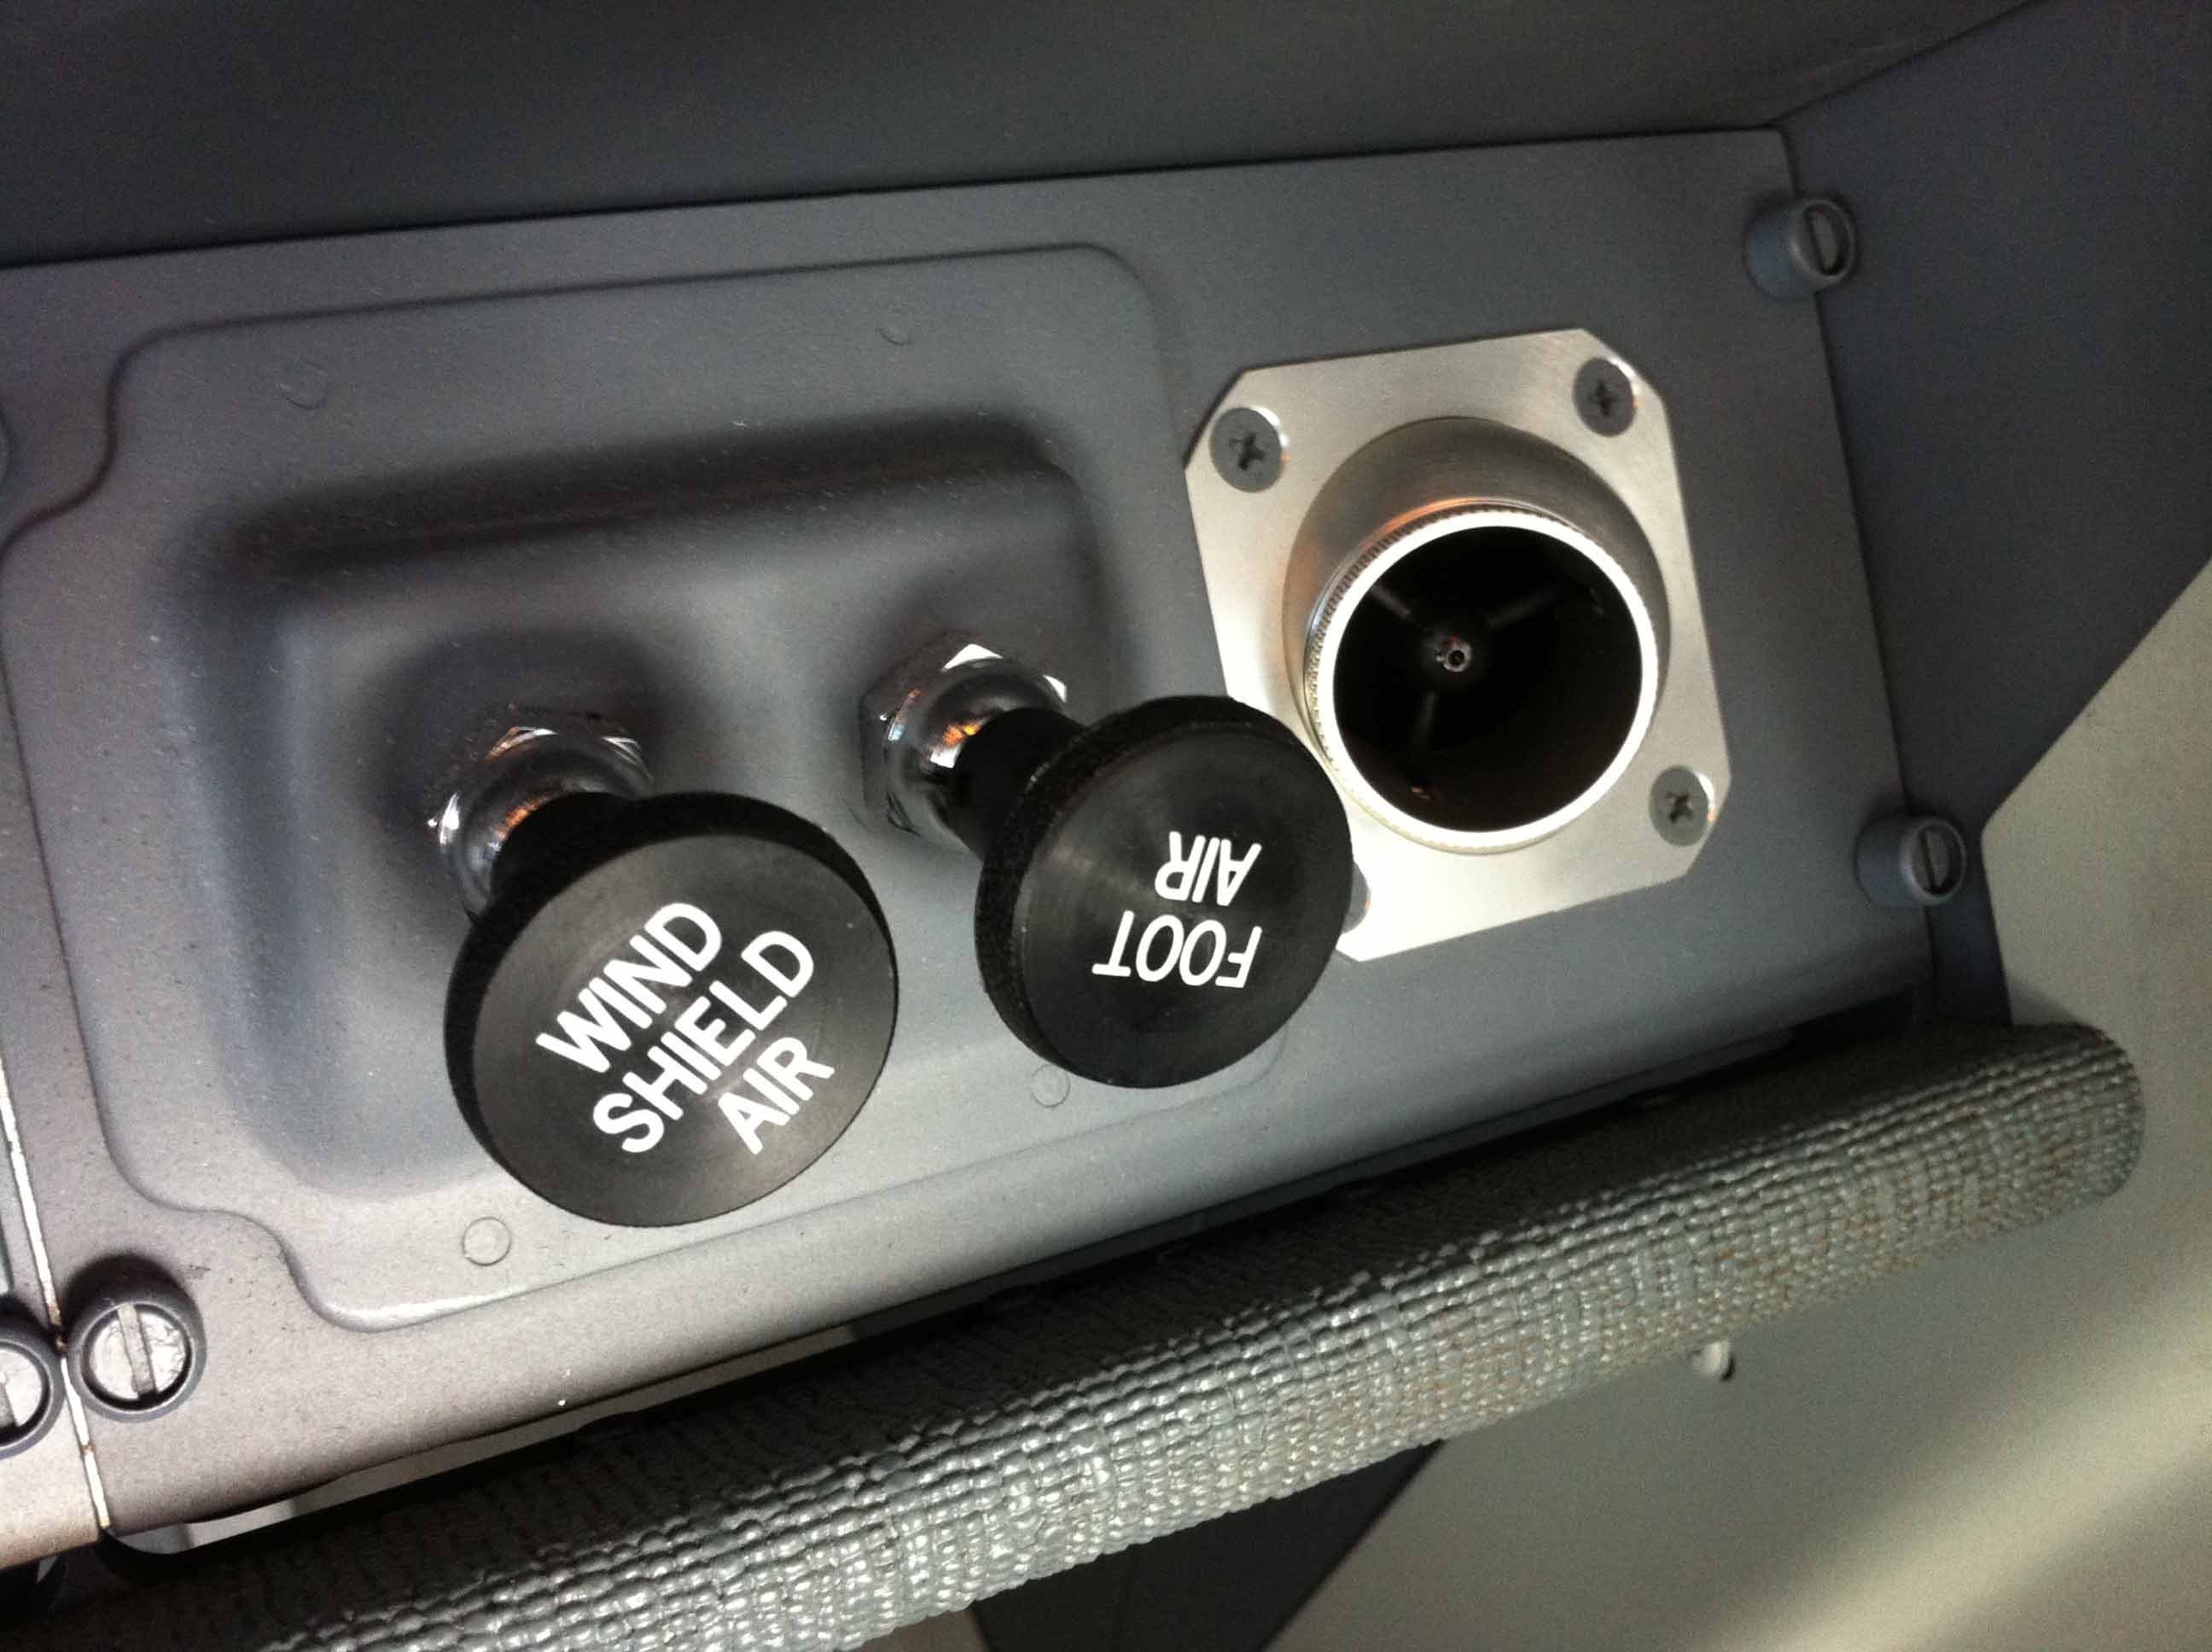
Foot Of Air, Windshield, Air
DESCRIPTION:
The " Foot-Air/Windshield-Air’ control switches are located to the right (Capt), and to the left (W) of the ‘air-vents’ in the Lower Panels.
When both of the switches can be pulled out (Pull) at the "Foot Air" in air of the air blown out from the rudder pedals to the legs or feet) on the Capt/FO.
For the Windshield, Air is air, the air is blown on the left (Capt) and right (IR) windscreen (windshield) to get to the aandampen to go.
The real thing
The COMPOSITION
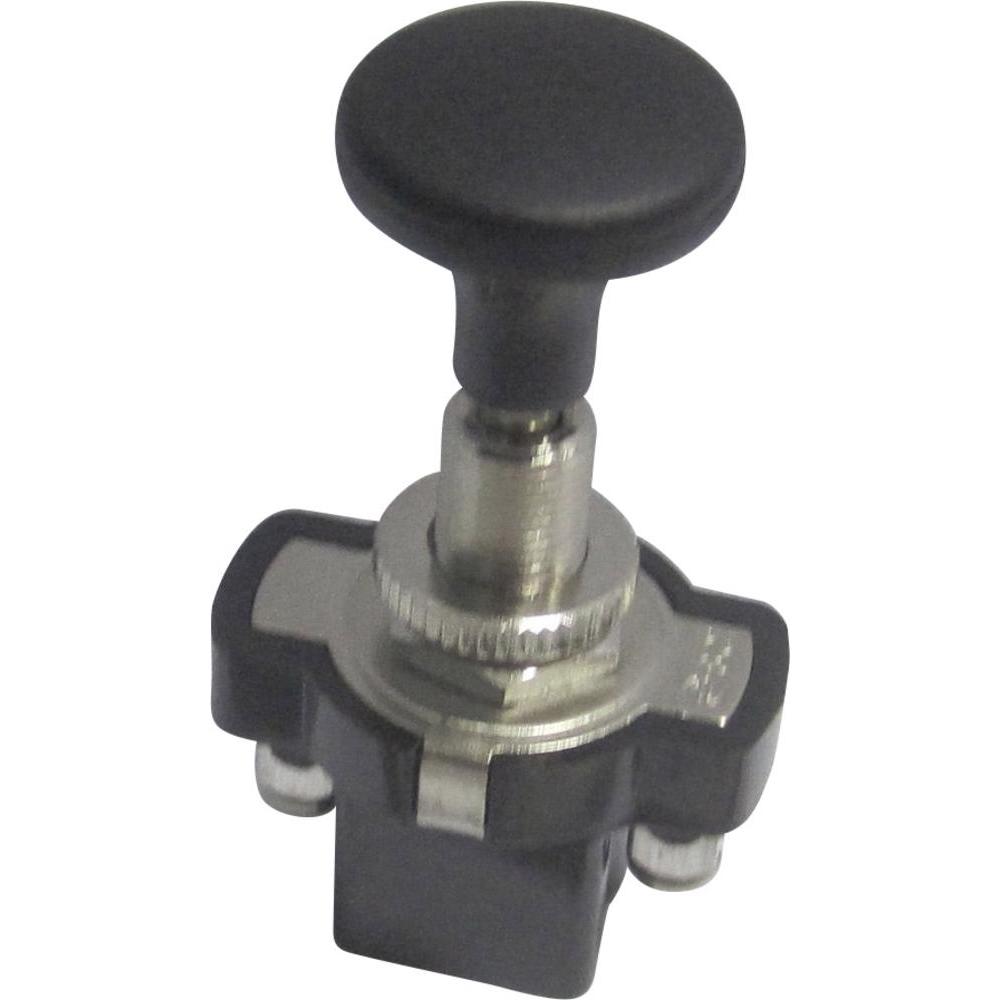
- The Pull/Push switches;
- Decals;
- Block of wood (a bit to your pillow);
- The Aluminium plate.
The Push/Pull switches
These are the switches I have bought in the Rs.be (Note to Carlos Hermida, and Michael (Prosim-Polarisfly).
The two parts of the Apt, Lower Panel, and the two pieces of the PHOTOGRAPH to Lower Panel.
Title : SCI A3-5CC-SQ Car pull switch, 12V/DC, 10A, 1x off/on lock 1 pc.
Part no : 701175-62
Decals
The decals or stickers of the – FOOT AIR and WINDSHIELD AIR I got at my local an engraver.
The inner circle of the sticker has a diameter of 17 mm.


Block of wood
It is a wooden cube or a slanted pillow I made out of mdf wood 6 mm dimensions. For the sides I I together, and the holes on the left and the right side I have closed up with pieces of wood.
The dimensions of this block are to be found in the pictures below.
!!! These dimensions are in view and in accordance with the comparison pictures of the real one. Thus, it is not the actual size of the real thing!


The box is provided with 2 holes allowing the switch to come out.
And then I have the whole edited, with houtplamuur, and everything is sanded down so that the corners are nicely rounded.
Then everything is painted over with a poriënvuller to get all of the holes and the gaps to be sealed. After the introduction of the poriënvuller it around the block again, lightly sand.
This poriënvuller can you buy it in a commercial for the modelbouwhobby. The poriënvuller it has the properties of fast drying, small holes are to be sealed and have a smooth finish to create it. The stuff has a very strong, unhealthy odor, and if it is, ventilation is necessary.


Aluminiumplaatje
The aluminiumplaatje is A 1-mm - fat.
!!! The measurements are in view of and in accordance with the comparison pictures of the real one. Thus, it is not the actual size of the real thing!.
Also, in the Lower Panels of each of the homecockpit will be a bit different, which makes the size of the aluminiumplaatje is also subject to change.
The working conditions, I have to run it with a standard hacksaw, and a jigsaw for the hole in the middle of it.


MONTAGE
First, the metal plate (back-plate) of the Lower Panel, where the air vent is mounted, and a rectangular opening cut in which the dimensions are the same as in the opening of the aluplaatje that we have made.
Also, the wooden base (mdf) on my Lower Panels, I still have the same opening made to make the switch to sink due to the Lower Panels around it.


It's a finished block of wood with switches on the aluplaatje appropriate for you to see if everything is properly in place. I write with a pencil, you can aflijningen mark. After that, it is the part inside the tags glued to it. I've had to do this, superglue is used. Use super glue to stick it on the wood, and aluminium to give a good connection.
Then, the perimeters or sides clean, with shipping to most european countries. This provides an additional connection or fastening between the block and the aluplaatje.
After a drying time of 24 Hr, and everything will be sanded to the desired result, i.e., the various "sides" are pretty close, and rounded, proportionate in size.
The final scour off is done with a thin abrasive paper (korel 380-400).


After the application of the first primer, as can be seen, or that all irregularities, crevices, and holes are disposed of. If you can't see what's filler and apply for optimal improvement (+sanding).
The substrate is then lightly sanded and overcoated with the varnish (Boeinggrijs). This painting (primer and paint) was done with a can of spray paint.


The confirmation of the aluplaatje with the block on the panel to the Bottom Panel, I used double-sided sticky tape. This is the tape that I have ever seen in the australian capital territory have passed, and the features are very easy to stick to and you will be able to easily remove it. It has been over the years to be a valuable tool for the construction of the homecockpit.
Under the aluplaatje, there is adequate time to get enough tape to make.


")
")


VENTILATIE
In the future, it will be at the "Foot Air" switch, and a fan connected to it. It will be behind the rudder pedals are mounted, rear of the MIP-mode.
The fan will provide the necessary cooling of the front side (Lower Panels) of the dashboard.
The Windshield Air switch that will be connected to another fan that the necessary ventilation will be through the air vents on the left and right of the sidewalls.


Translated by Yandex.Translate and Global Translator


