Front ceiling
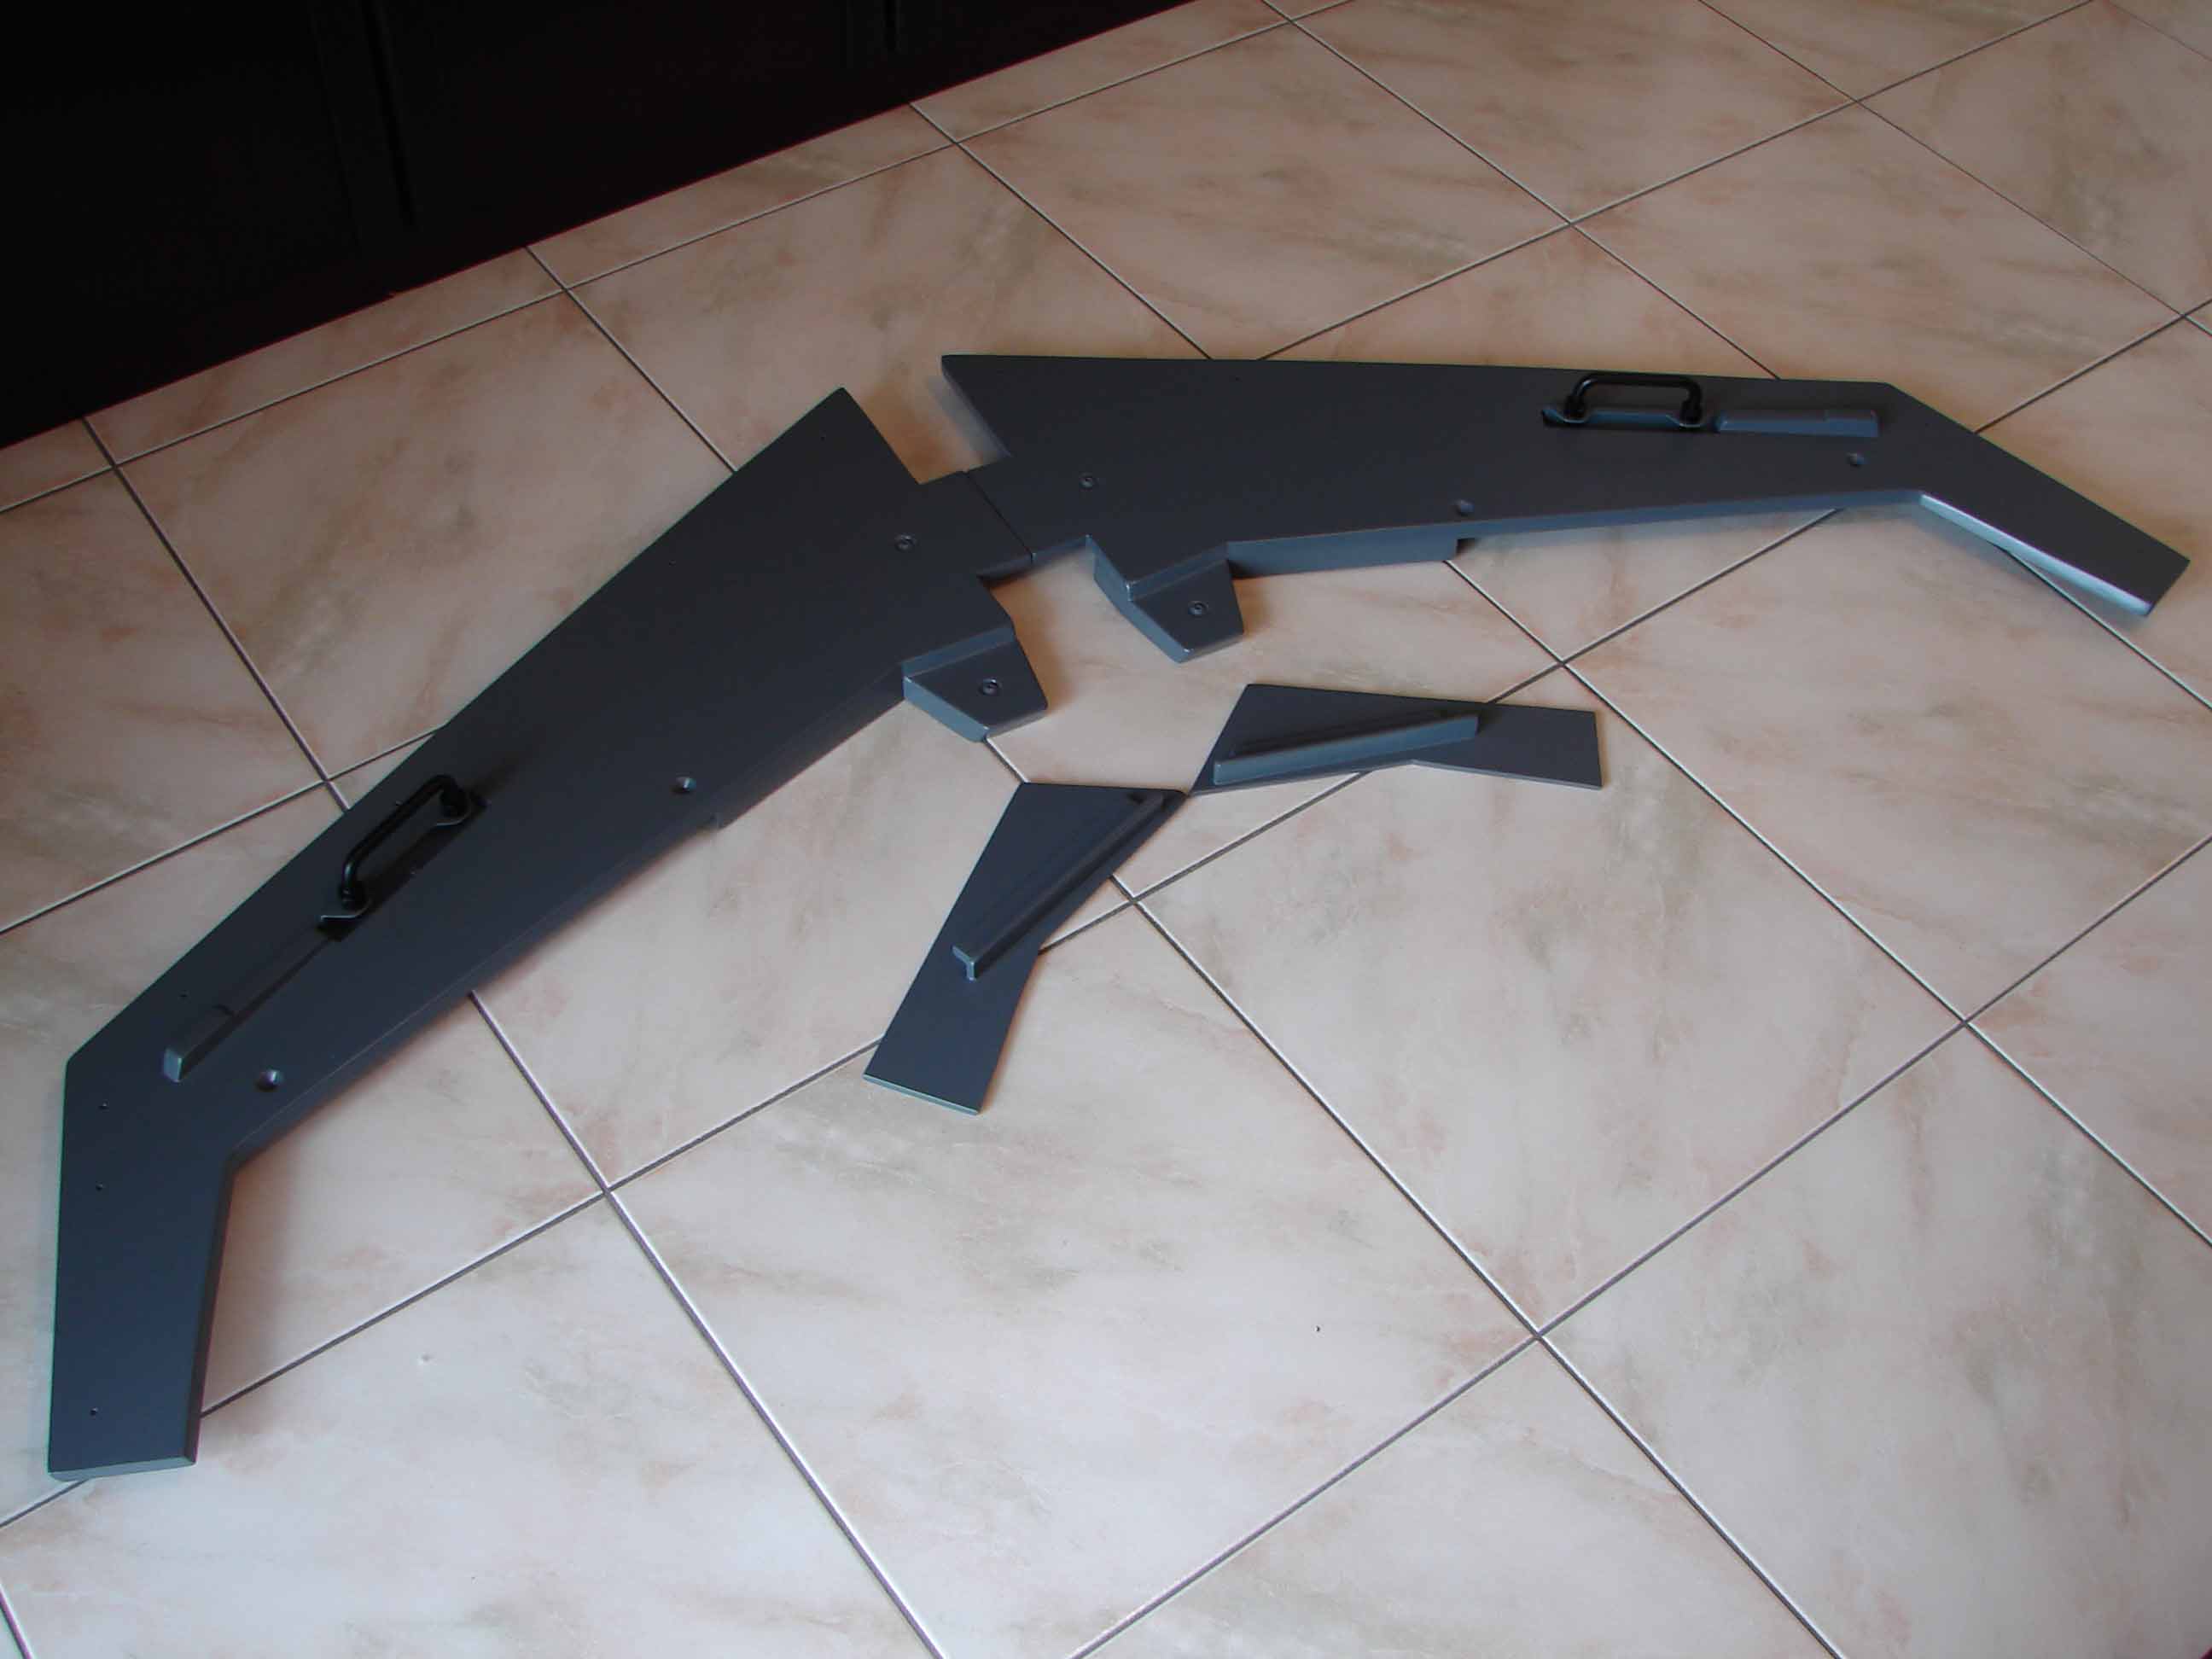
The ‘ceiling’ or ceiling of the cockpit is divided into 3 parts :
- Front (front ceiling) with folding handles;
- Eyebrow windows with map lights;
- Rear (rear ceiling) with decals.
FRONT CEILING

Description
This is the plafondgedeelte between the ’windshield’ (front windows) and the ‘forward overhead.
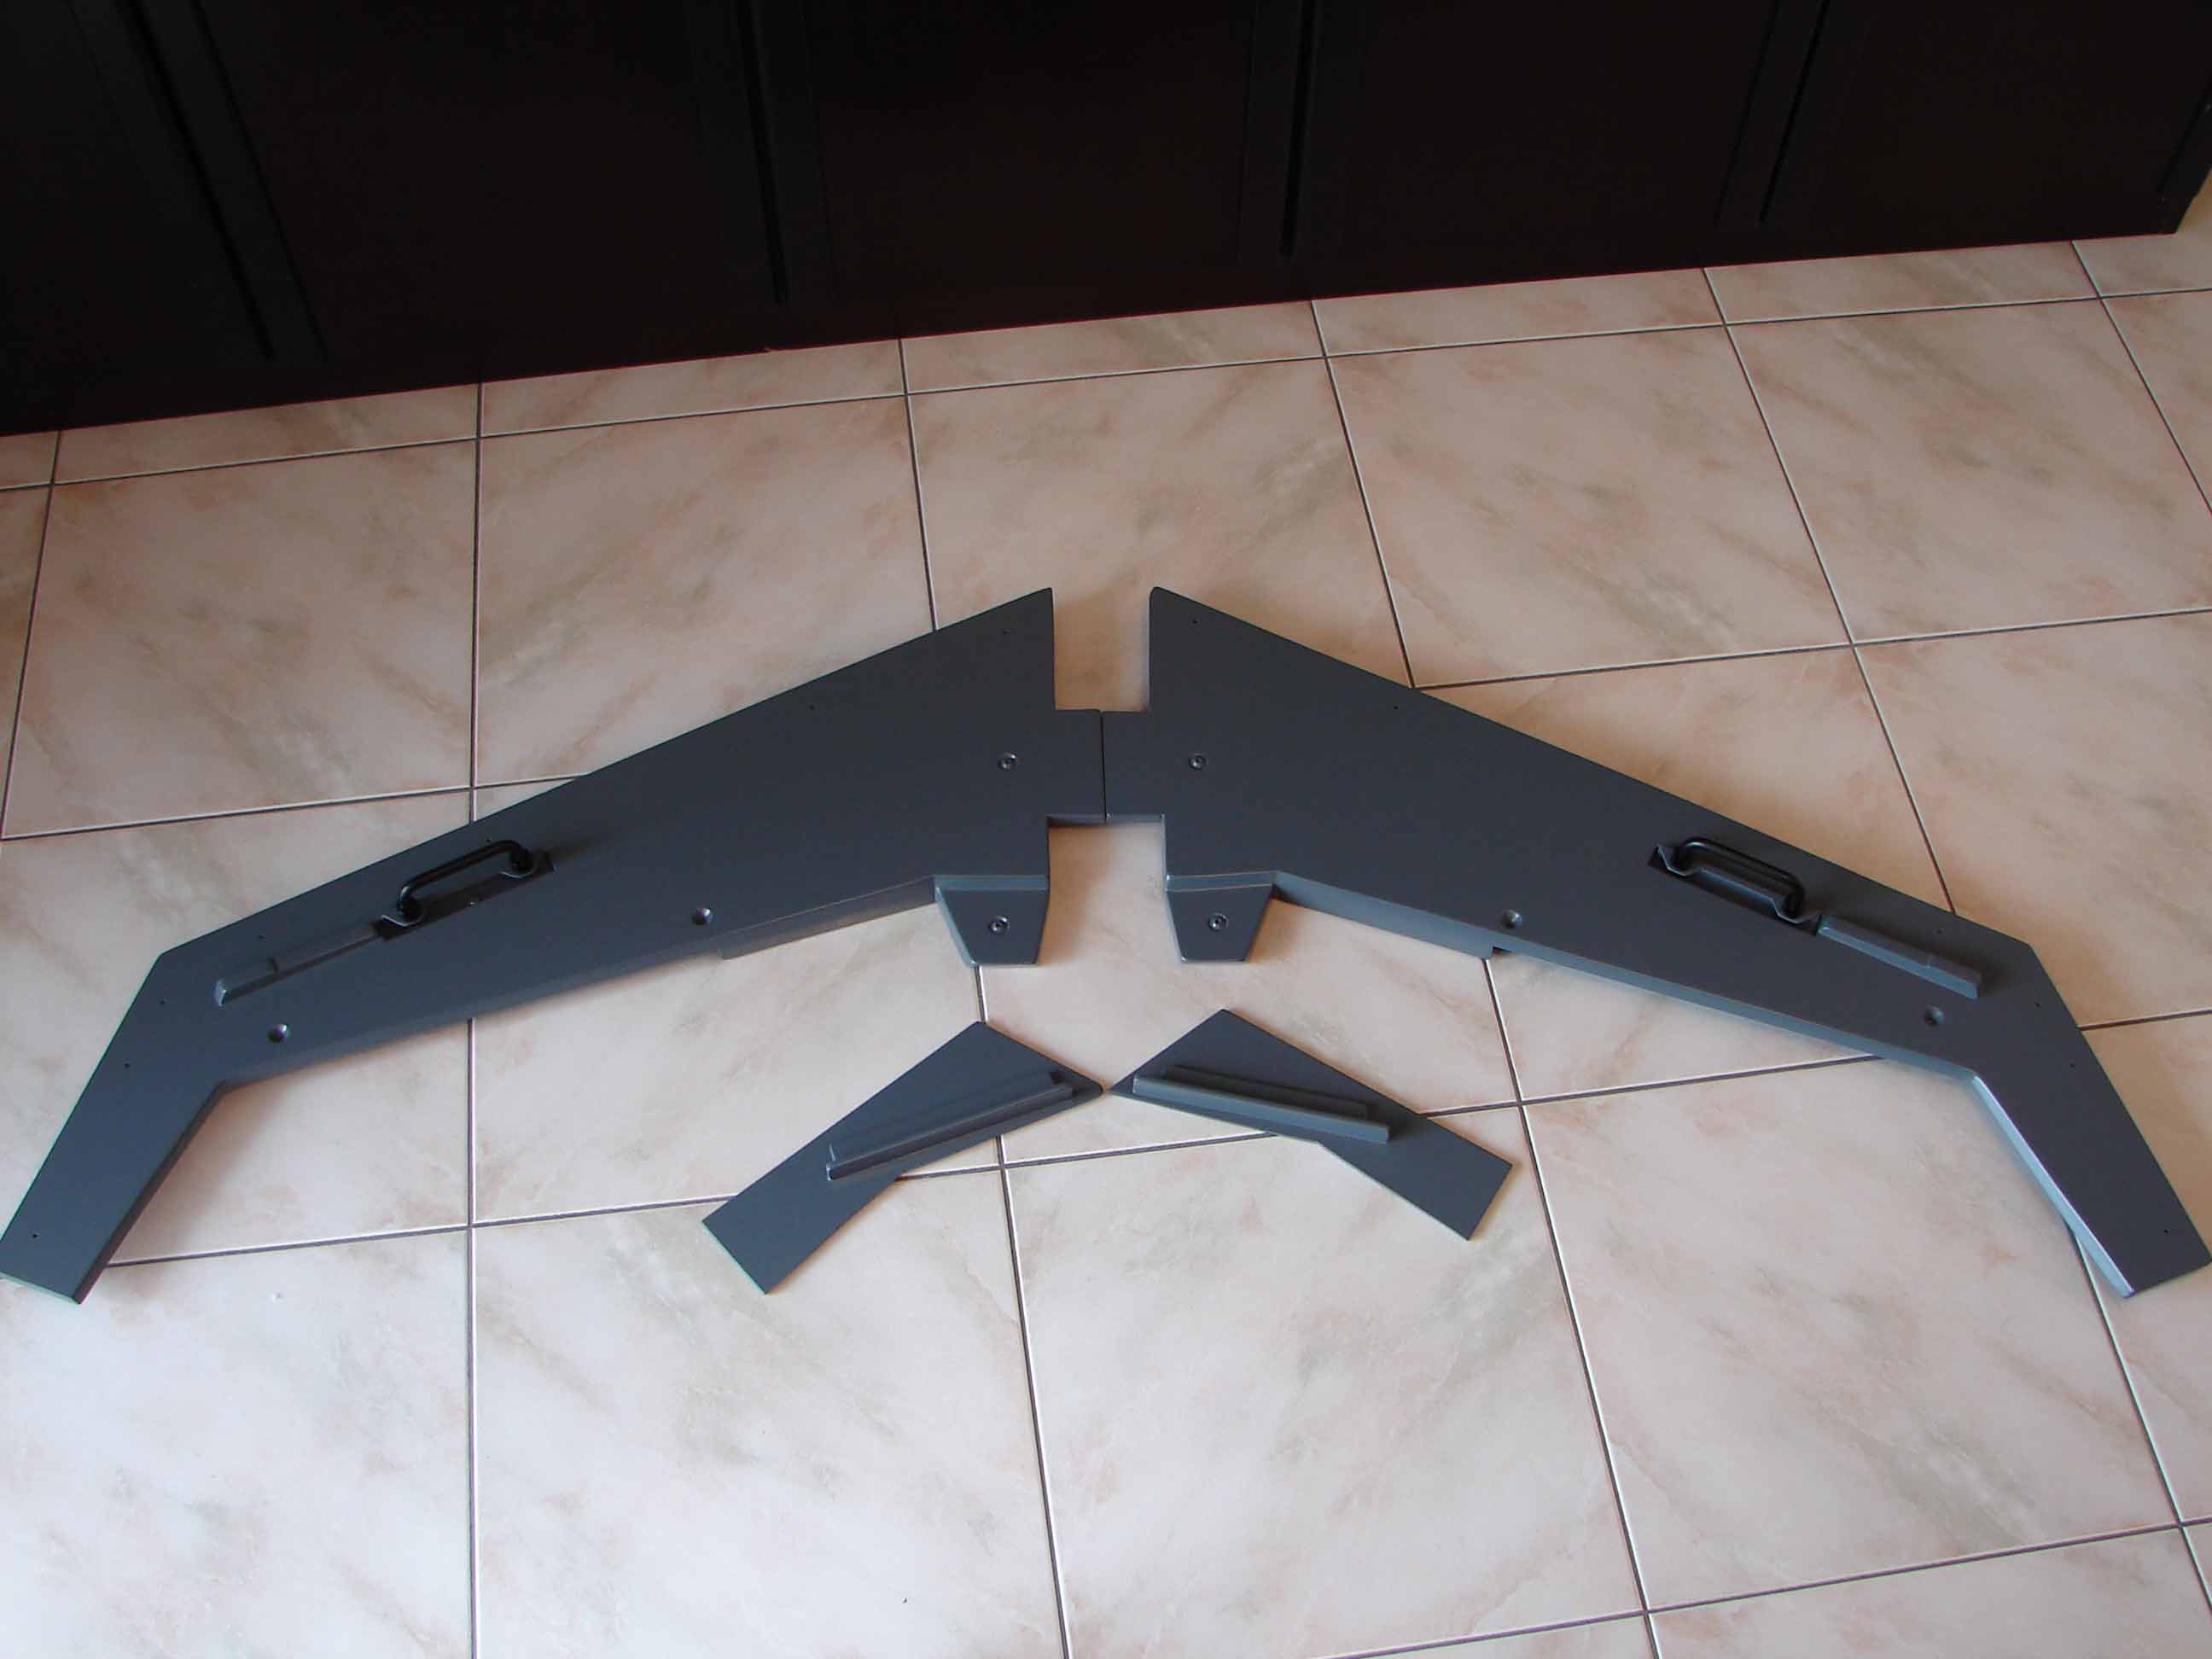
This front is composed of 2 mdf panels 12 mm thickness (Capt and F/O). After studying different pictures on Airliners.net I have this mdf panels in the middle (the left and right of the compass) with the necessary details that are found on the ‘real thing’ (more or less).
These details – the left and right of the compass – I have to adapt to my ‘eyebrow windows’ that afterwards, I want to install.
This ‘eyebrow windows’ come from a real B737-300 and differences of model and size than that of the -800 type. So these details are a mixture become between the -300 and -800 type.
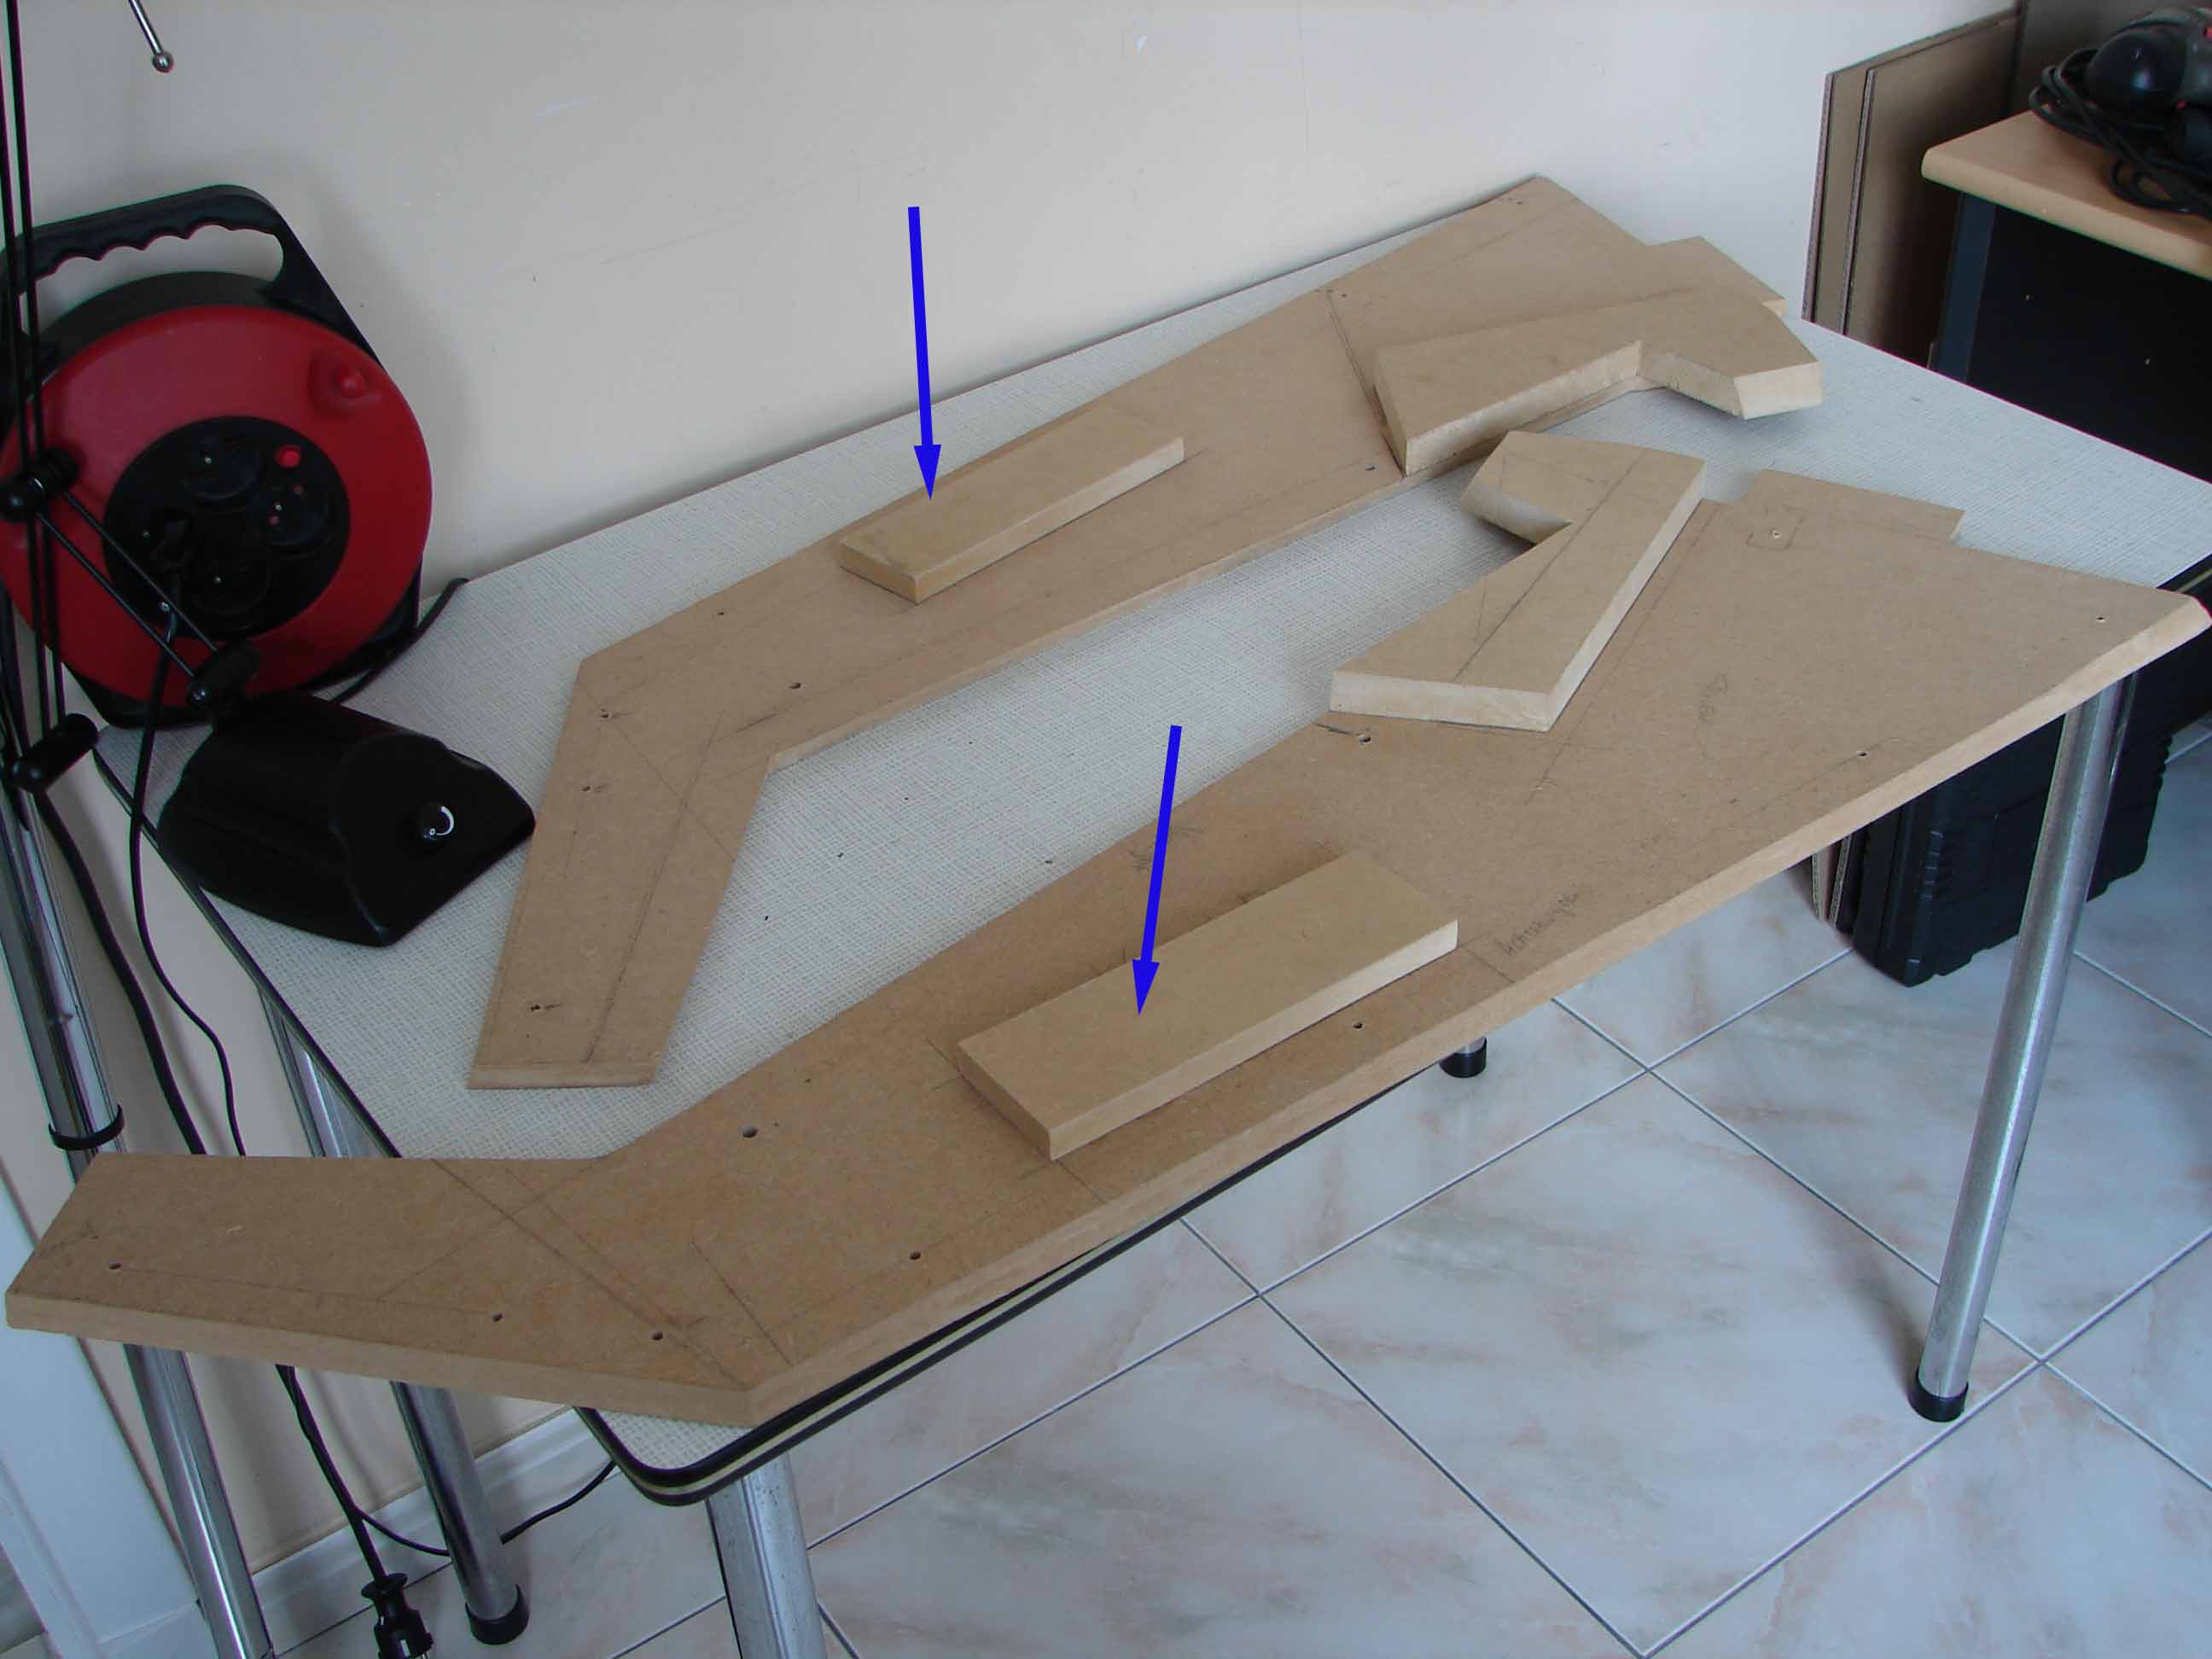
I have the first of the ‘front-ceiling’ a few proefvormen made out of cardboard to see if the dimensions and contours a little knock. Other homecockpit setups, each have their own dimensions that's why it is not interesting sufficient dimension to mention of the ‘ceiling’, although I still have attached. Or knock them with other setups is questionable. The concept and form speak for themselves. It's the idea that counts ...


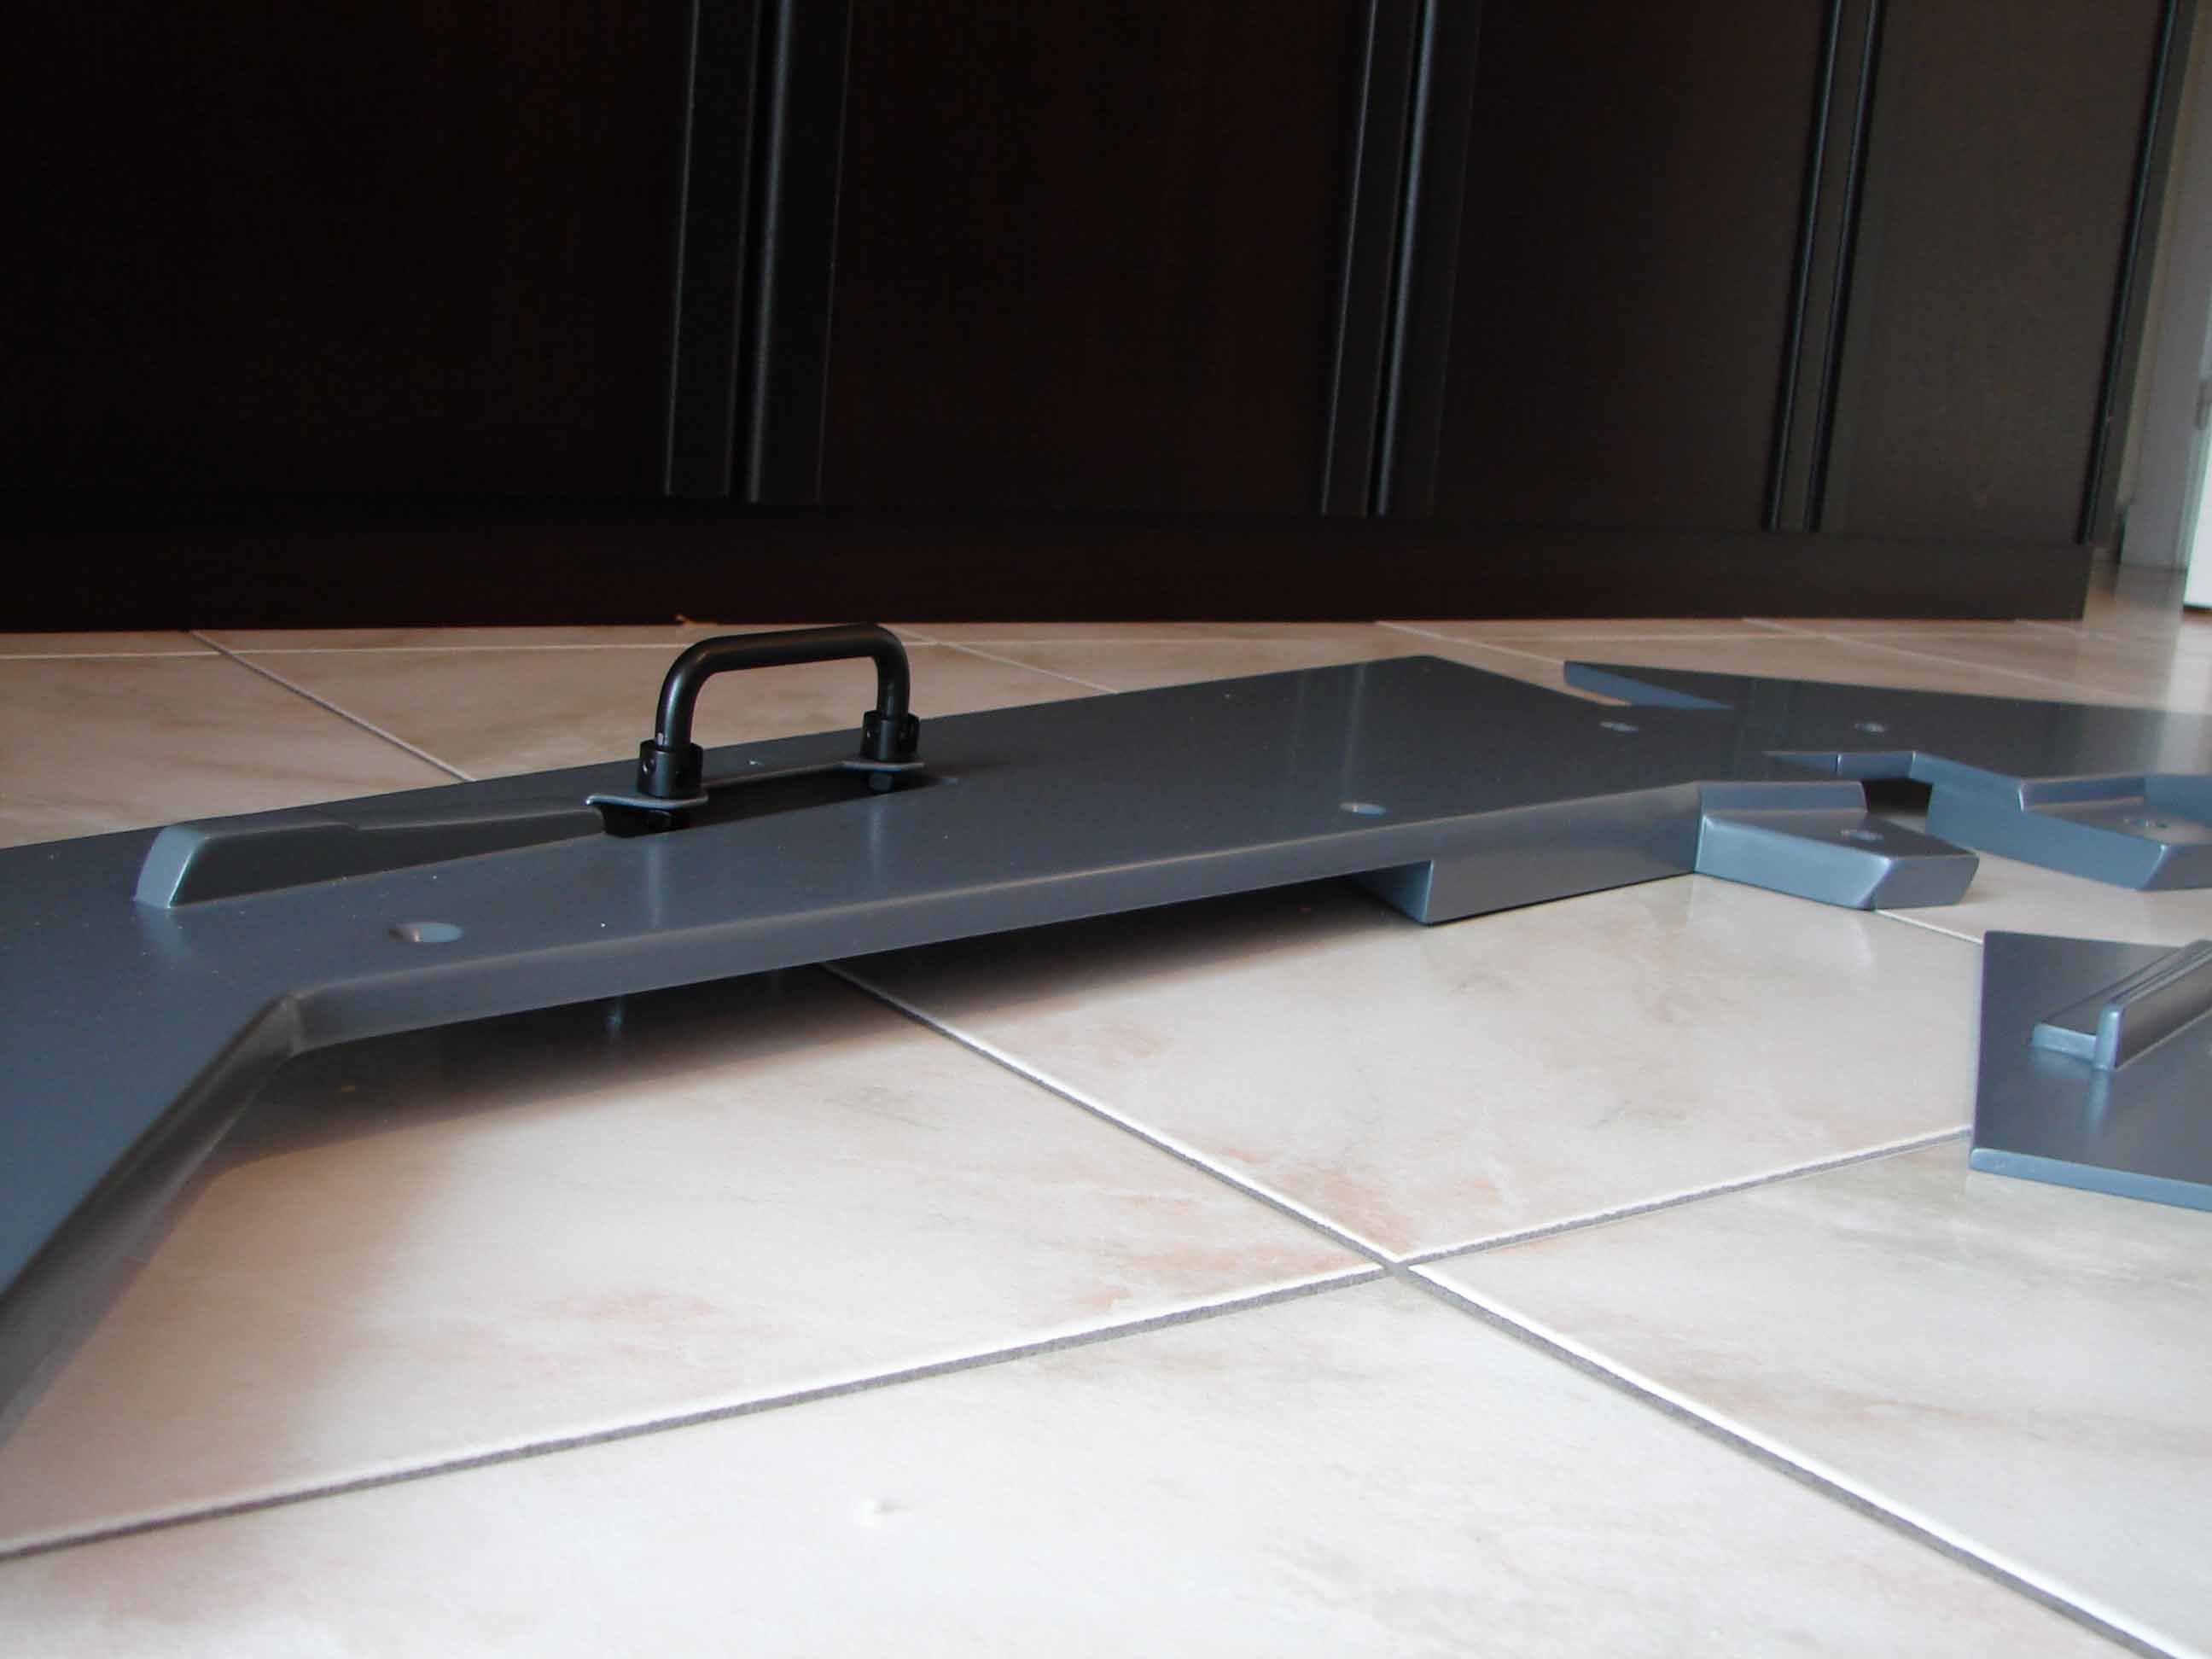
The ‘front-ceiling’ is also provided with the necessary folding handles. These handles are attached to brackets that are partially sinking into the mdf panels of the ‘front-ceiling’. Before that I was in the right place two rectangular openings cut in the mdf panels.


Paintings
The mdf panels I have on the sawn sides edited with poriënvuller to a more smoother result to get the edges (tip Martin van Liempt).
Left and right I also houtplamuur used to get from a corner to a smooth curve.
After the poriënvuller and filler well is dry, I will lightly sand and 2 coats of primer.


Afterwards I have everything painted with 2 coats of varnish in Boeinggrijs (ACC R06.06.30). The different primer and paint are applied with a spray to get an even smoother result.
It is important the paint is not too thick to spray but in several thin layers to work. Otherwise there is a risk that the paint begins to ‘walk’ with the result of the drop formation.
Also, it is advisable as far as possible dust-free painting (spraying), which is not always easy. It is also wise to make use of spray cans of a good quality.
One can in a paint store spray cans filled with paint but I have found that drained quickly and also after a short interruption of spraying, the risk is to be subsequently druppelspatten to get on the paintwork (horrible annoying this is). This can be o.a. are to a clogged nozzle or a mistake in the verfkwaliteit. So it is a bit of a look ...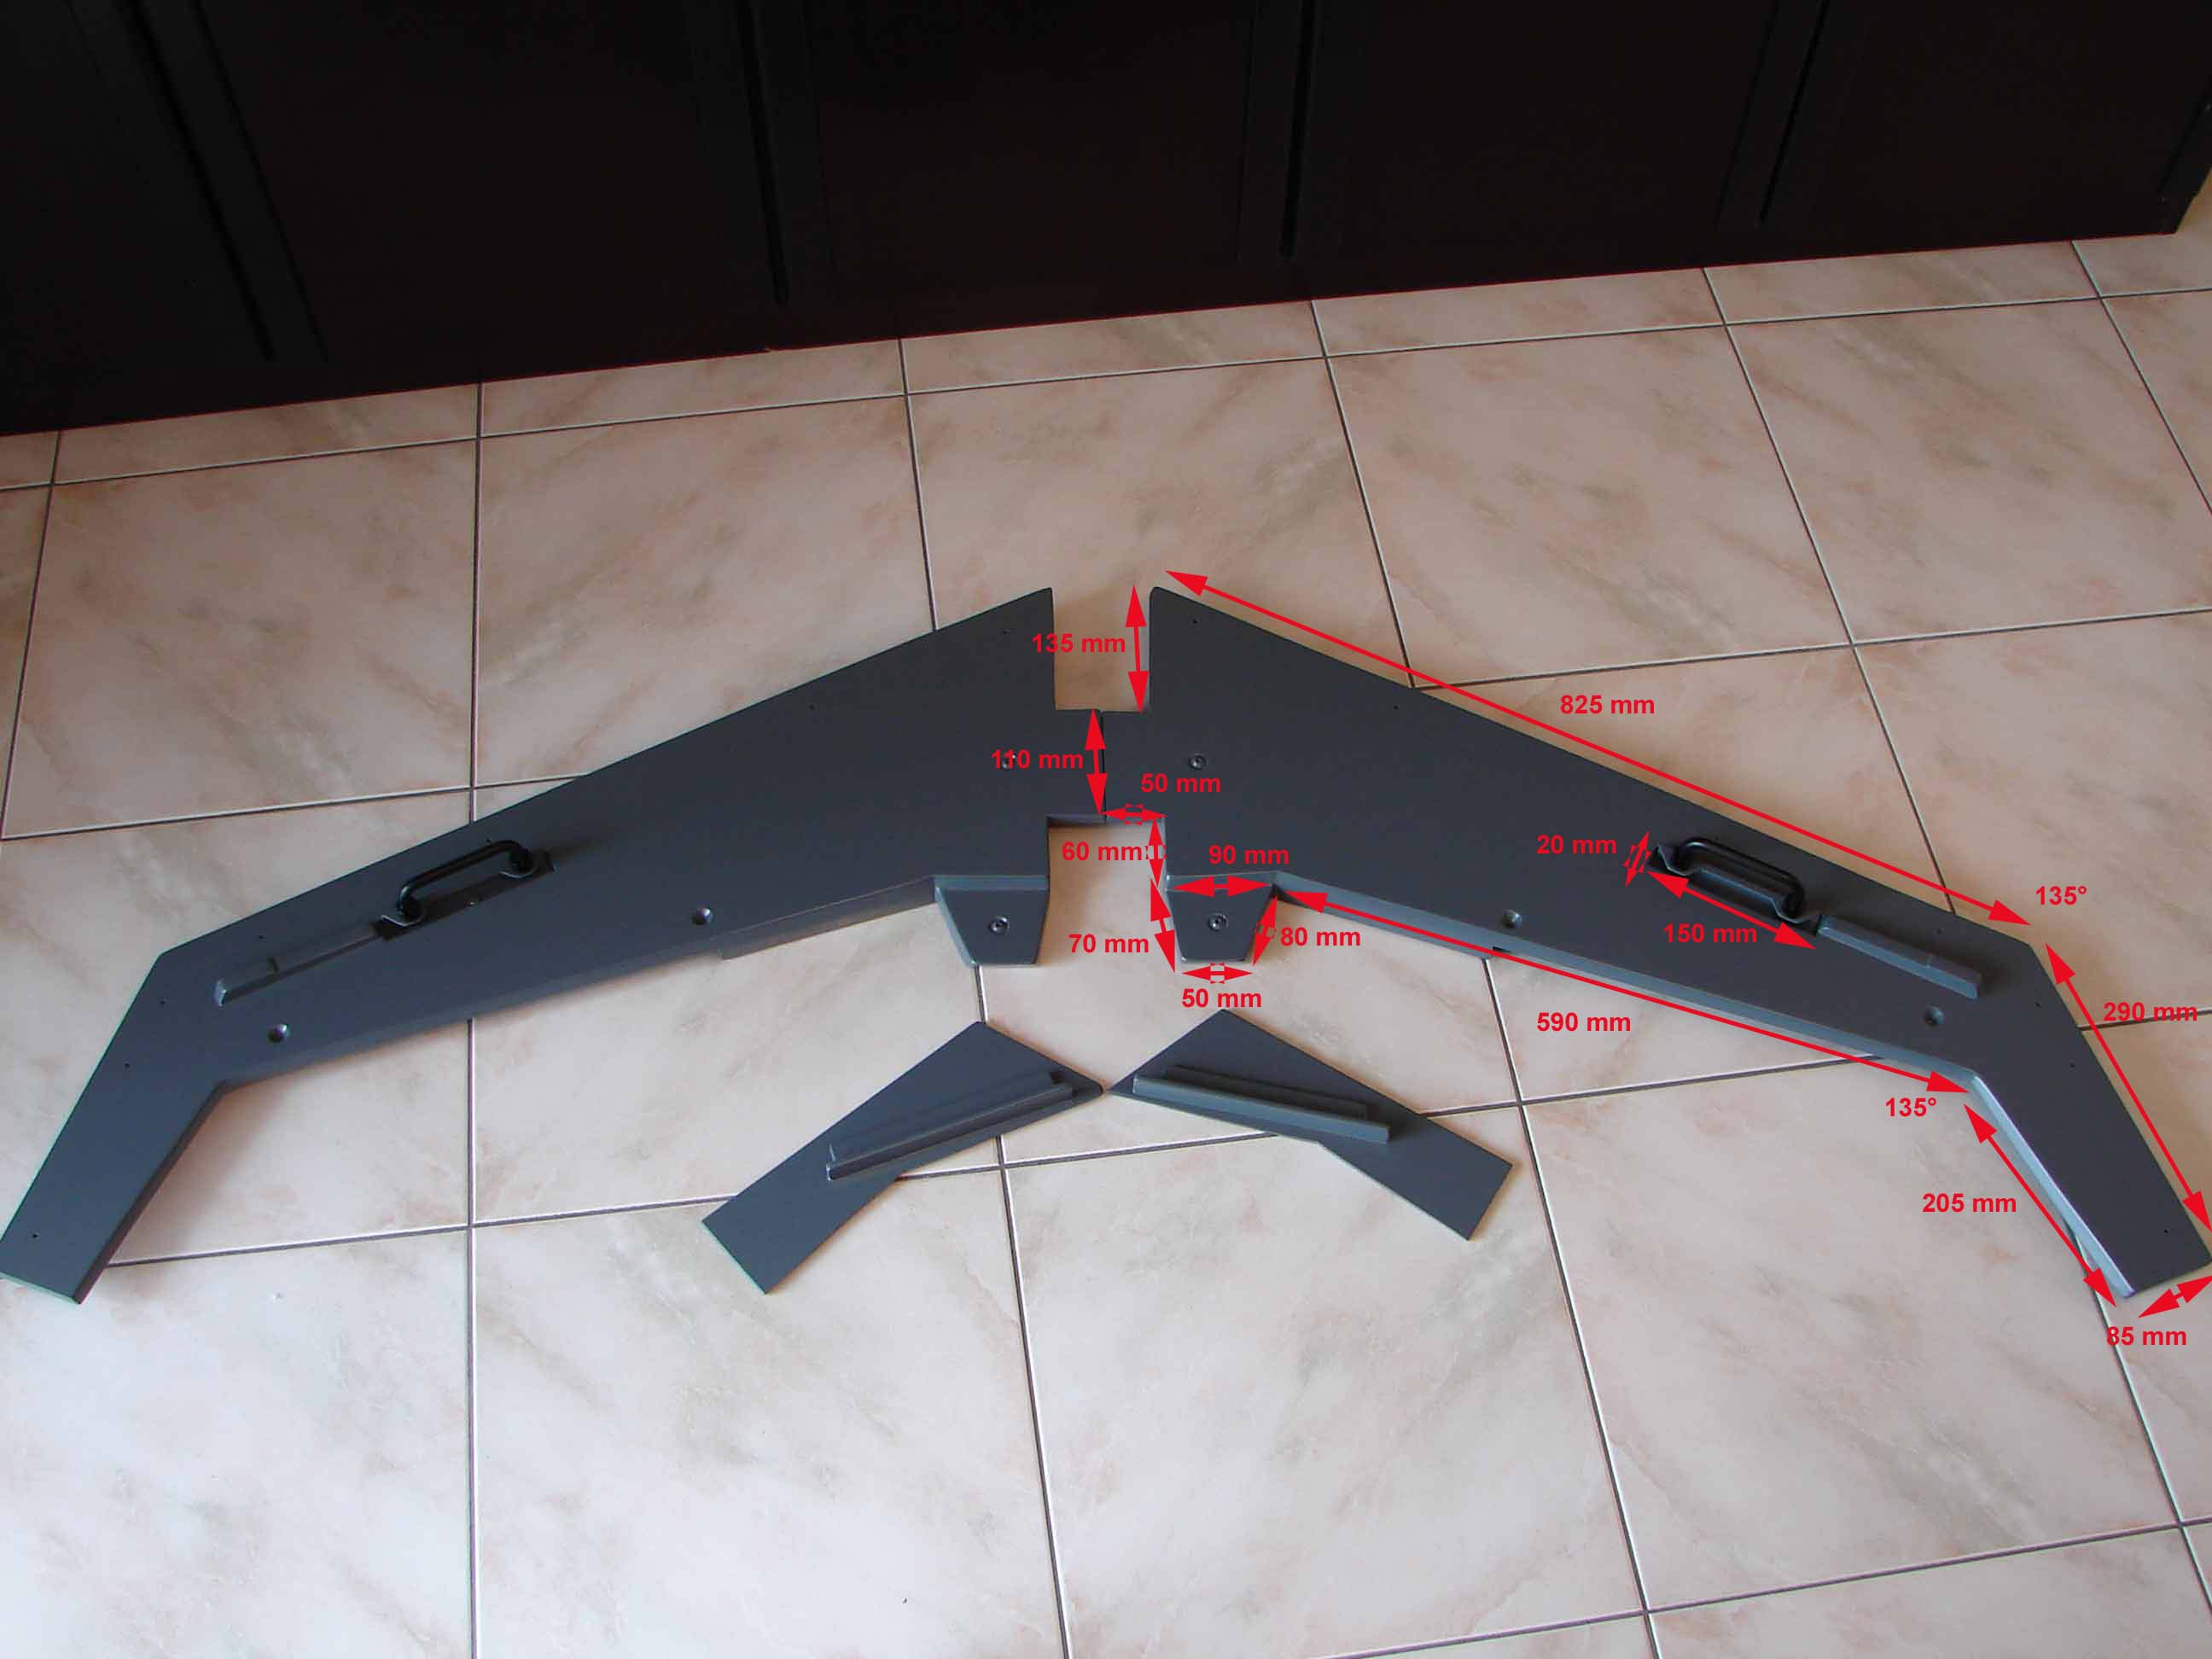
Confirmation
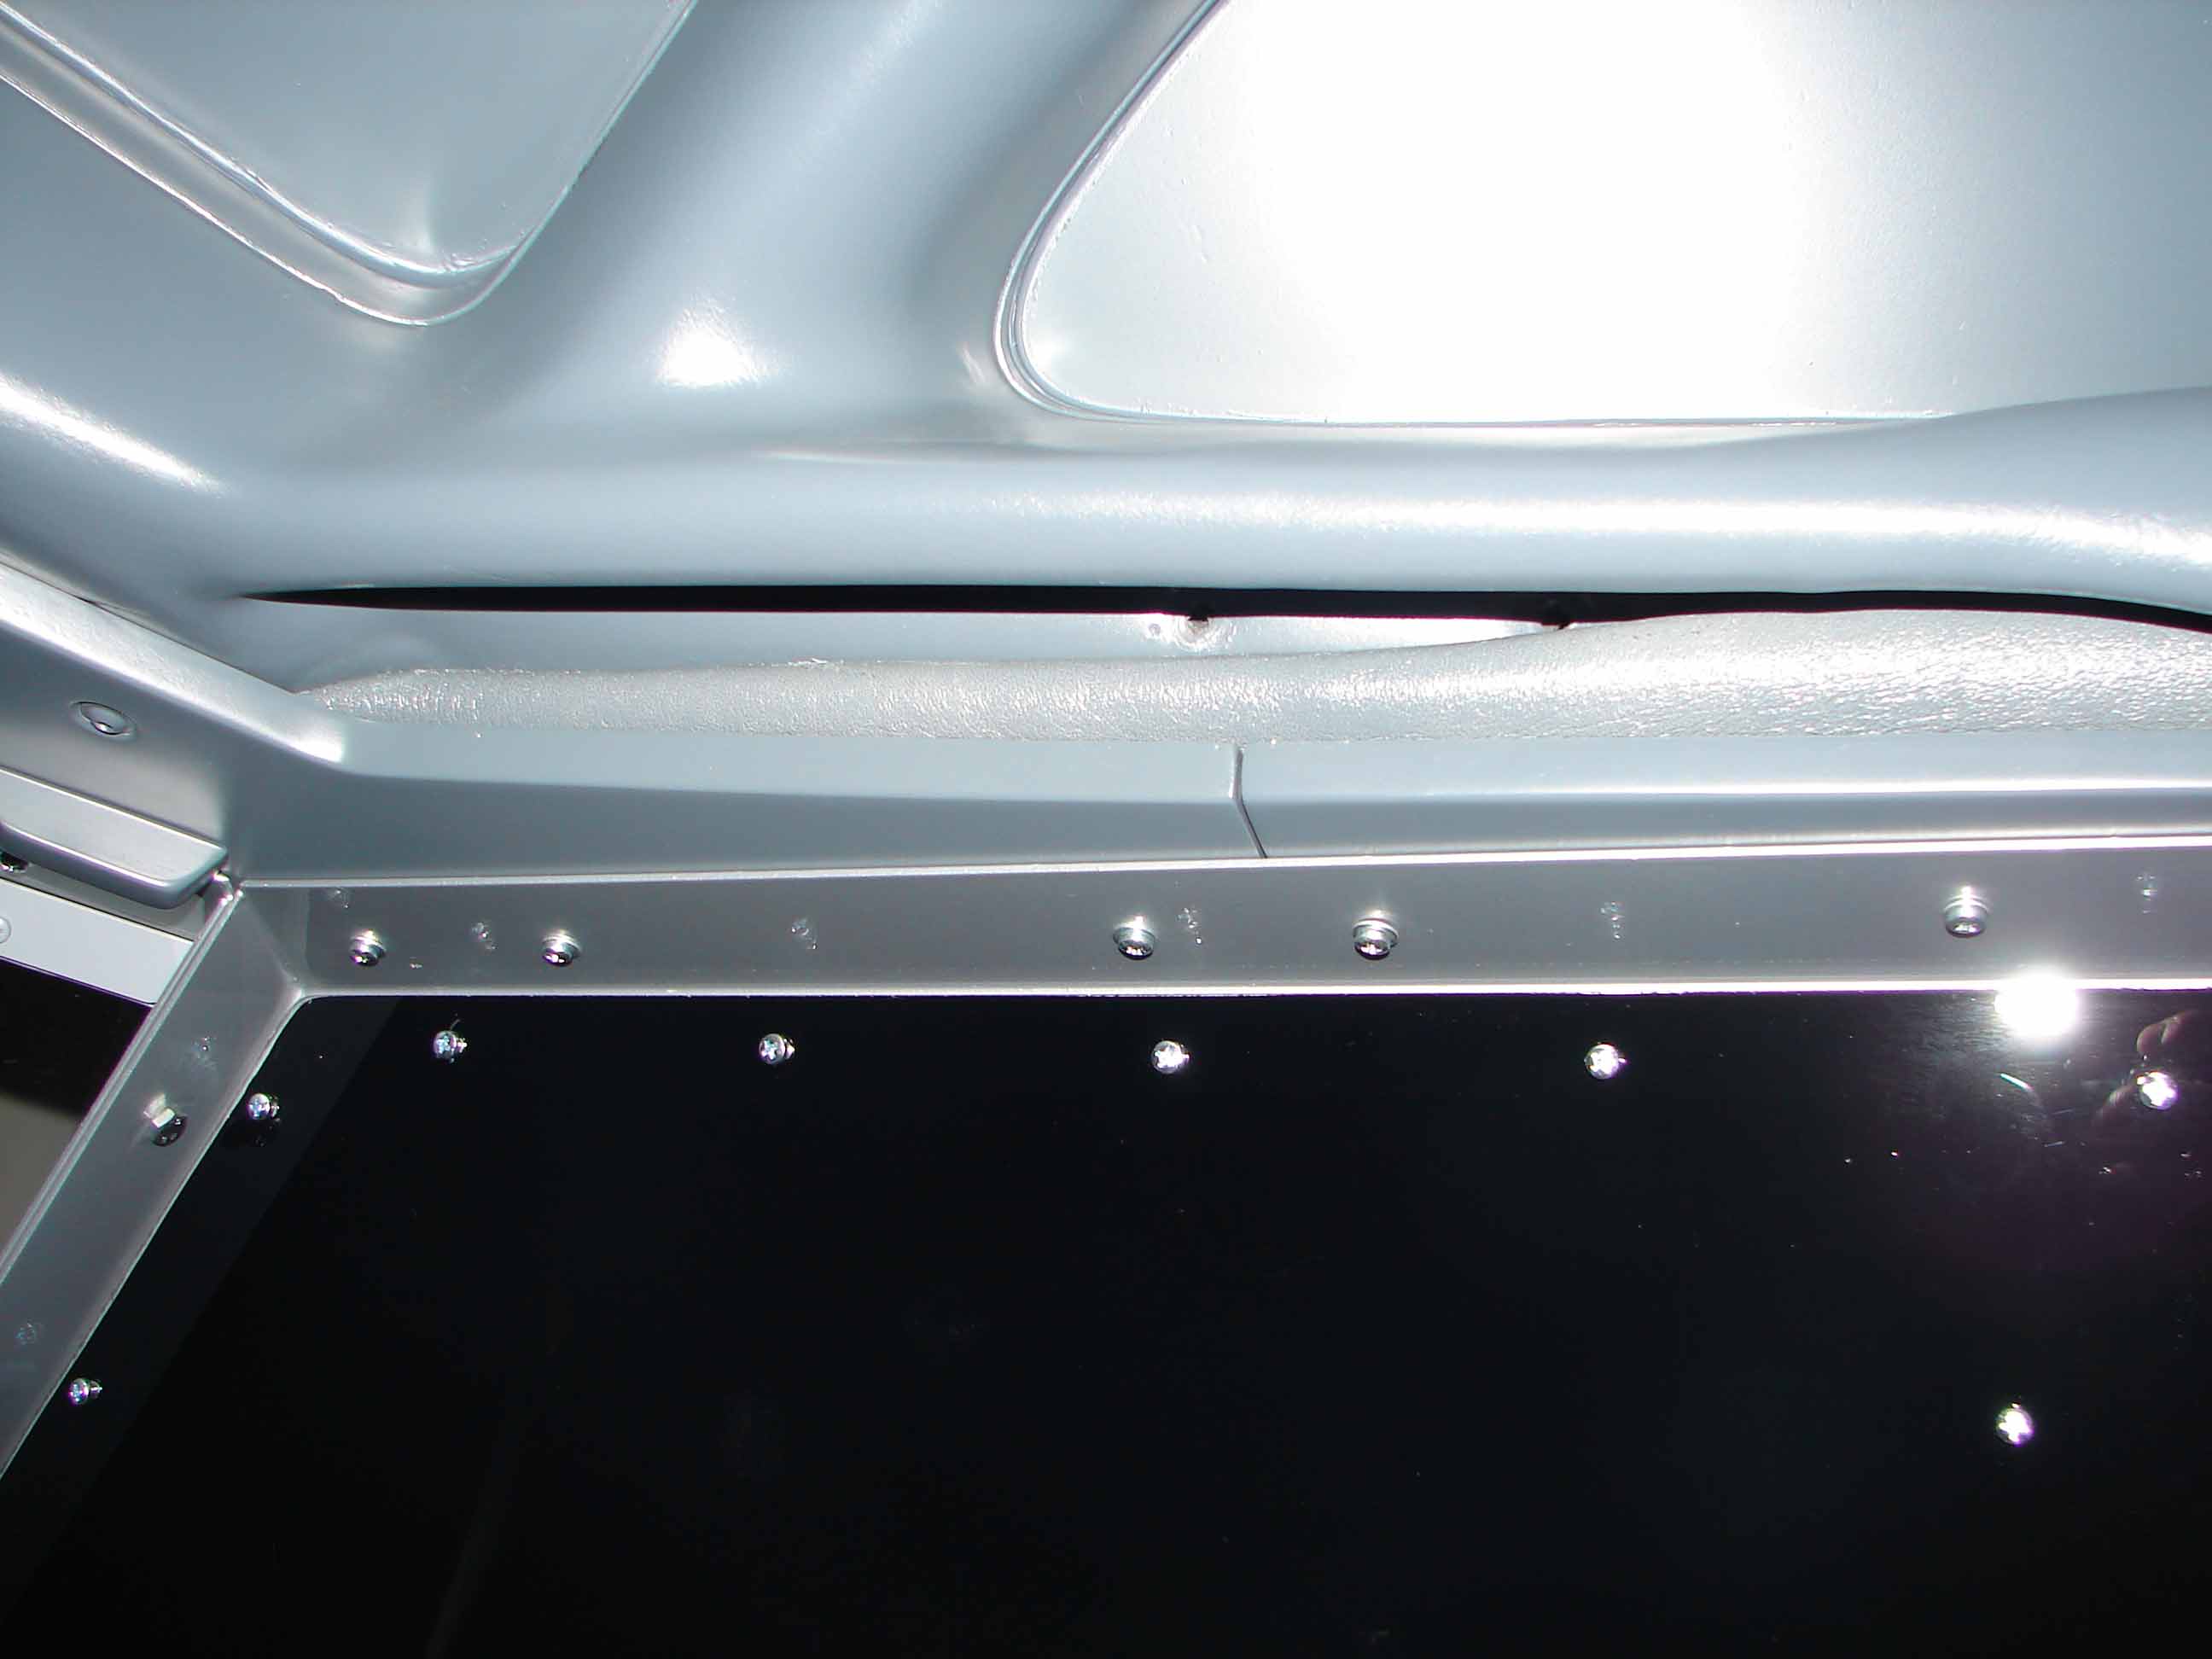
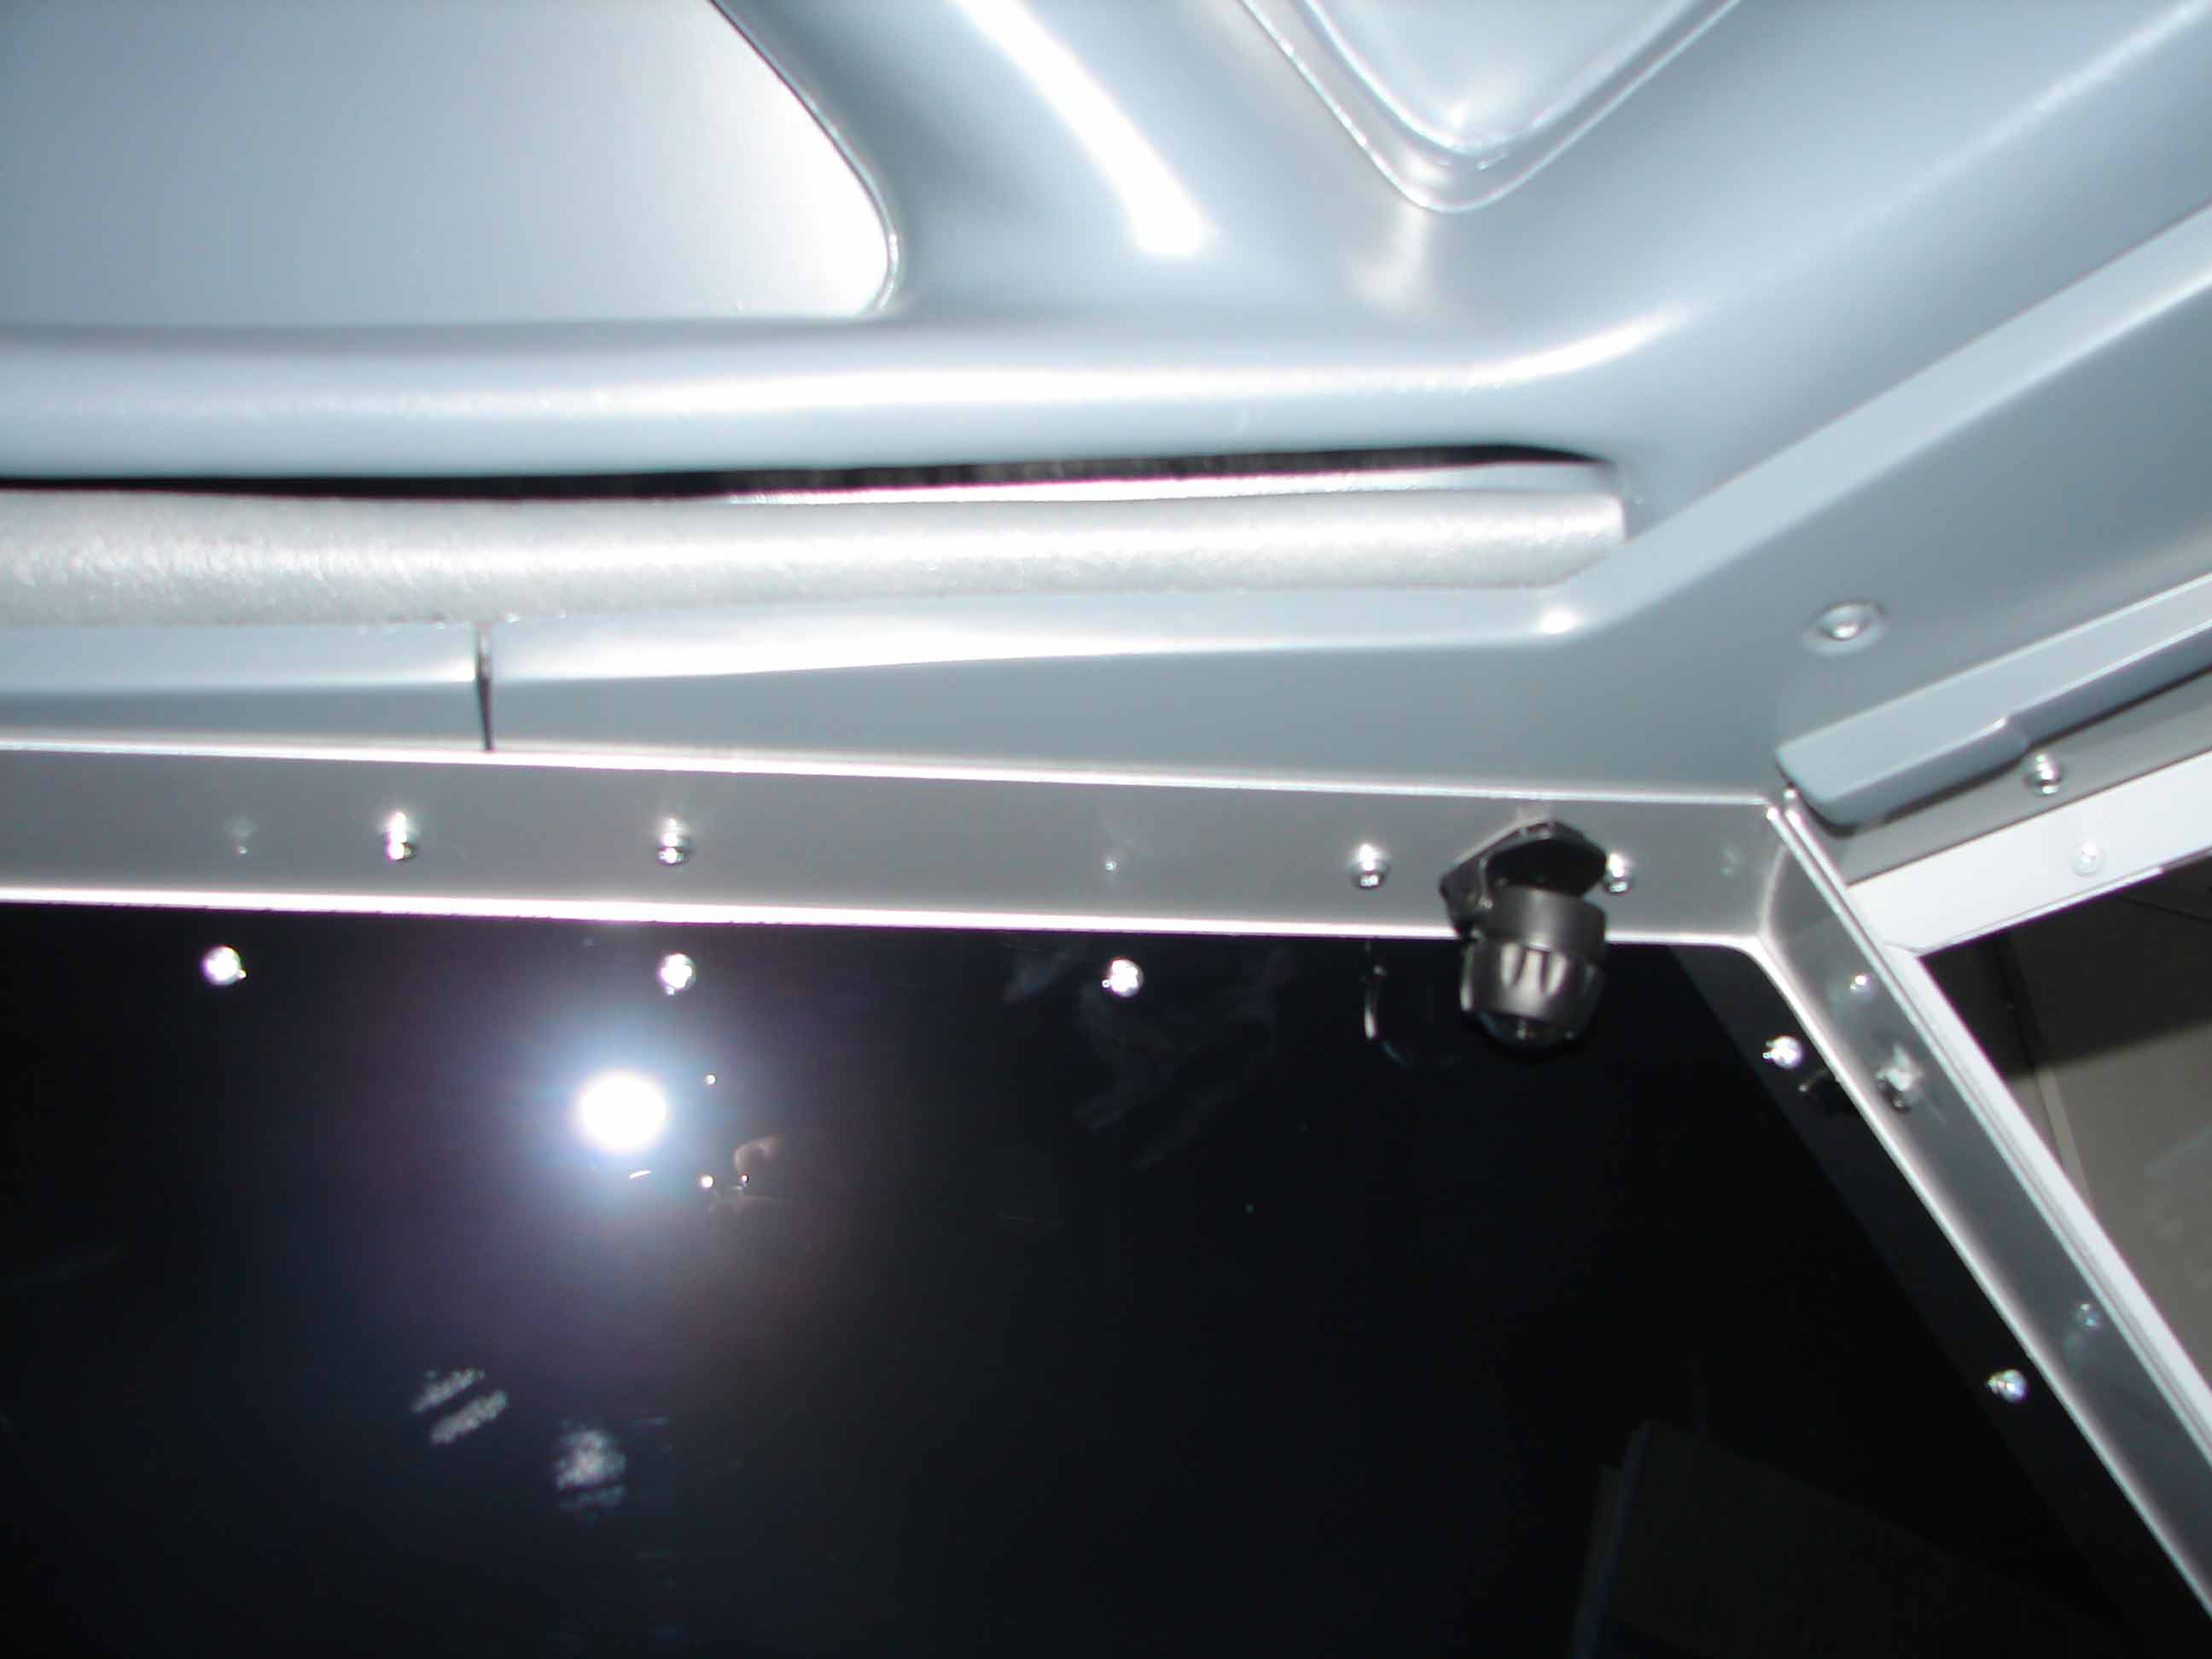
The two mdf panels resting on the top sides of the window frames and are bolted to the frames with 4mm bolts.
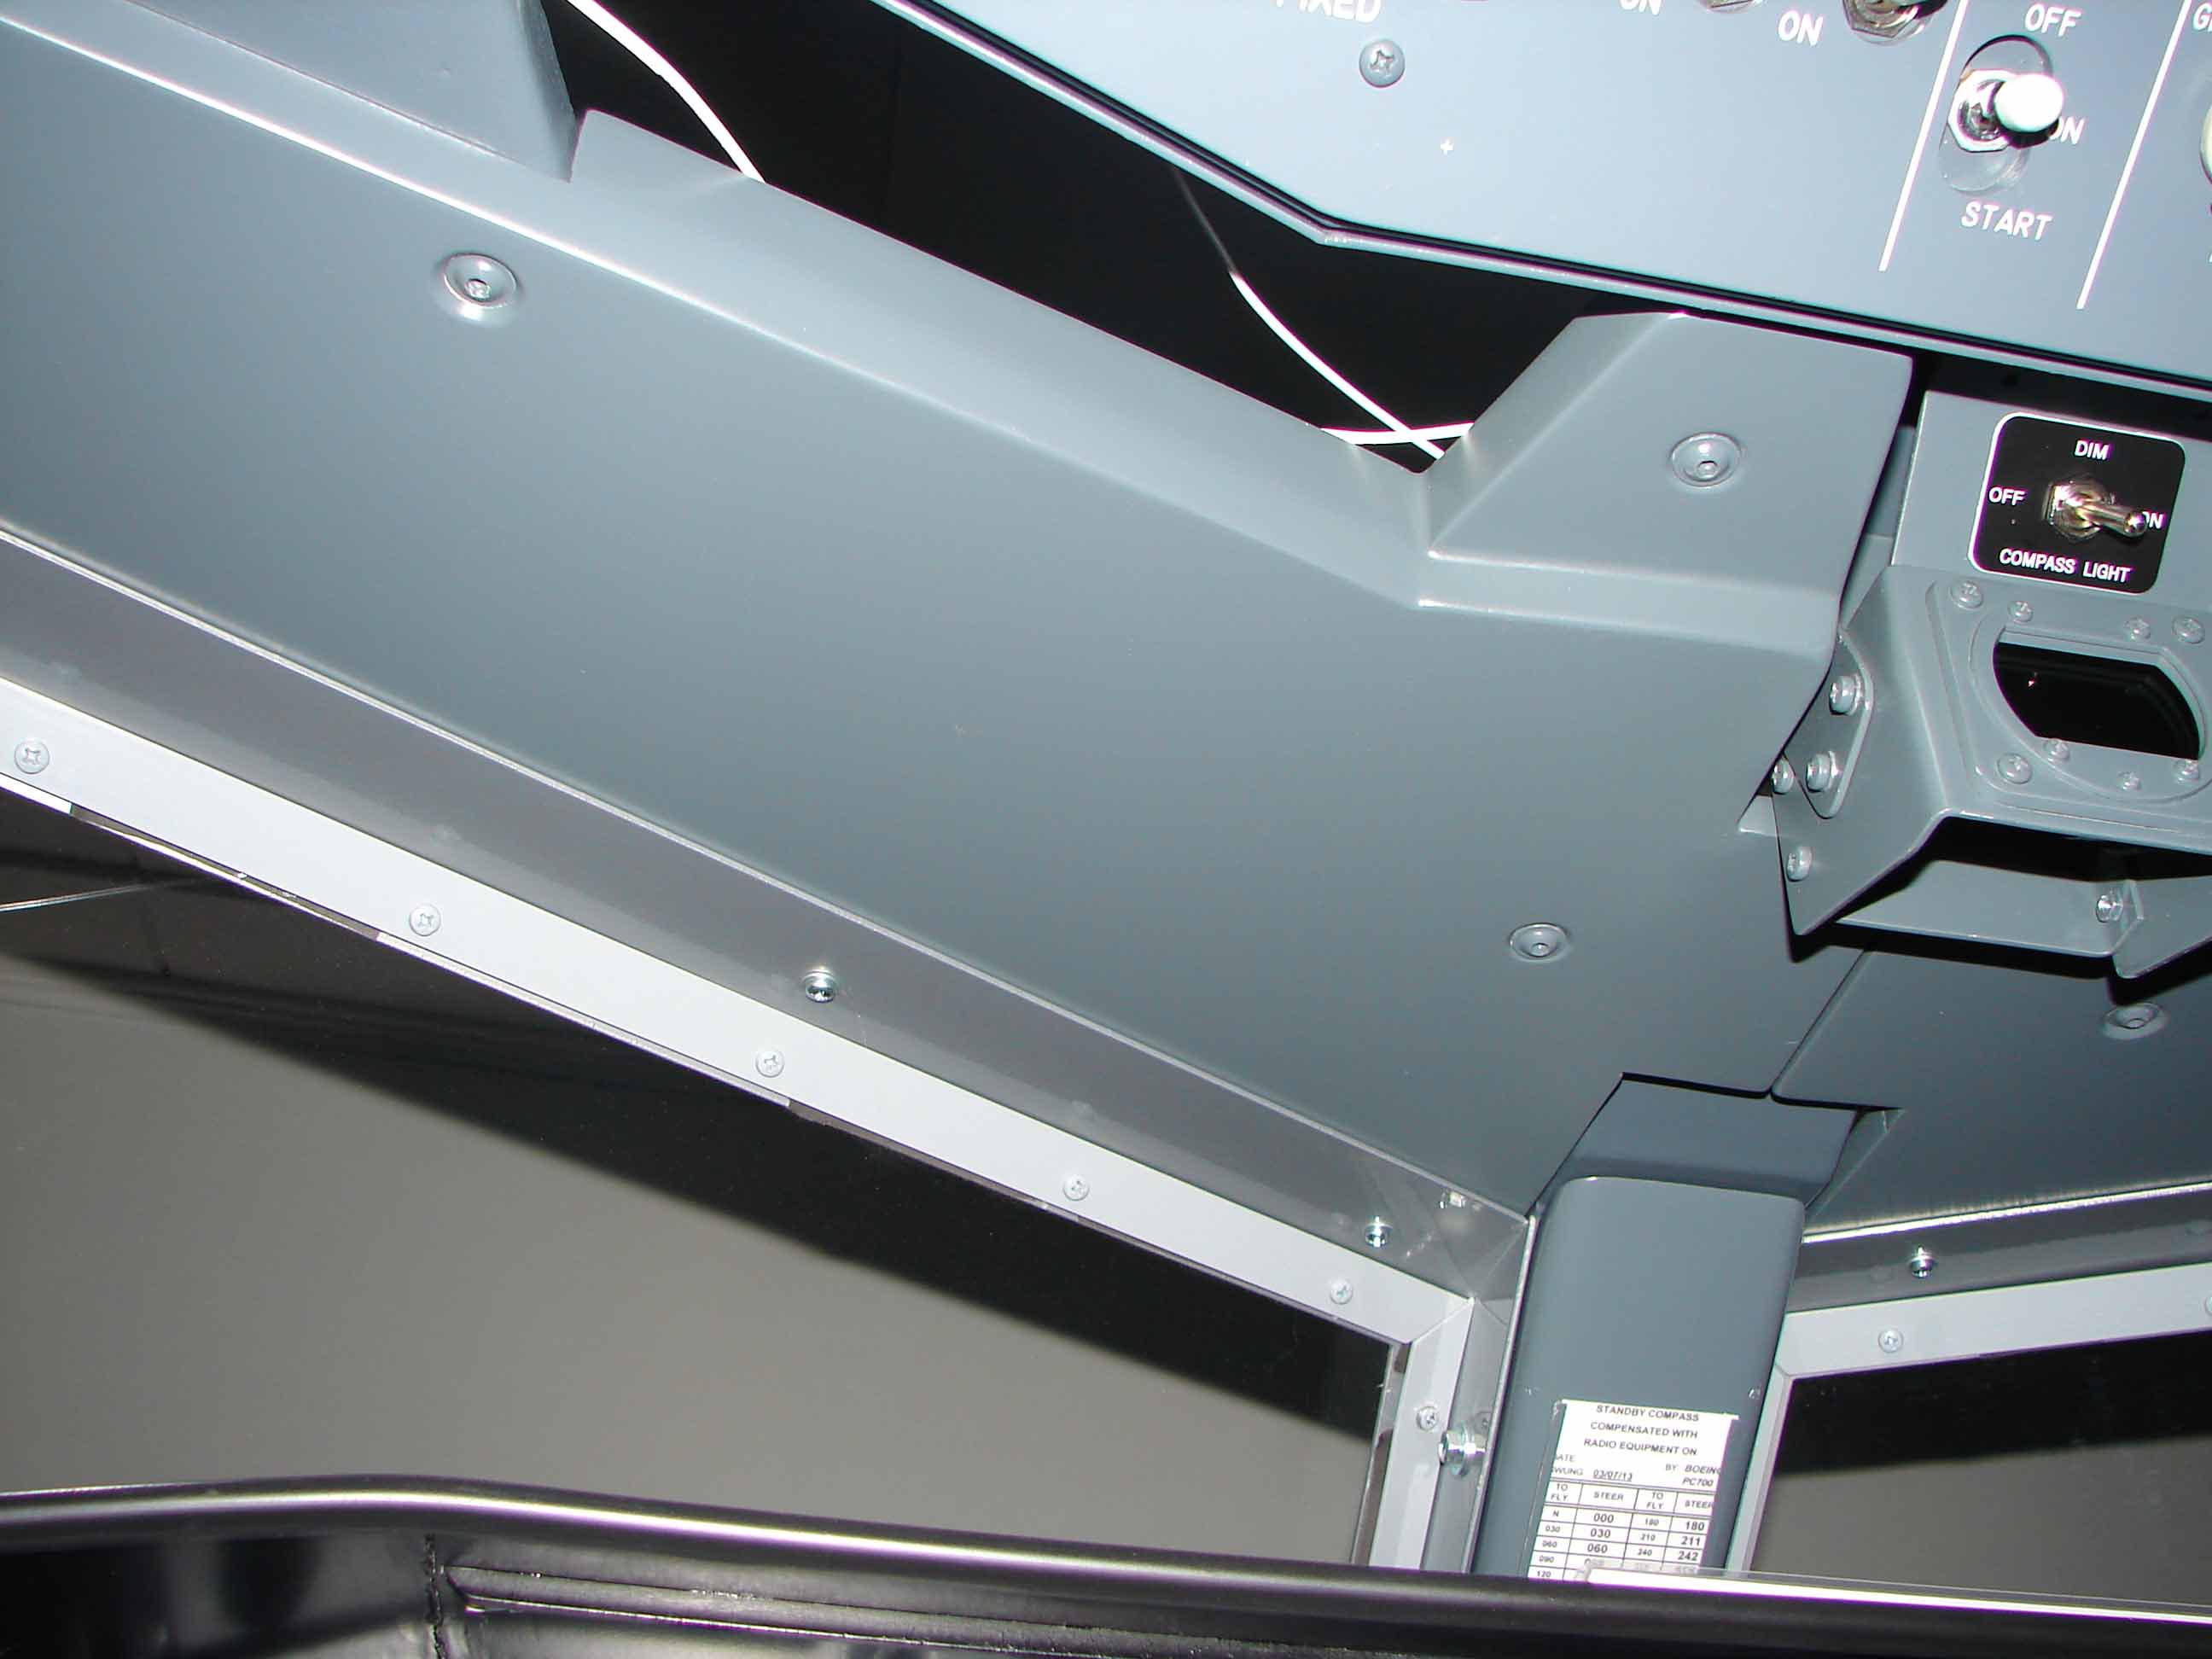
Behind the compass is each mdf panel on the top with a bracket is also fixed to the middle support beam of the metal cockpitframe.
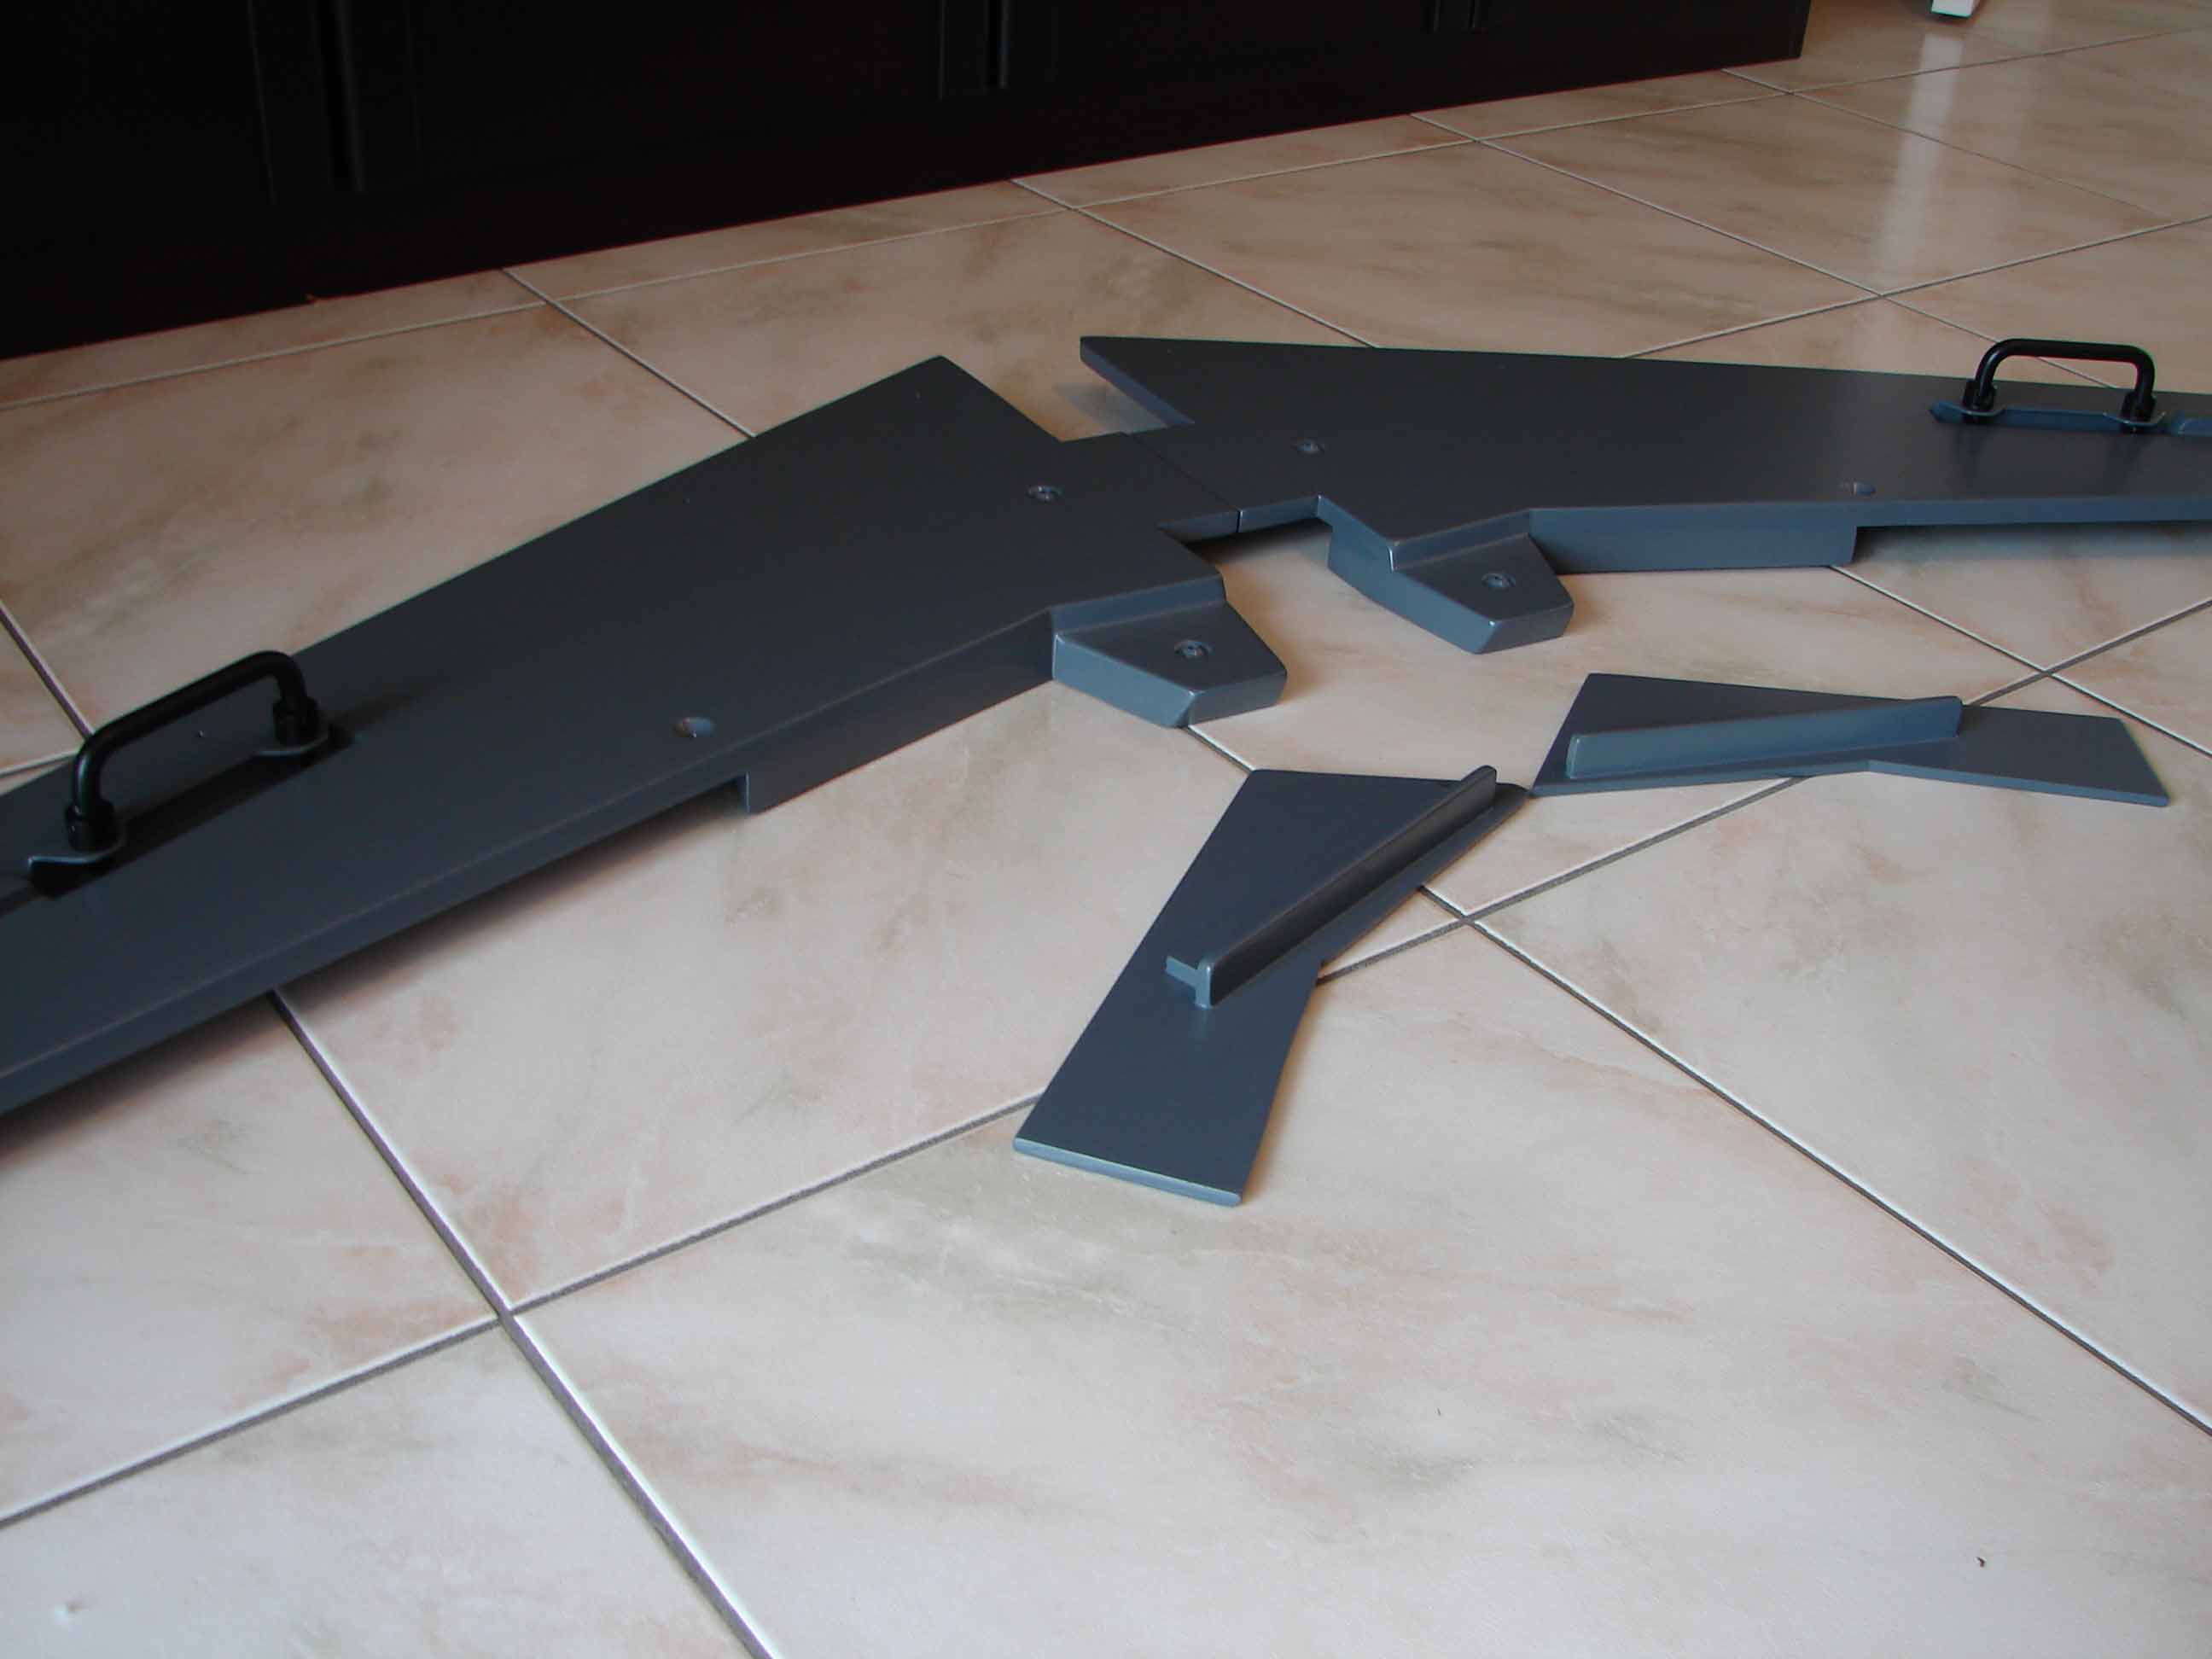
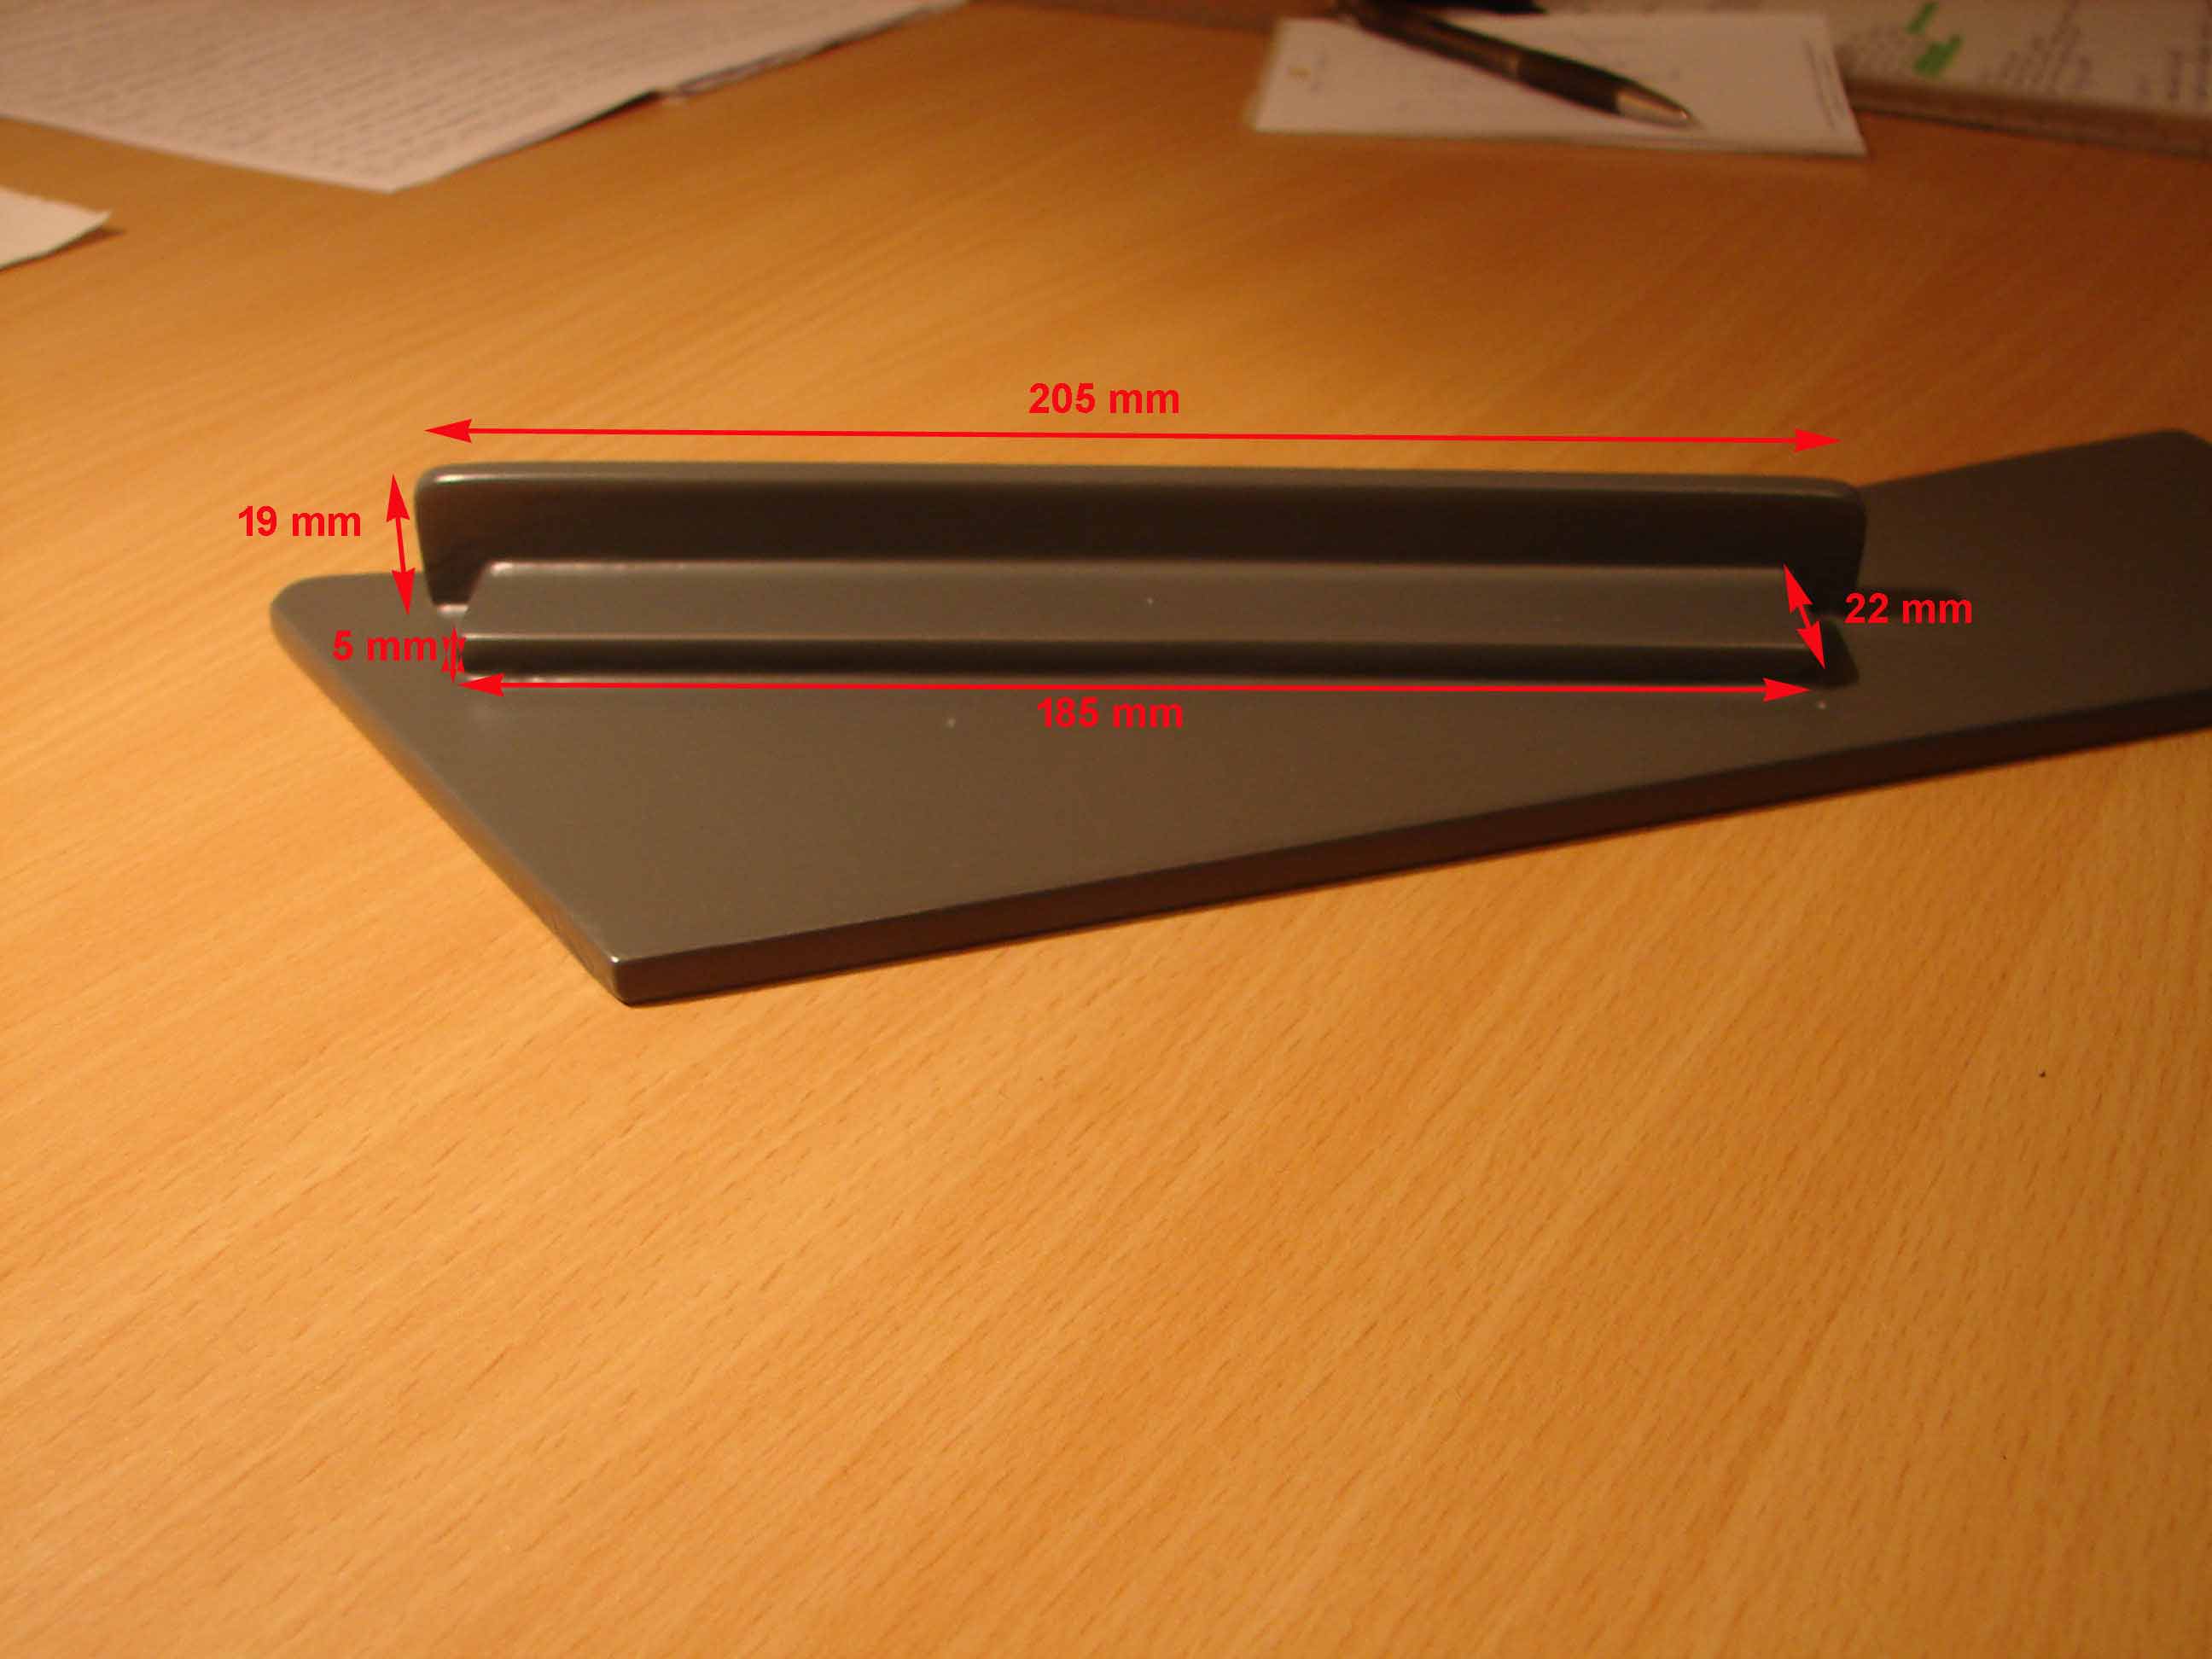
The surface-details that are found left and right of the compass are in layers on top of both mdf panels glued together. First, the custom-cut mdf block with the keystone and then the part with the upright rectangular batten.
The ‘Eyebrow Windows’ resting on the top of the mdf panels of the ‘front-ceiling’ and are on these panels attached with bolts.
Therefore, I have already in advance all uitgepast and measured and the mdf panels of the ‘front-ceiling’ fitted with the necessary holes where the bolts need to come out for the confirmation of the‘Eyebrow Windows’. These holes plus a few other ‘fantasy’-holes, I have some more drilled out as they appear on the real copies.


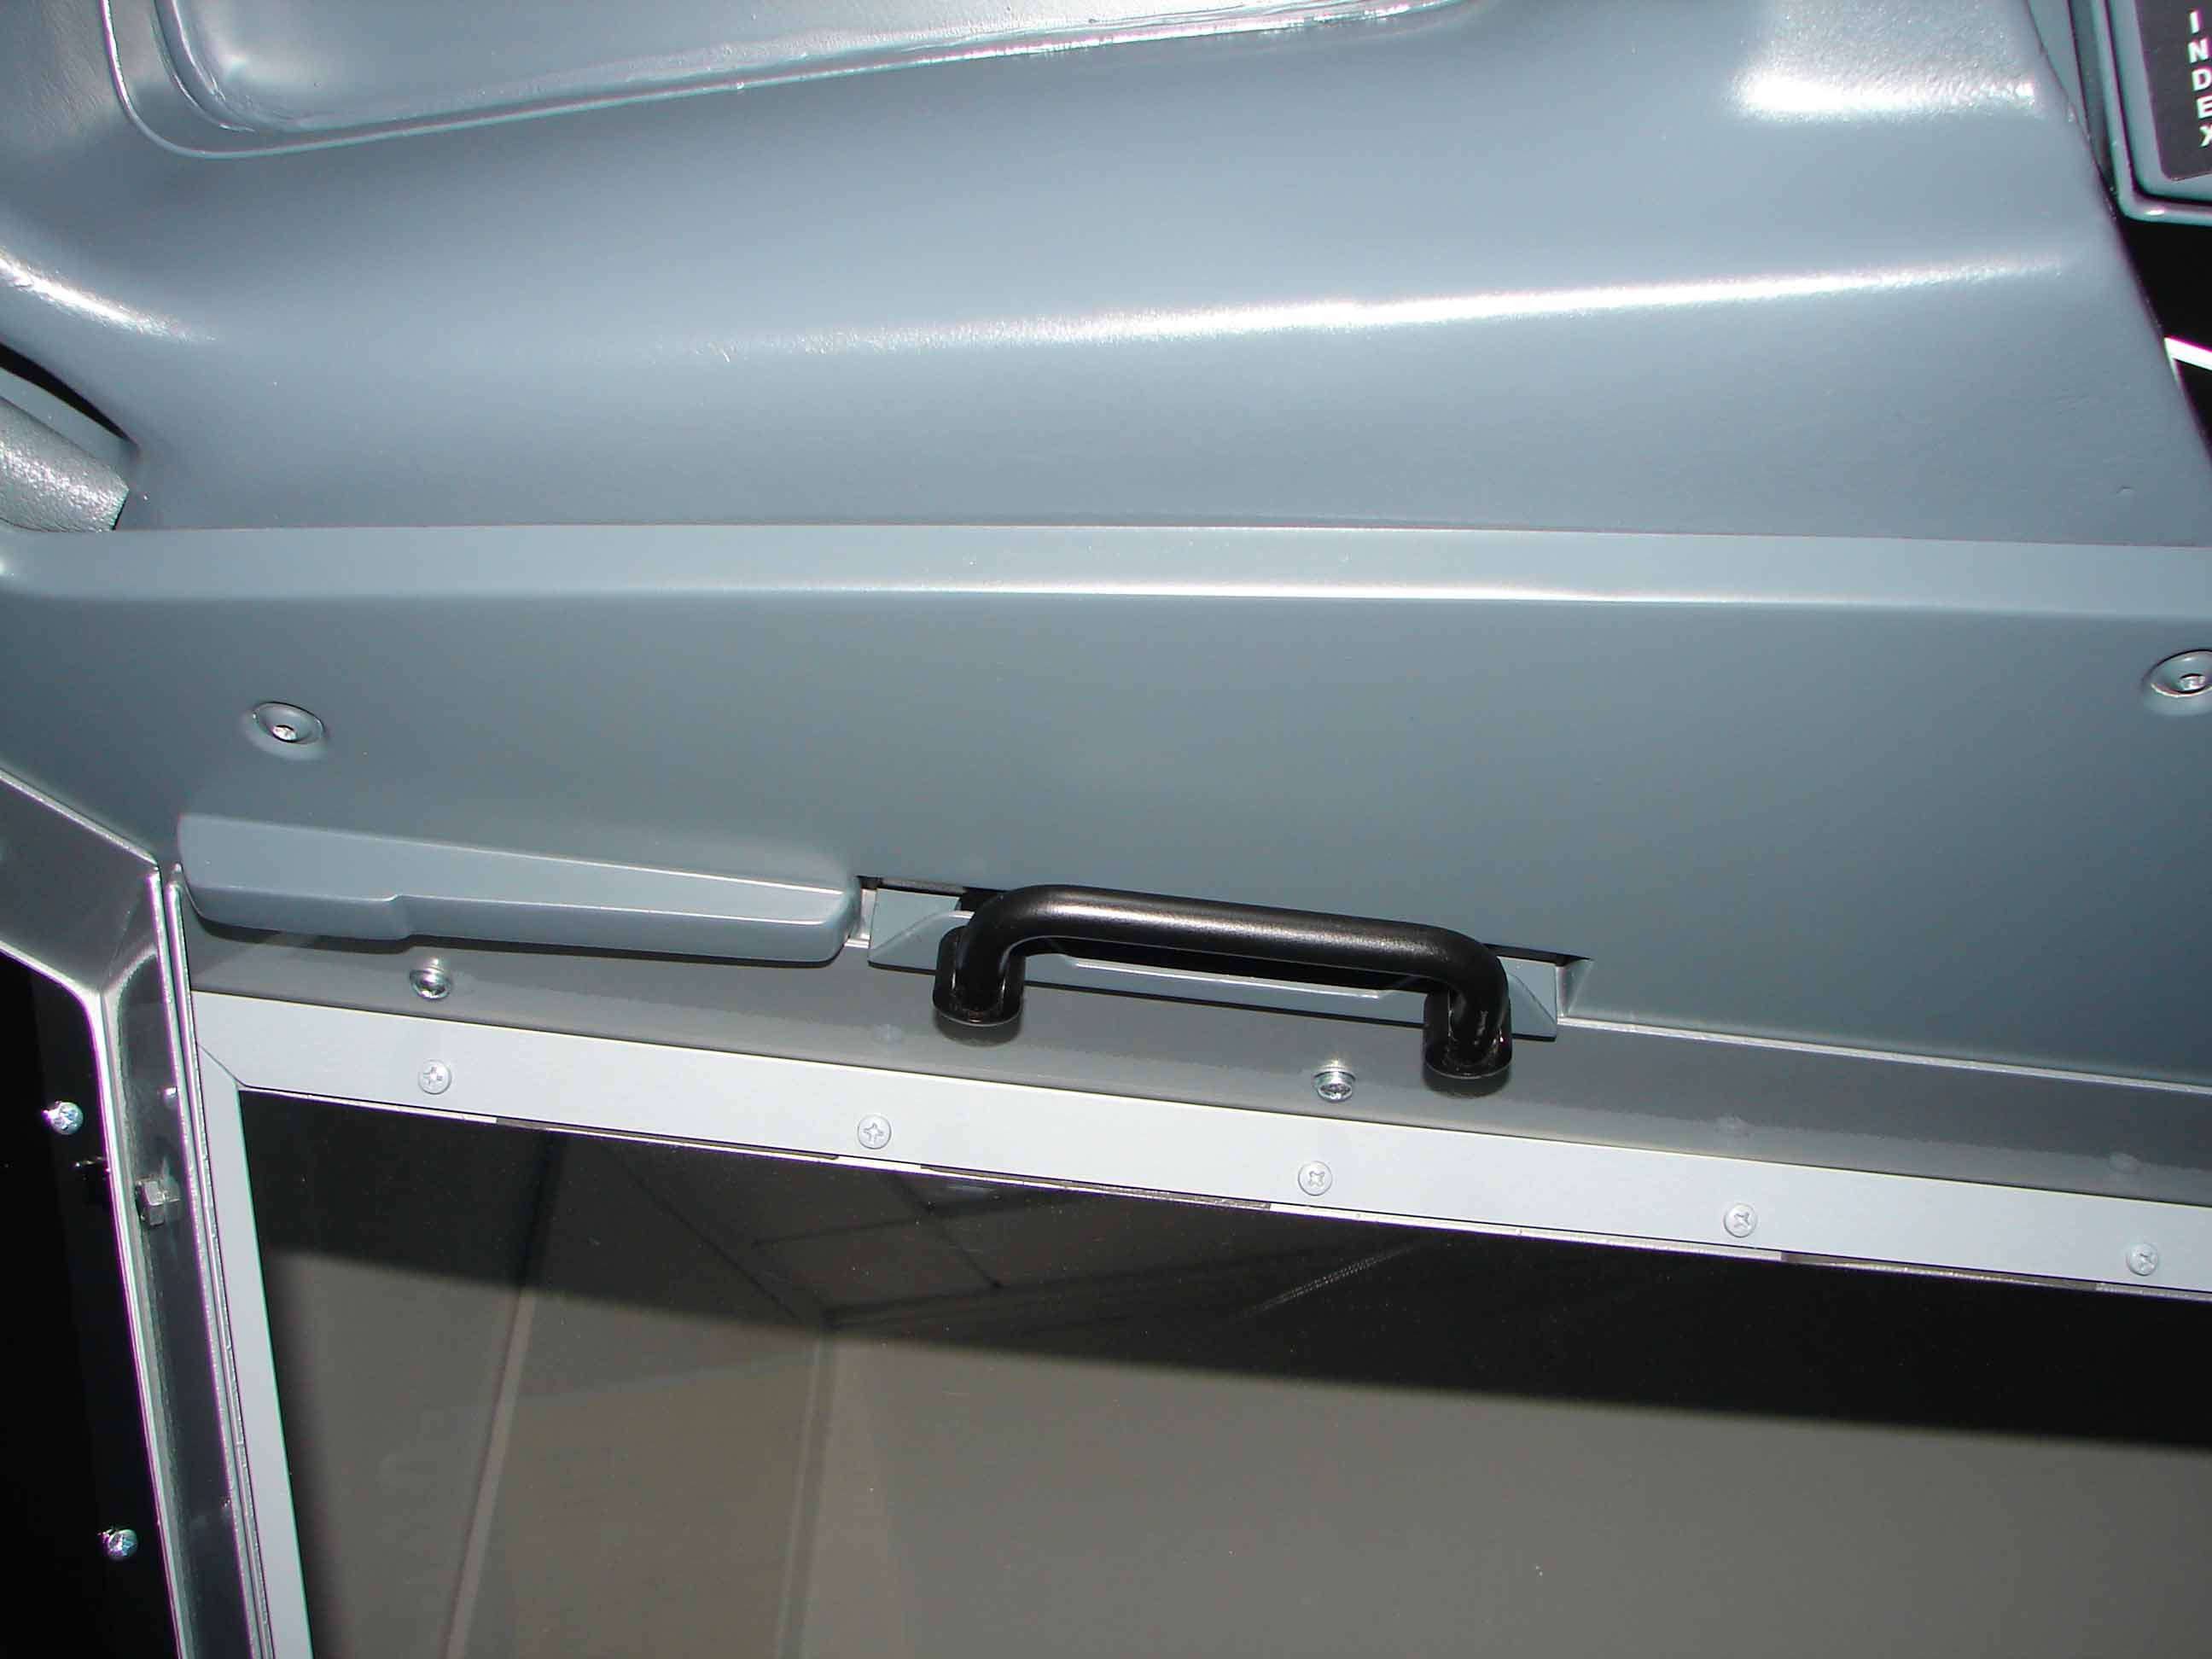
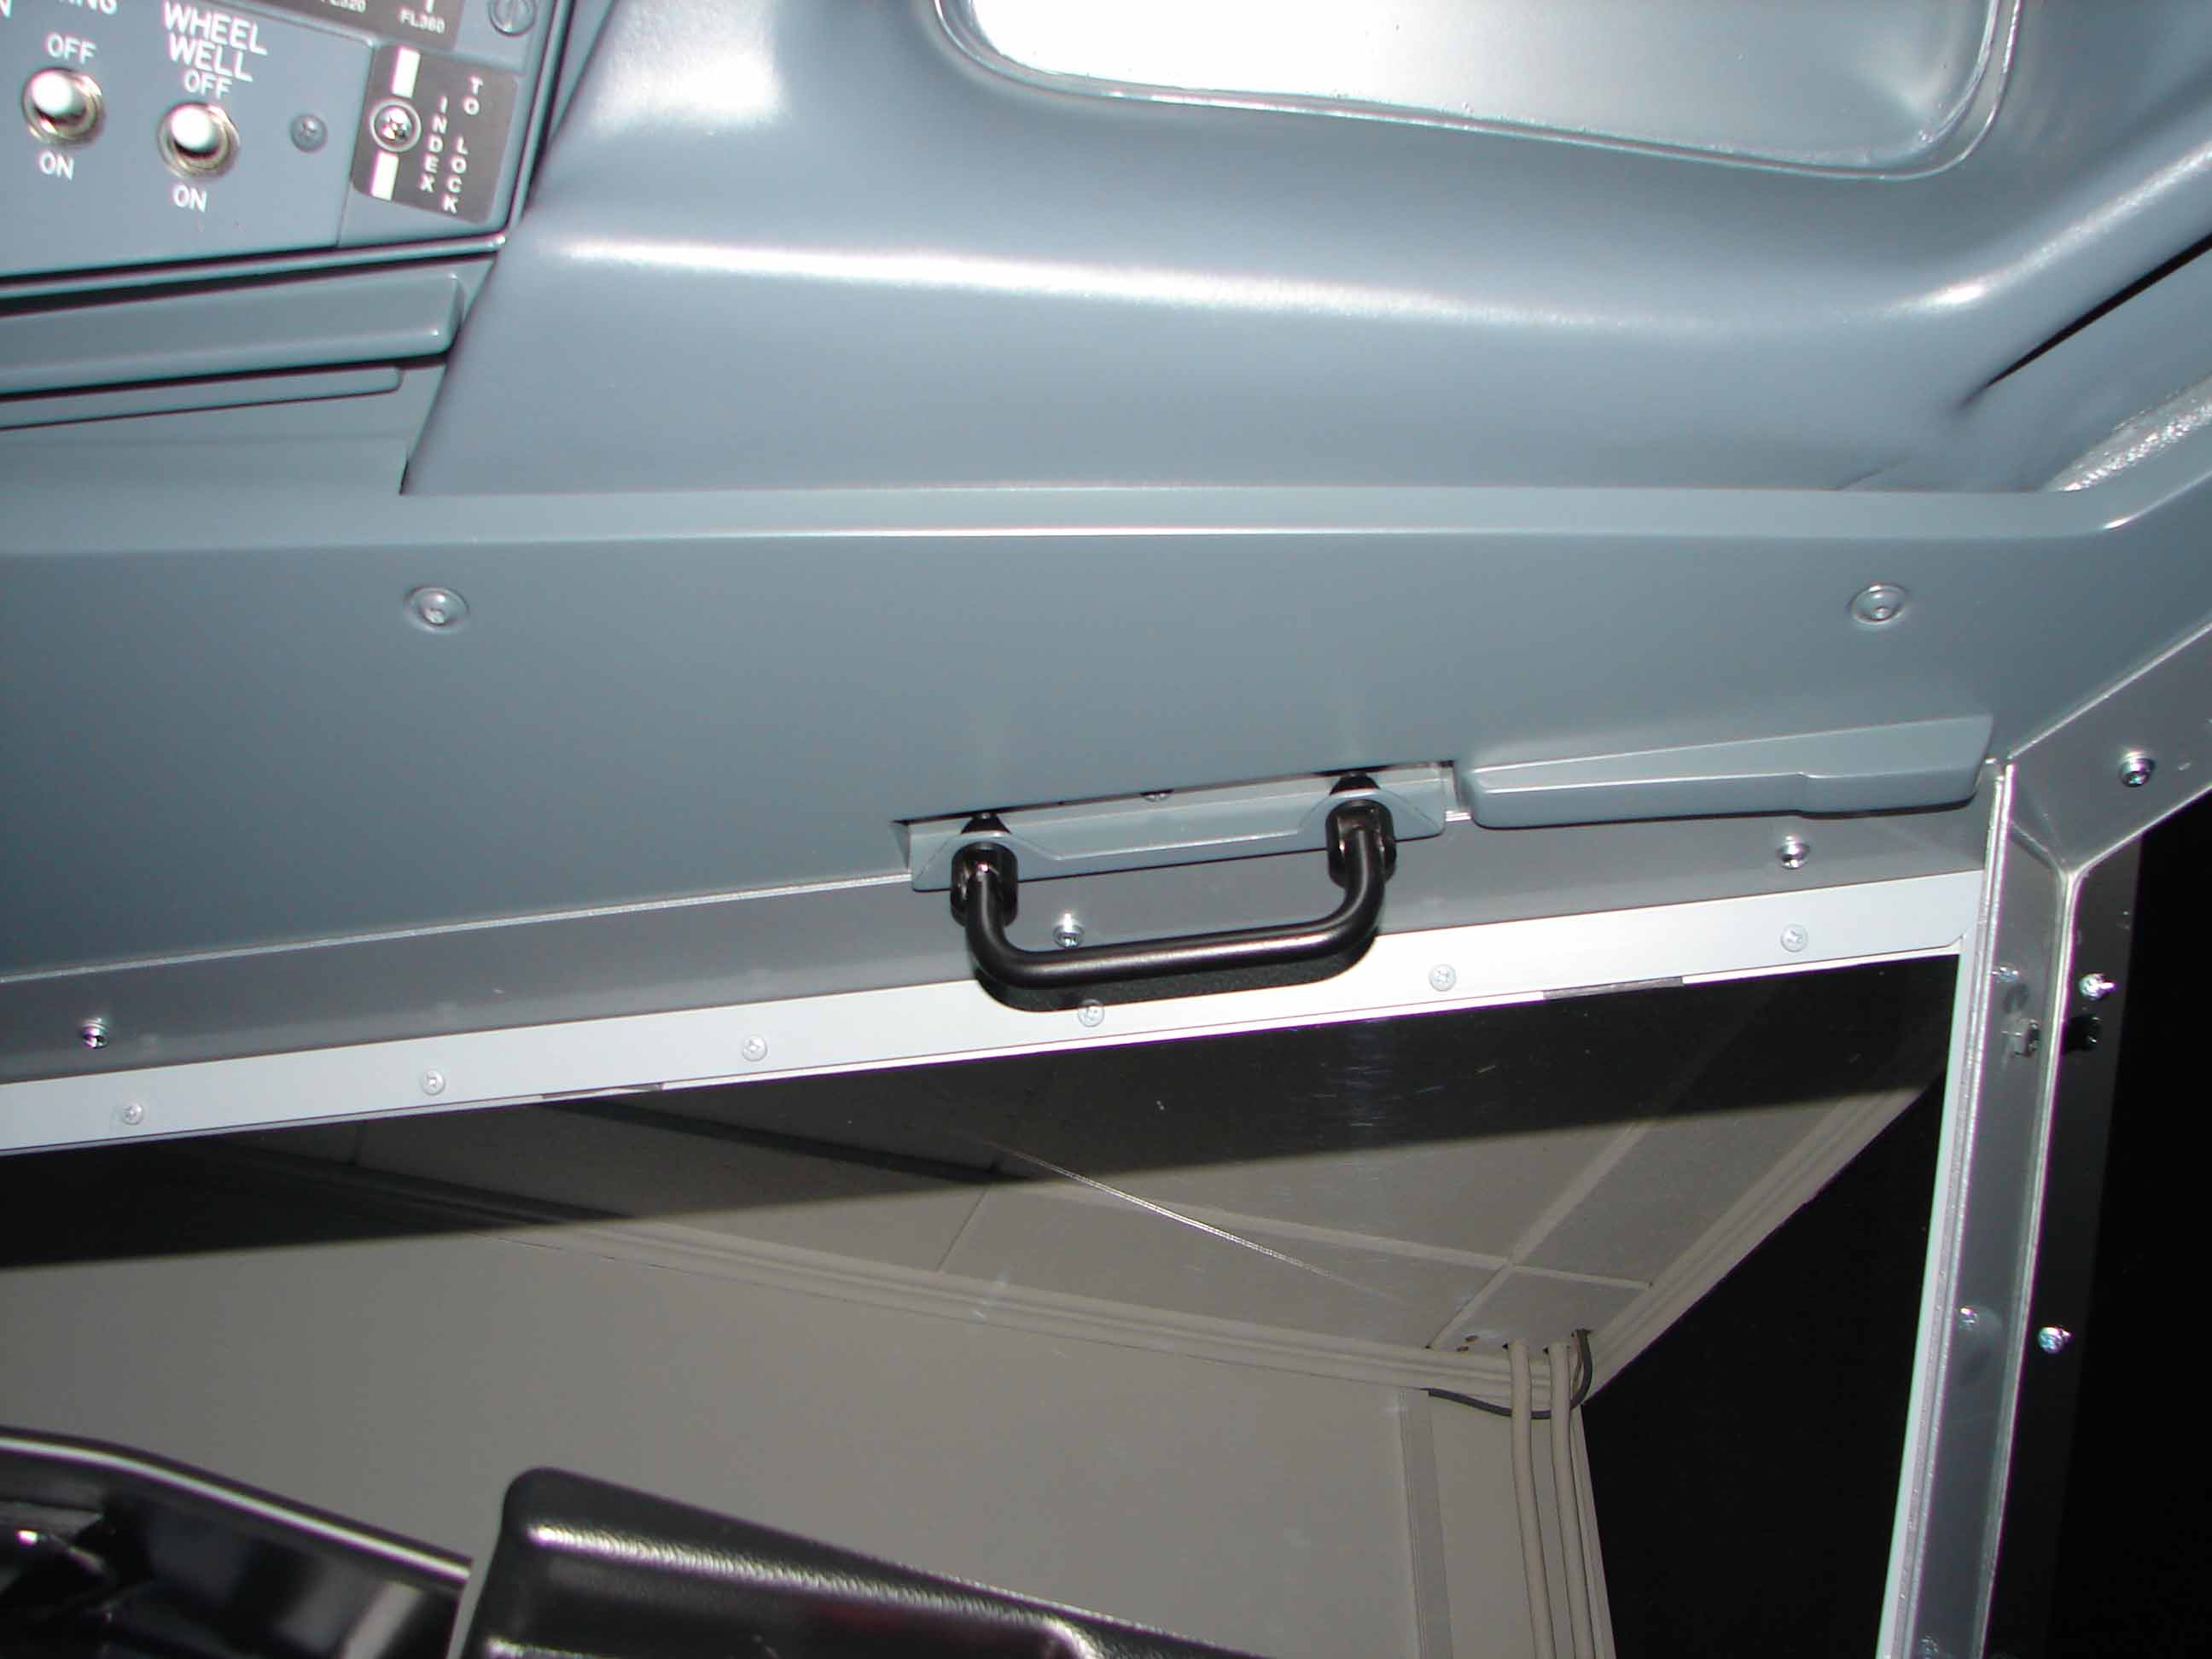
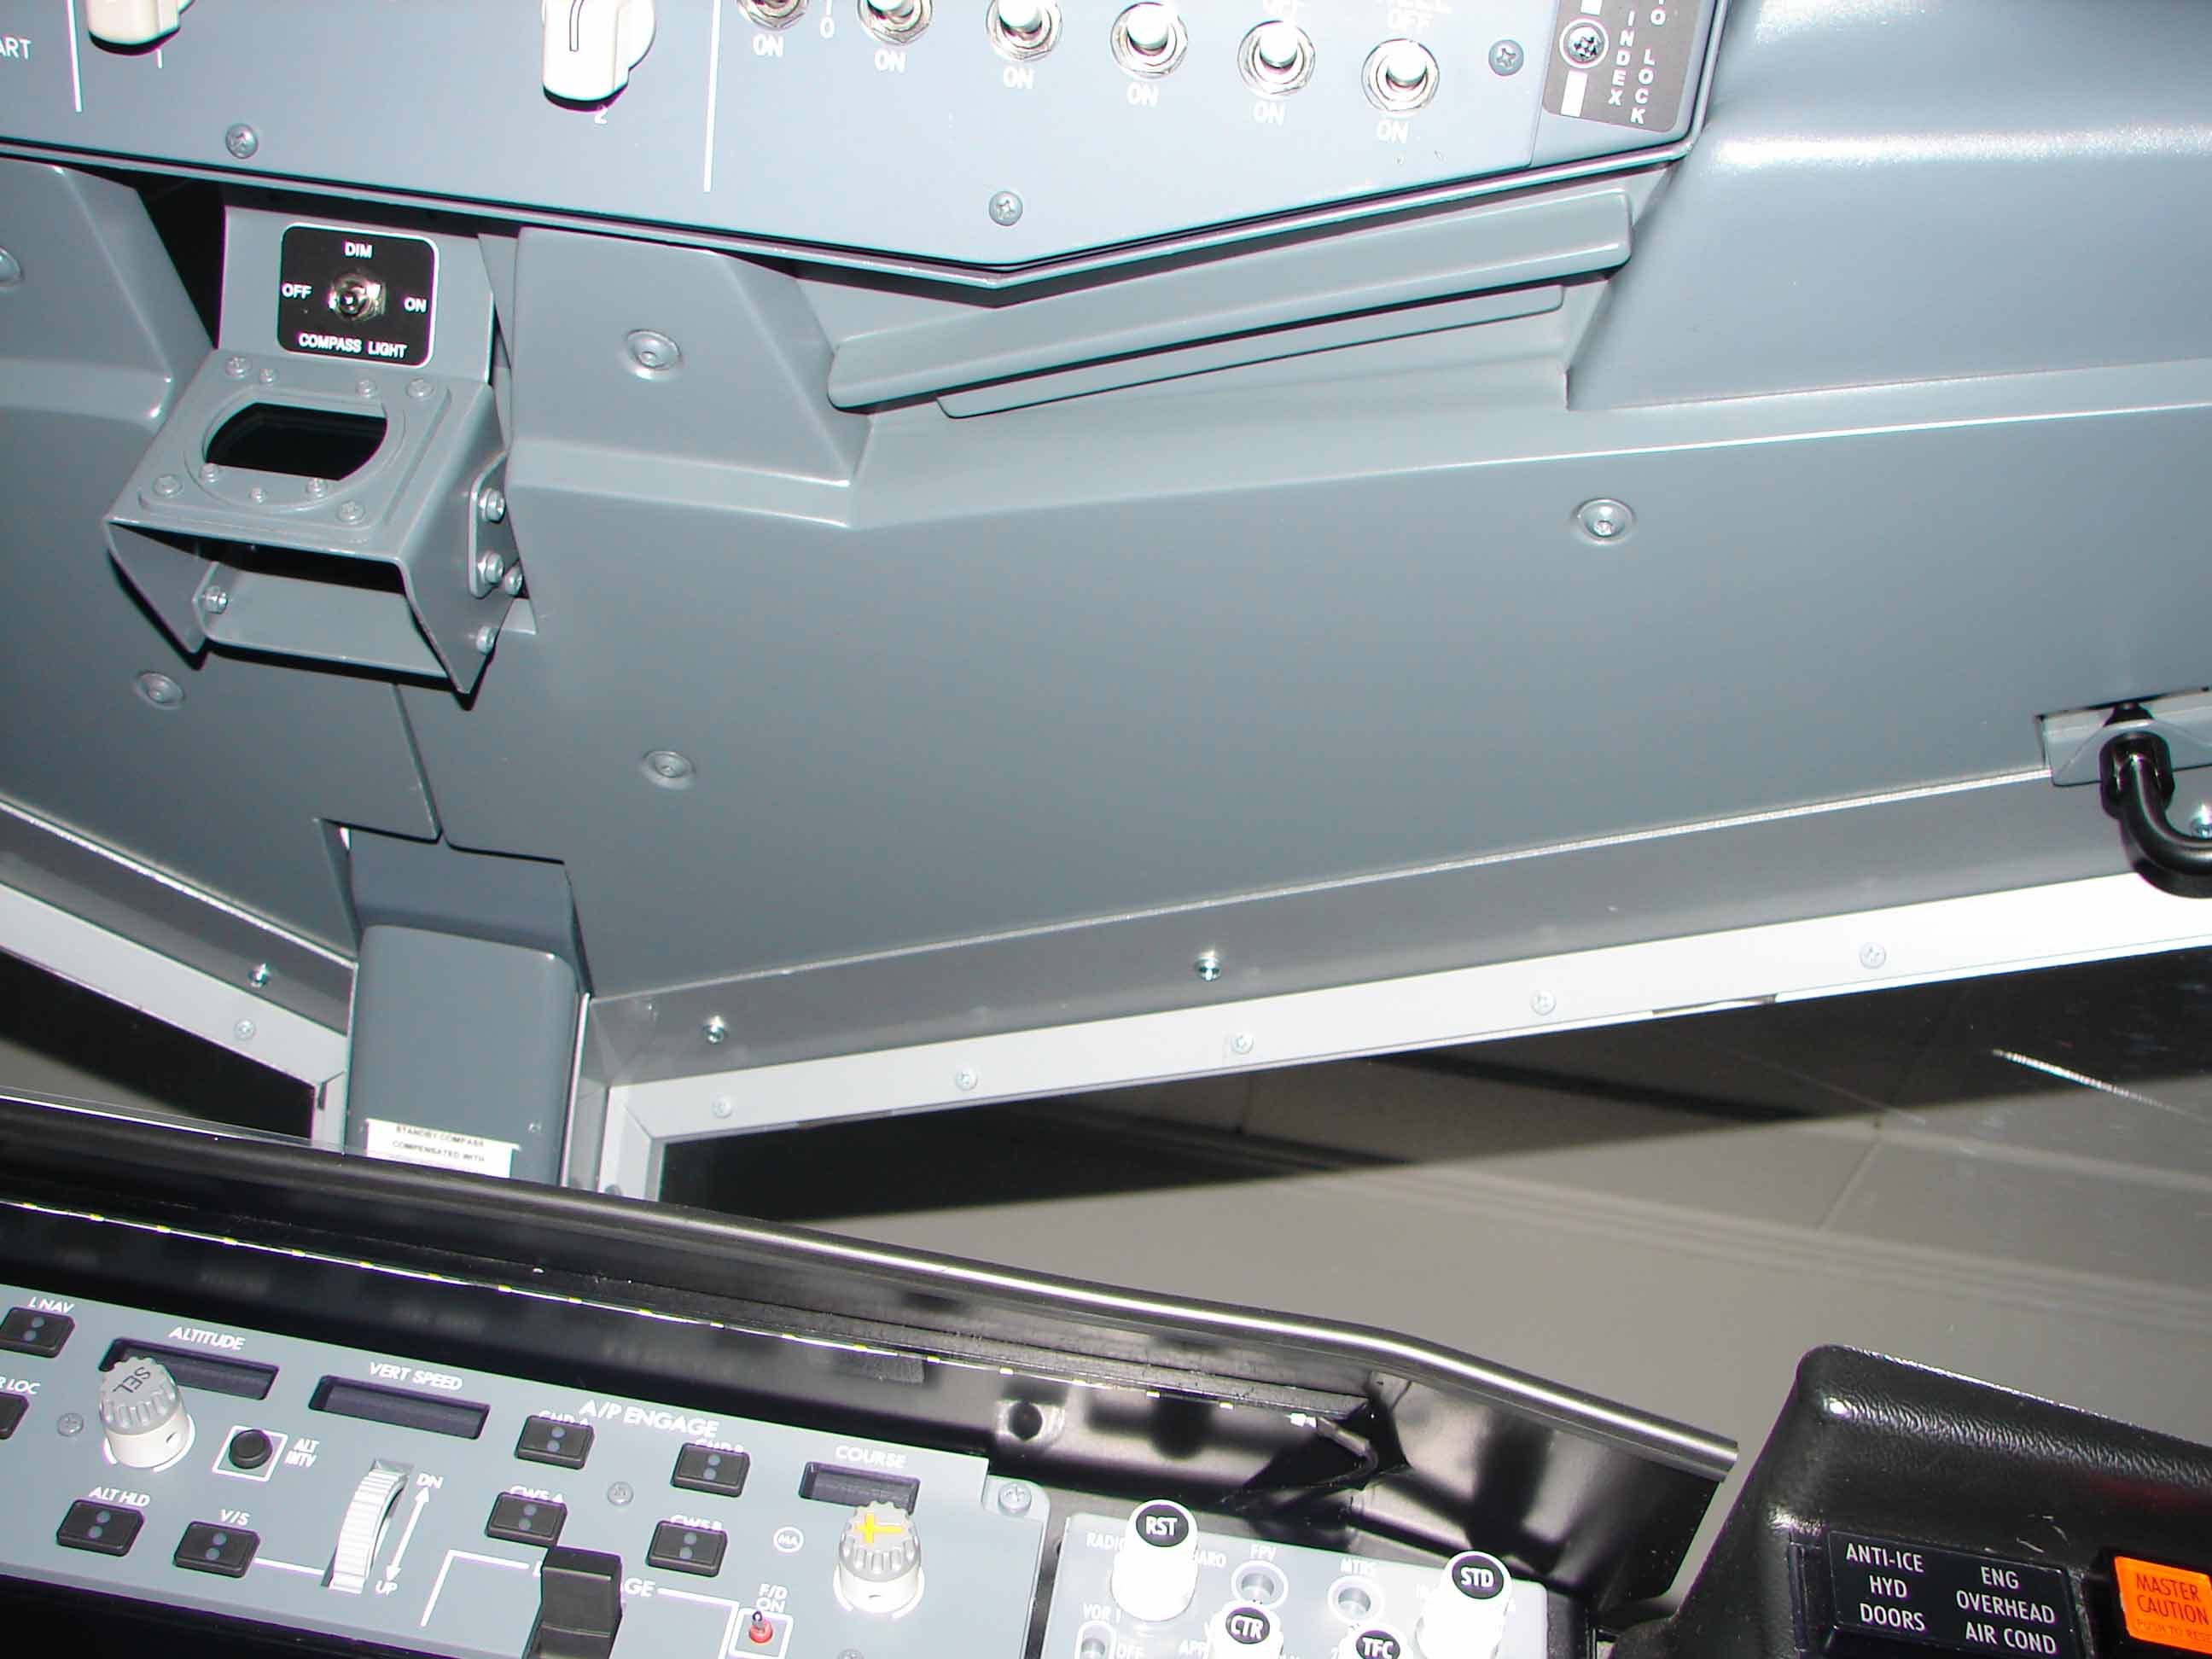
Folding handles
The left and right of the front windows (windshield) are foldable handles (pilot grab handle).
These handles use the pilots to and from their cockpitstoel to climb. Due to the limited space in the front of the cockpit is sometimes difficult without the loss of balance in a seated position to get. When these handles are not used, these are folded back.

This collapsible handles I found at Conrad.be . They are sold under the name of ‘meterhandgreep’ and are available in 2 sizes : 100 mm and 120 mm.
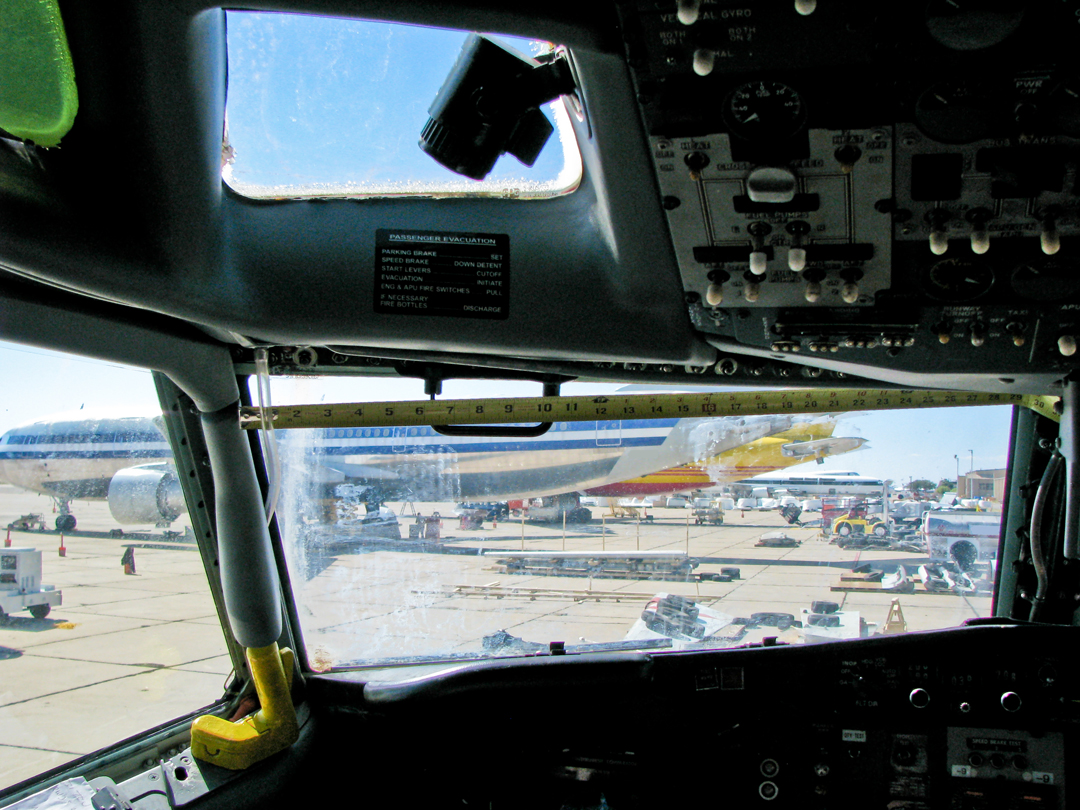
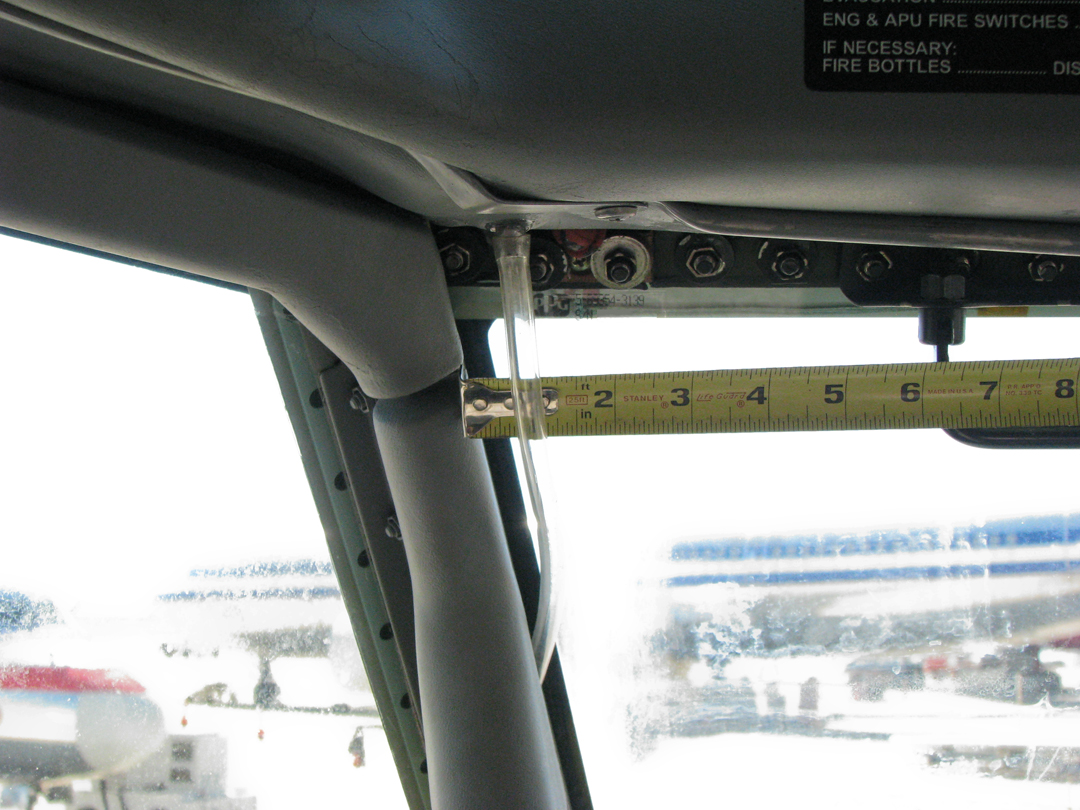
As shown below on the picture (in Inches), with a measurement in a real B737, 100 mm the correct size.

Also the details of the Conrad-handles come surprisingly correspond to the real instances (see below a few pictures of the real folding handles – Photos by Carlos Hermida).


Only are those of Conrad in chrome-plated hoogglansstaal and the handle has a black plastic coating. These exterior handles have a snap locks in both end positions and are supplied with nuts and washers.

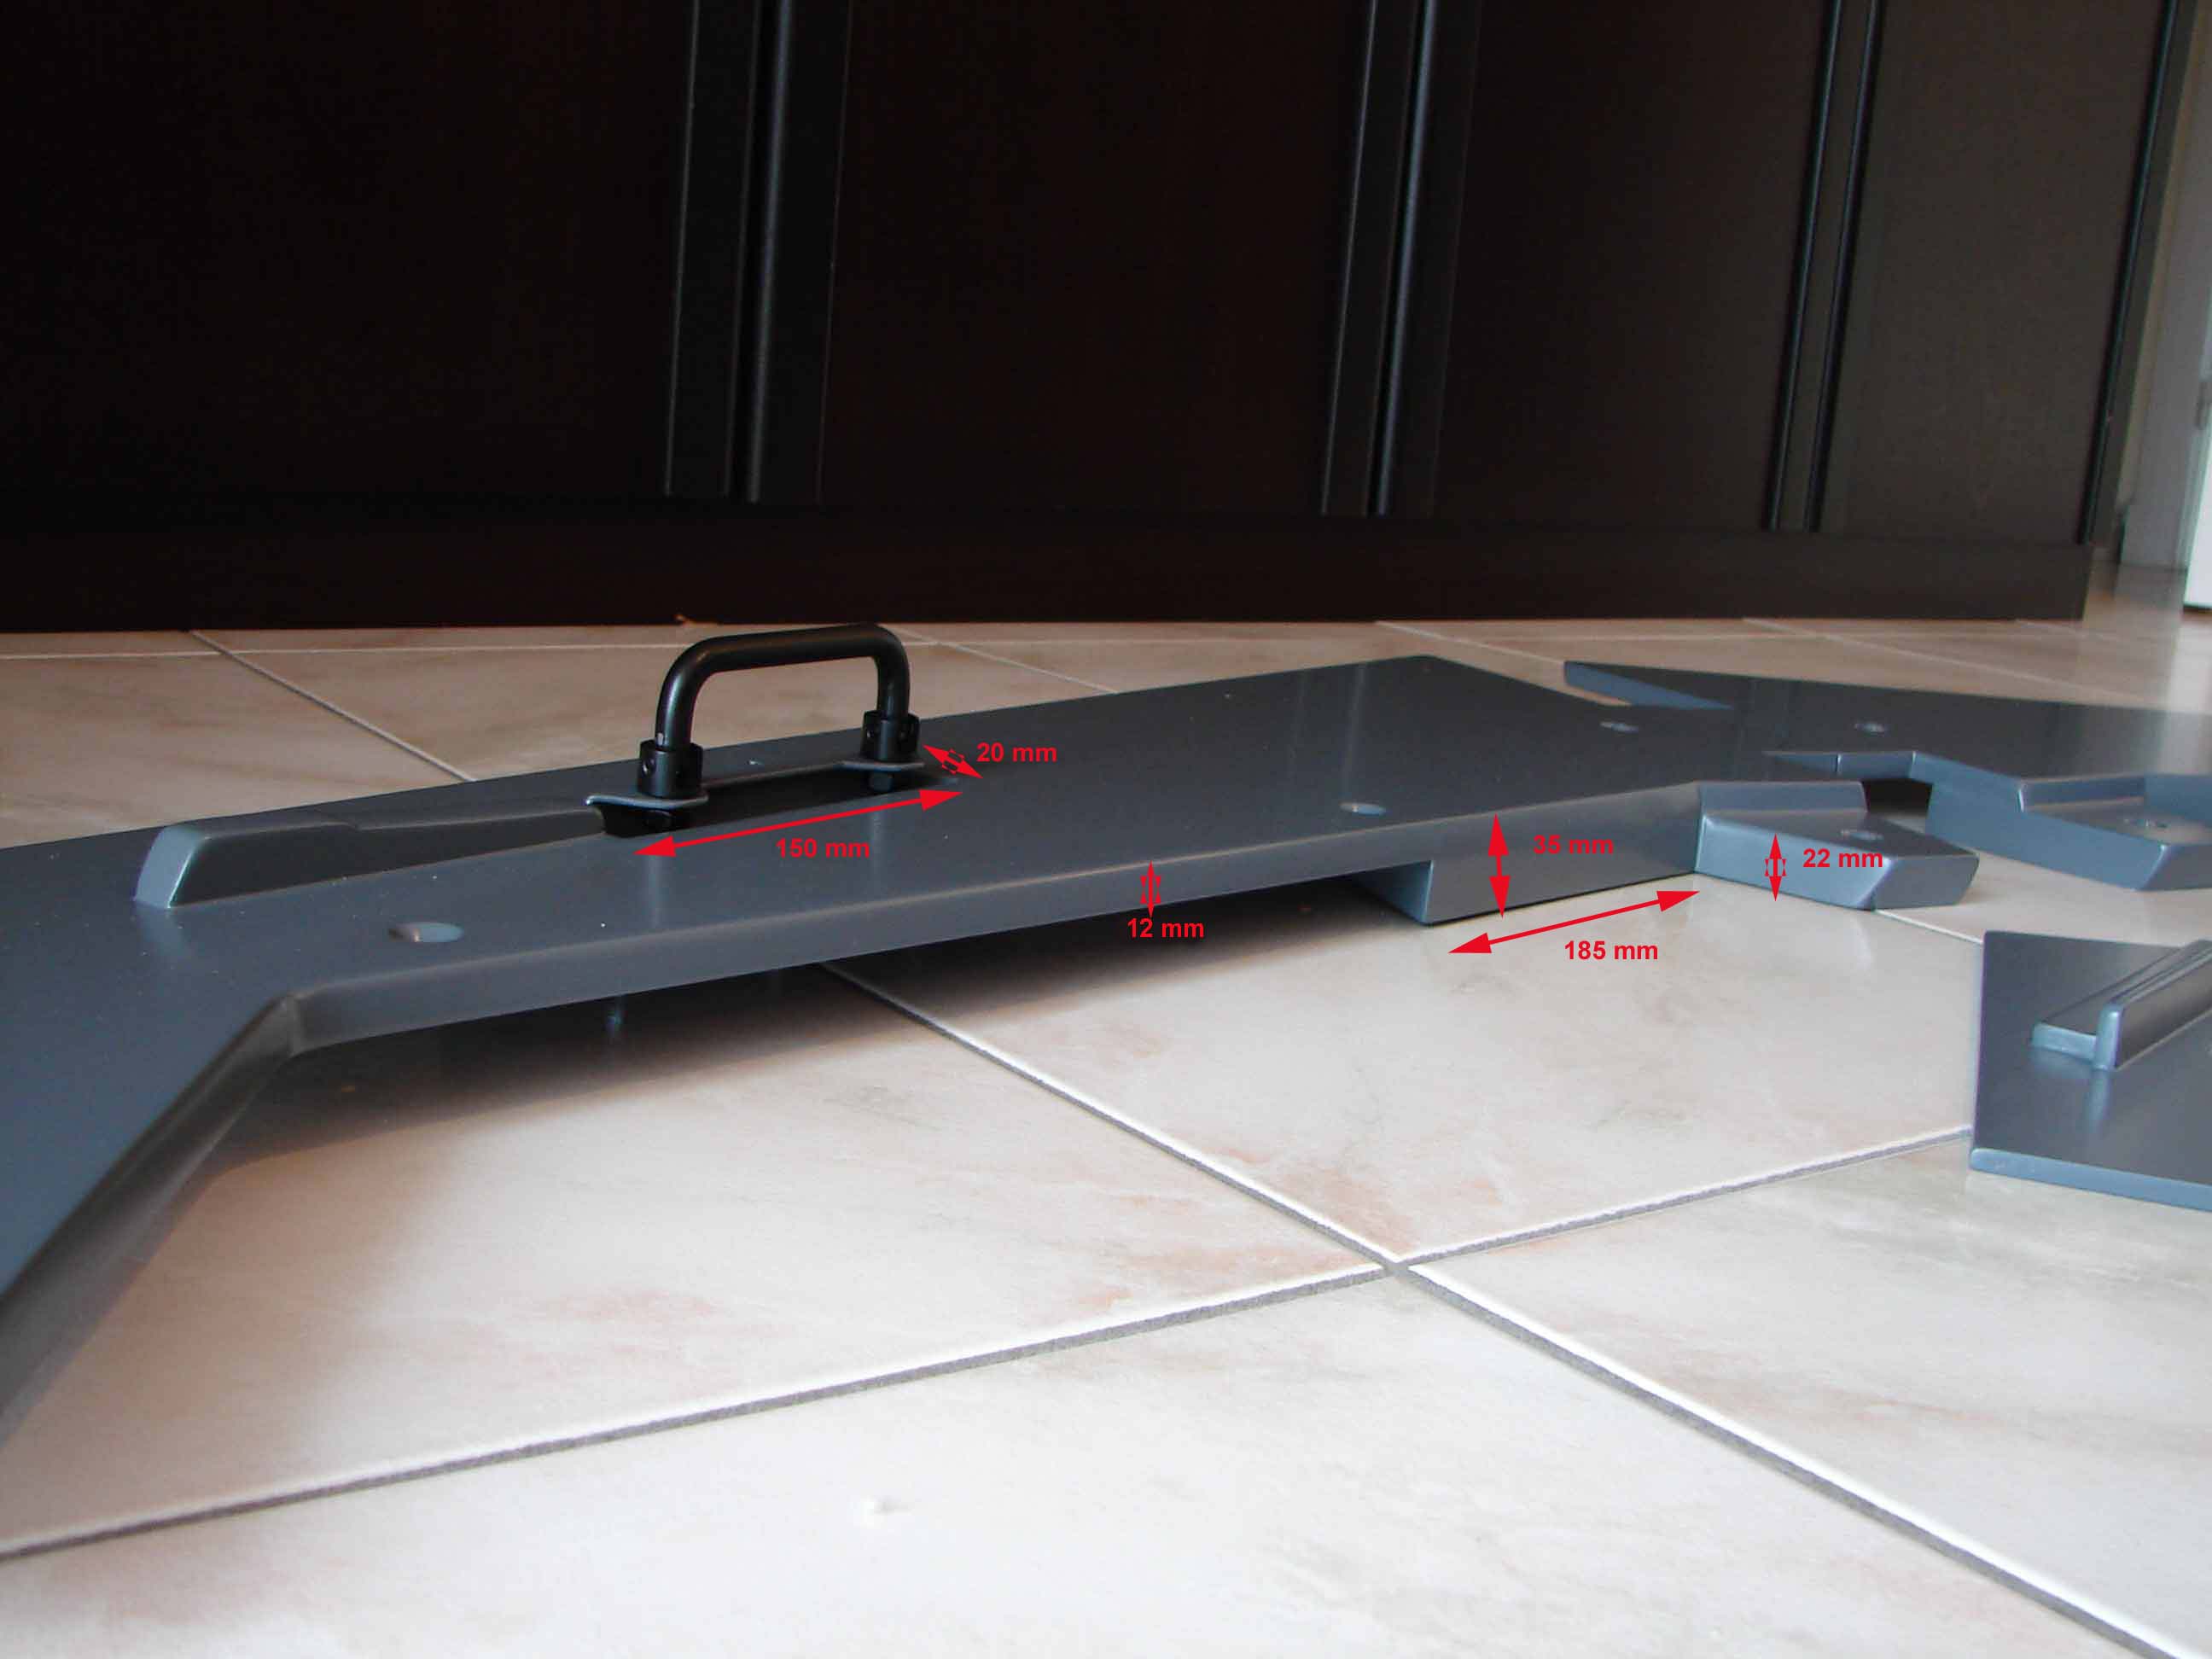
These folding handles to confirm I have brackets made from aluminium U-profile 20 mm.

Also, I have here as much as possible, the brackets mimic those found in the real. Only the bevestigingszijde to against the top side of the mdf panel to confirm that it was fully horizontal.
In the real bracket, this side is more slanted-upright position and then confirmed to be behind the windowframe. With what saw, and vijlwerk are the brackets easy to make.


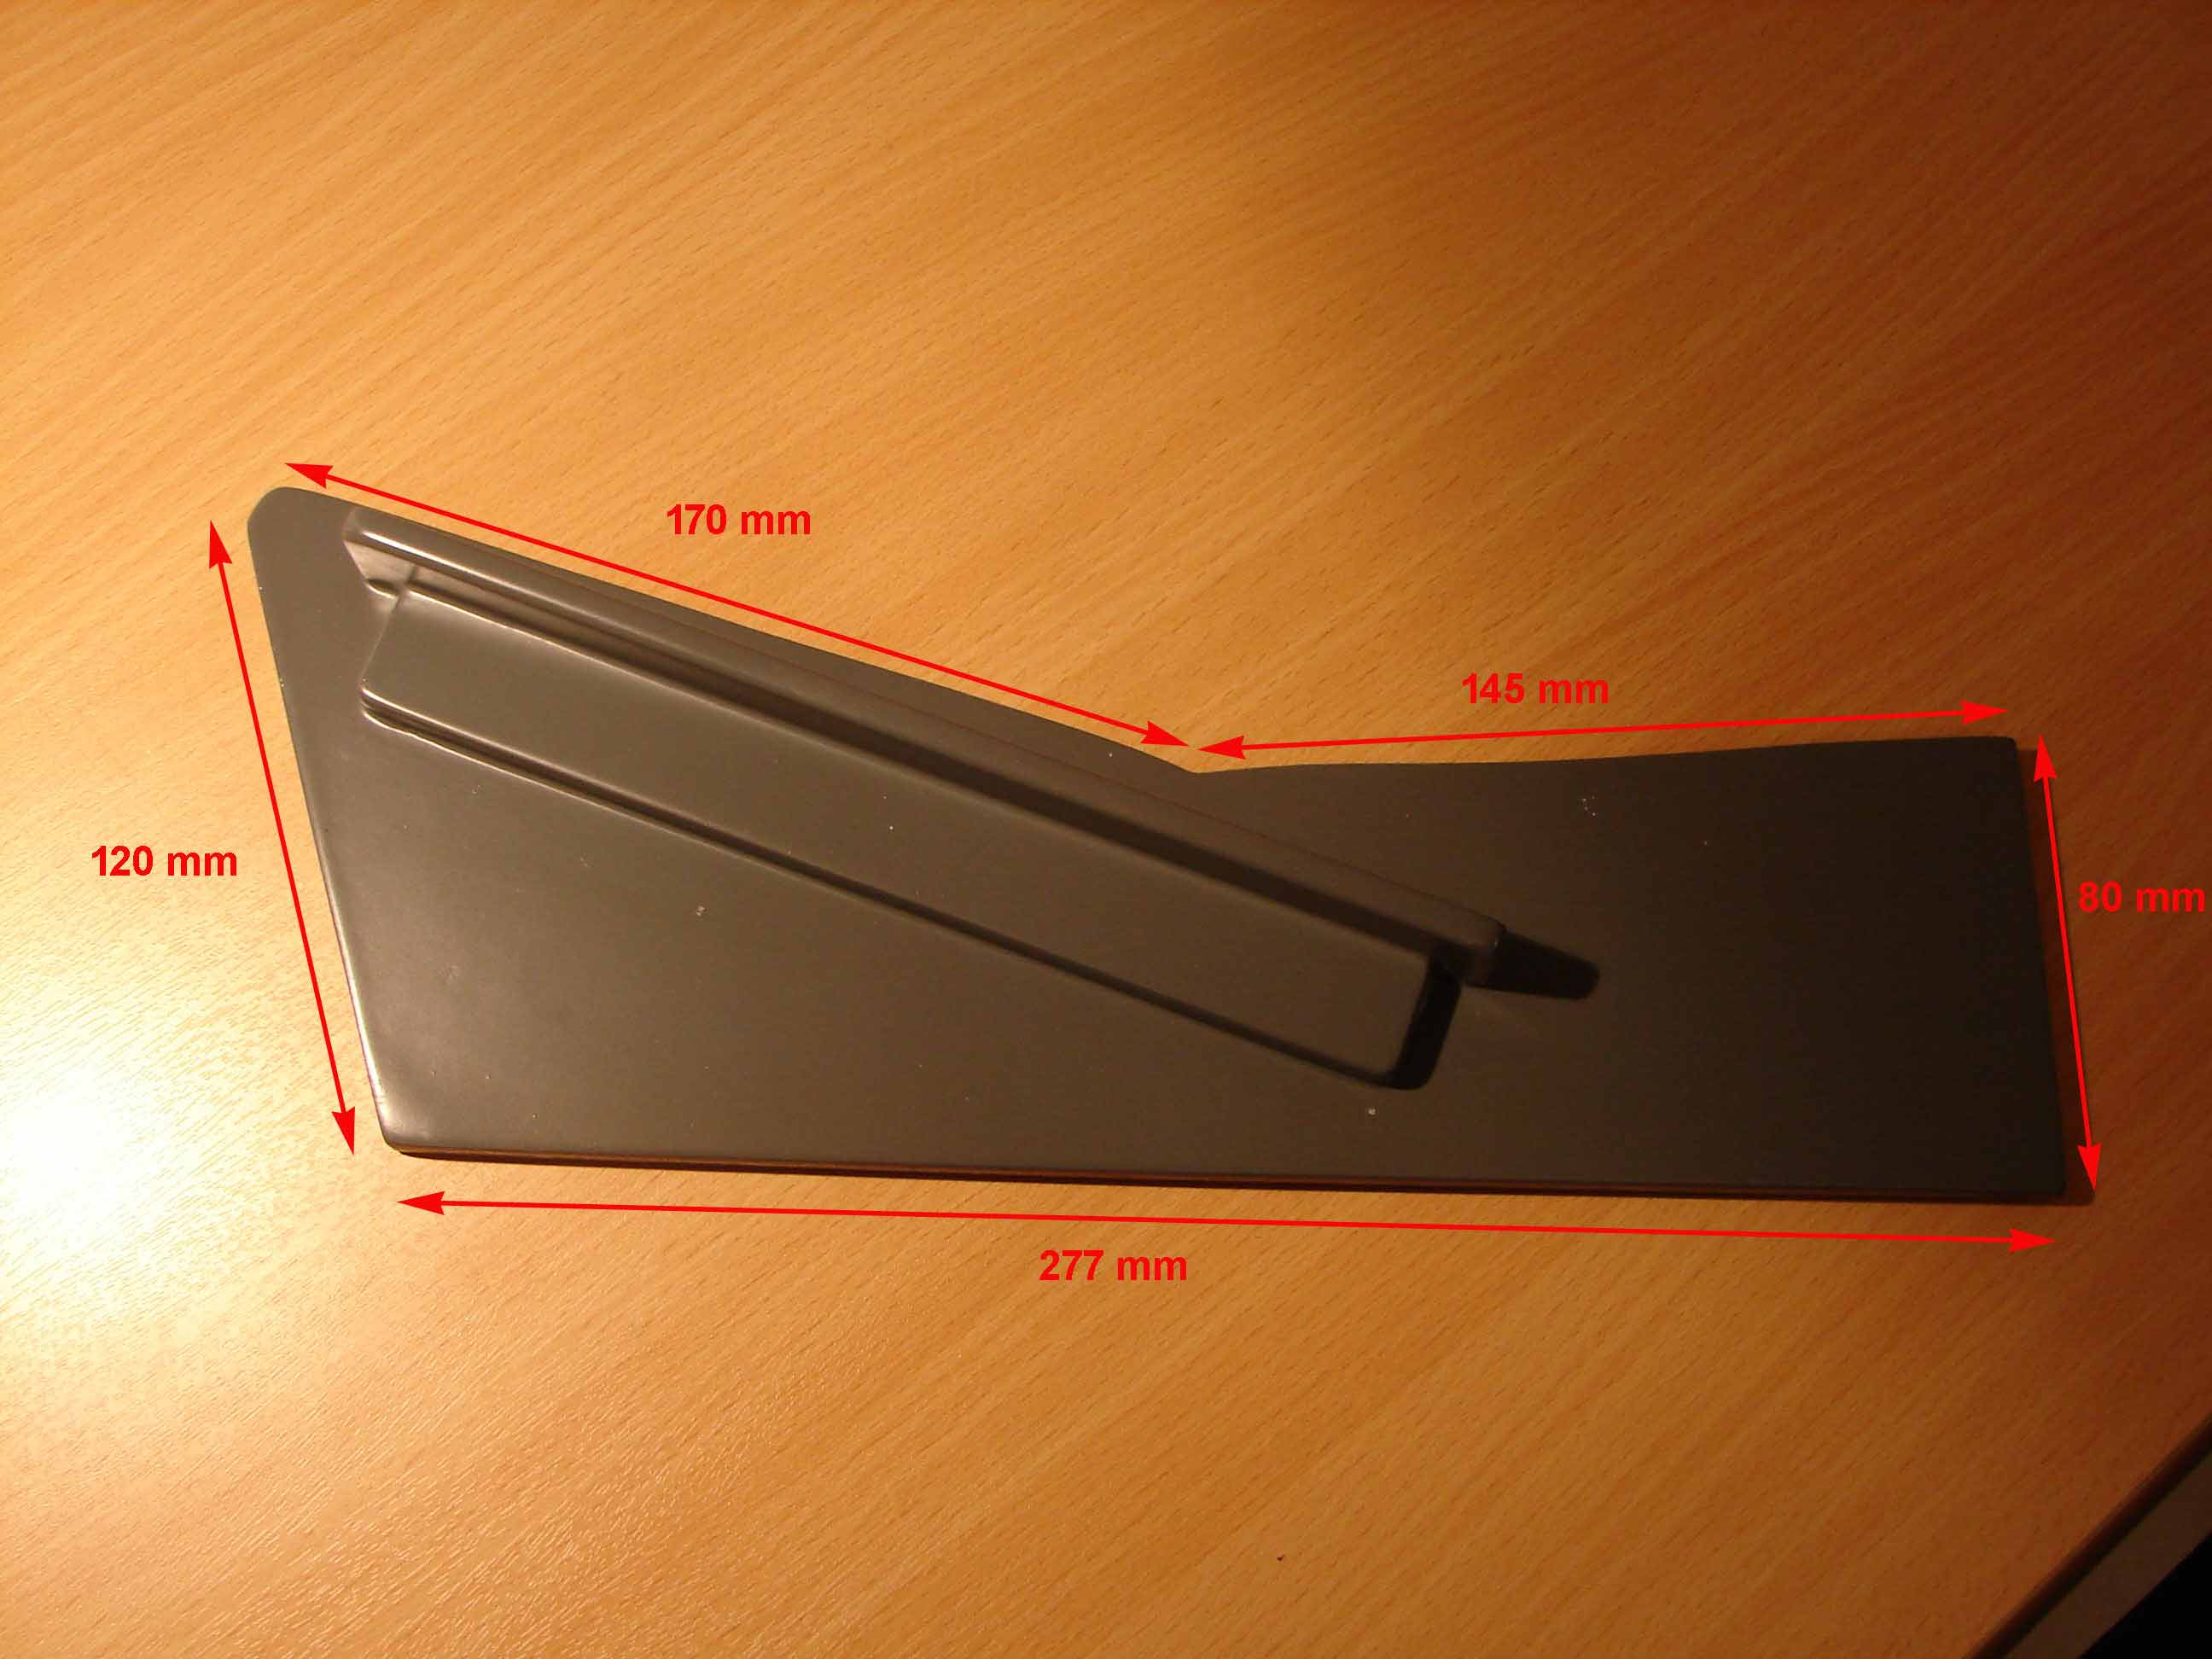
These brackets have I let it sink and built-in mdf-panels of the ‘front-ceiling’. So I have a rectangular opening cut in the mdf panel to match the dimensions of the bracket.


For convenience, and also to the windowframe not much to damage, I have these openings made just behind the edge of the windowframe.
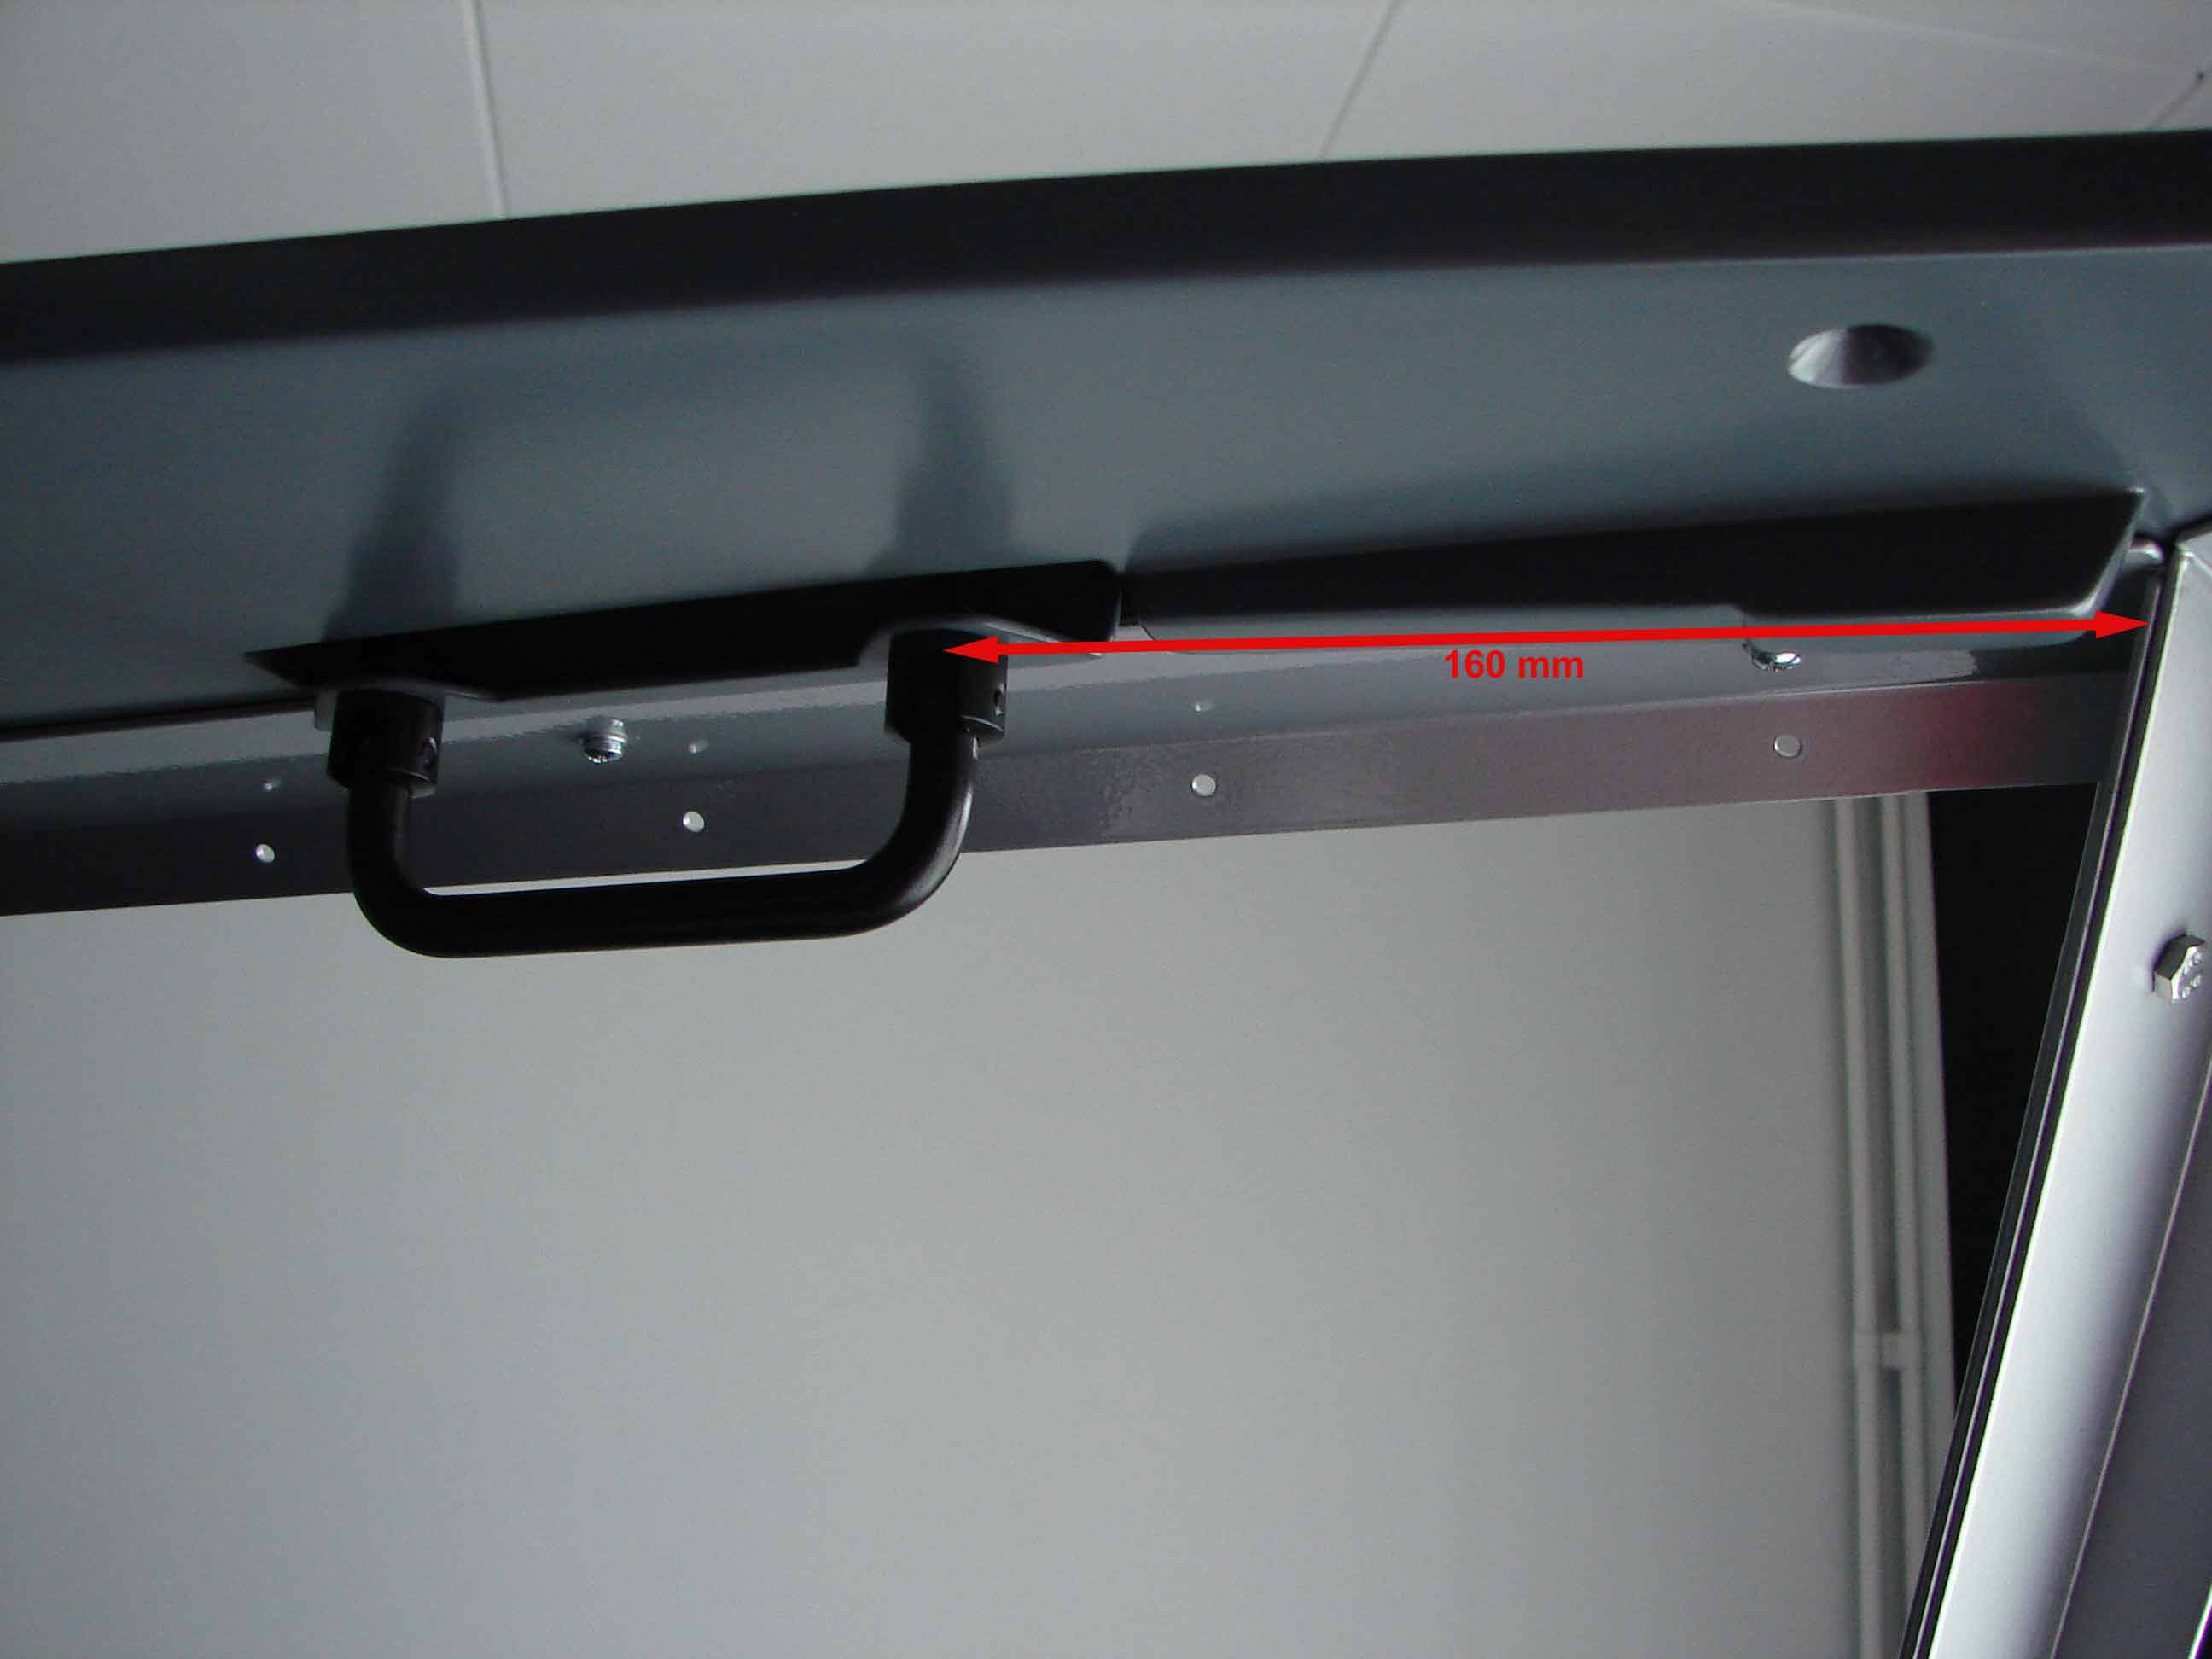
Then I have a wooden block glued on top of this opening. The bracket is then in the opening against the wooden block is screwed. The bracket with a handle to a distance of 16 cm from the corner of the front window and side window.
I have a few photos can be found on a forum where they can measure in a real B737 (see photos).
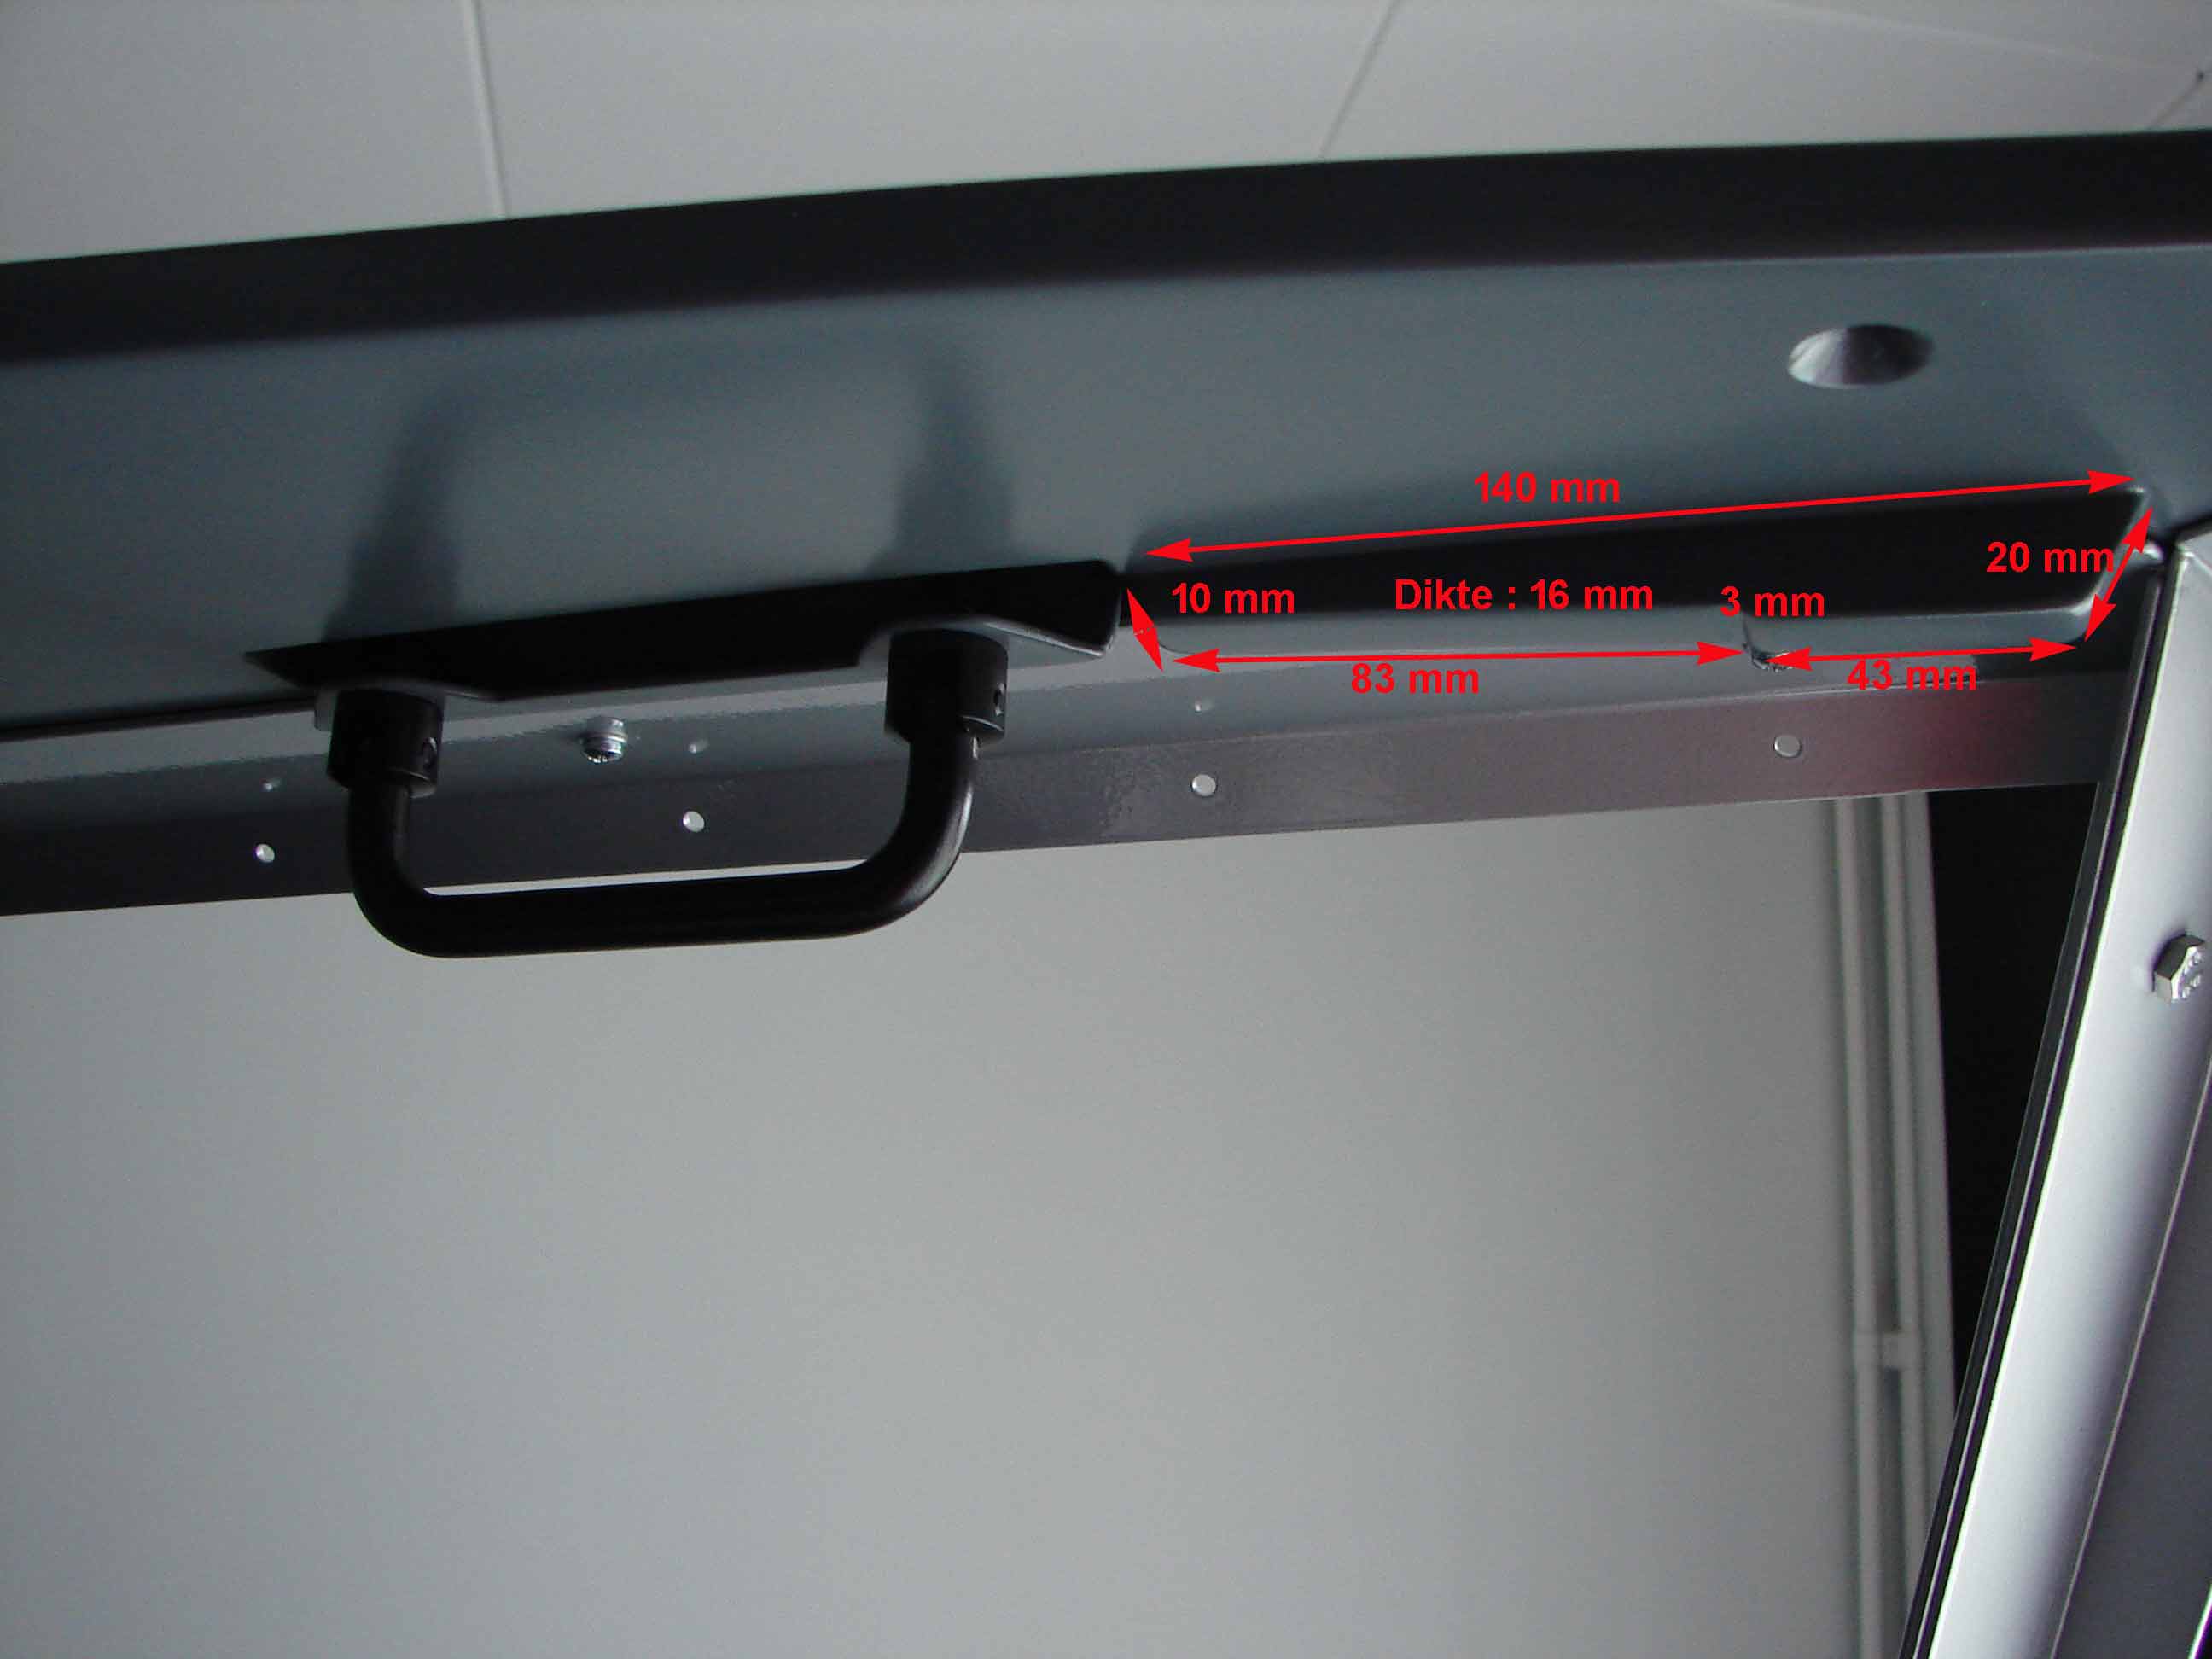
A small portion of the bracket is visible and therefore less. The plastic cover I have off and the whole handle has a black and tan.
The brackets I have Boeing-gray painted.

Translated by Yandex.Translate and Global Translator


