MIP mode
MIP MODE
The panels I saw with It. It should, however, some caution should be exercised, are, as they sometimes do not look at mm as well.
Be careful !!!
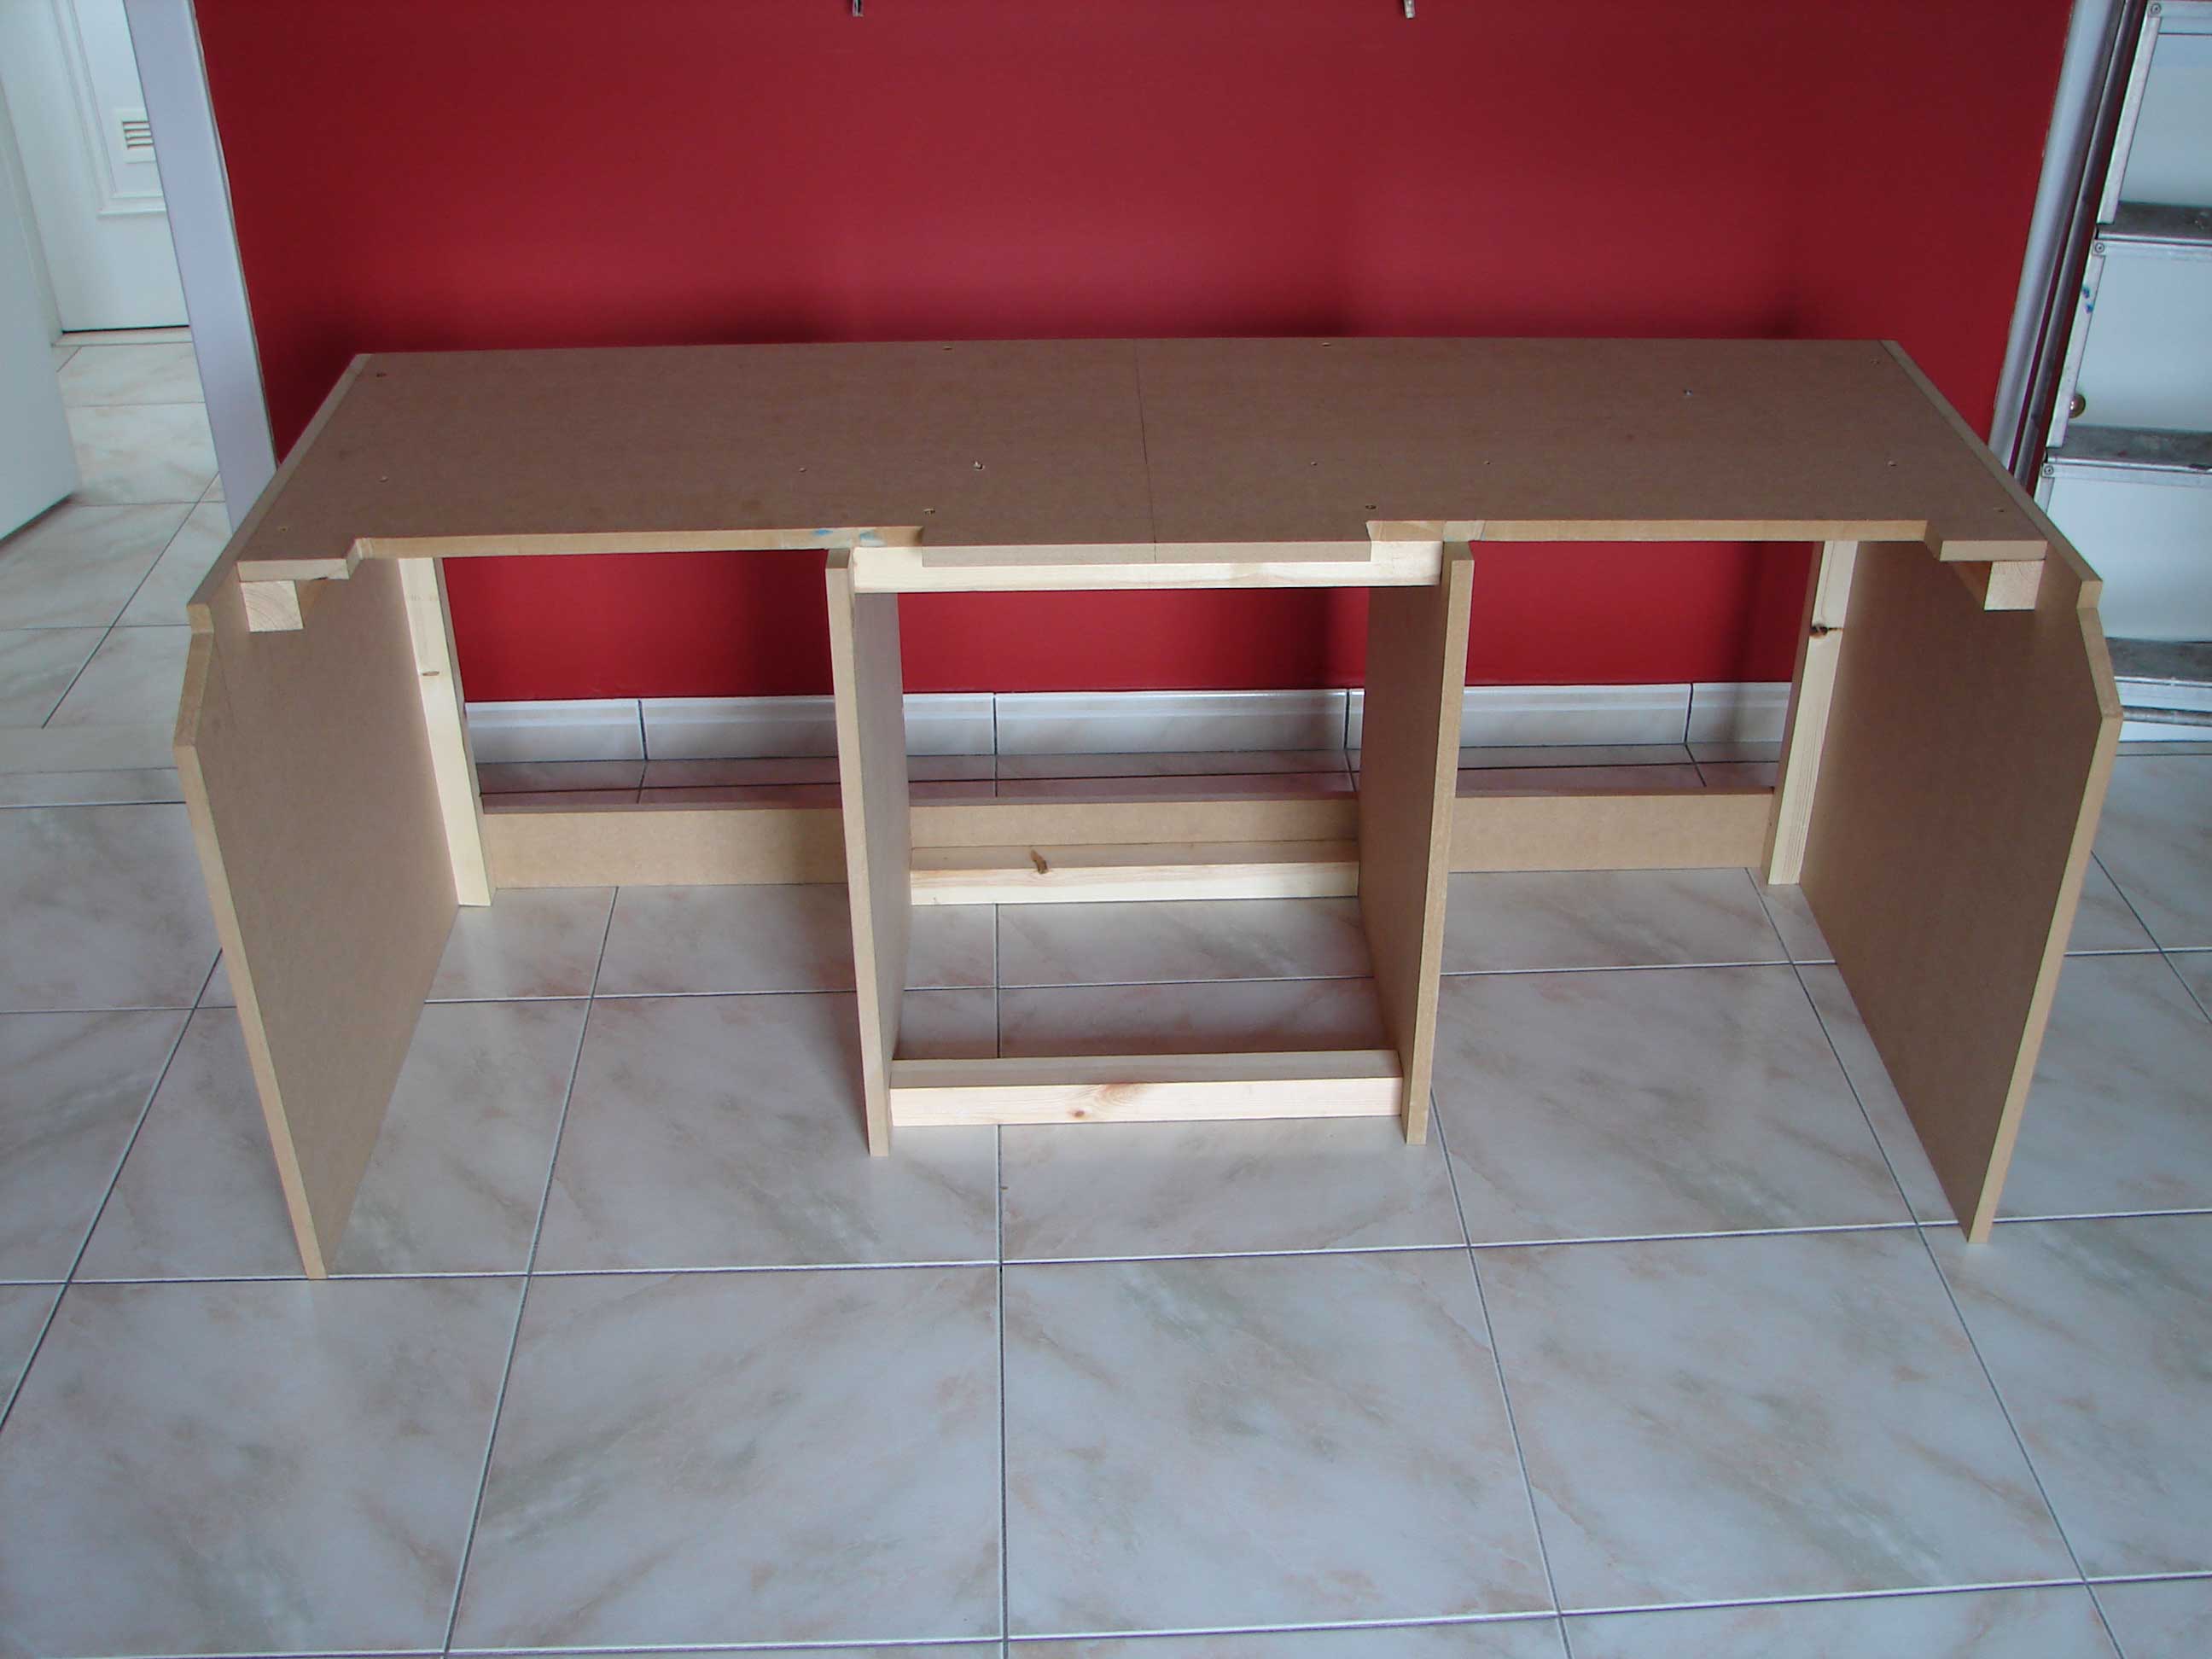
You will notice that the MIP stand and CDU bay with strong mdfpanelen of up to 18 mm in thickness. I also have a 10 mm for the width of the CDU-bay, so I was sure that everything between them would go.
I have a 33 mm was taken as the FlyEngravity size (1163, instead of 1130 mm) given my cockpitstoelen + rail is of a c-130, extra high.
Later (many years later), it is also apparent that the distance (width) in which the rudderpedalen have to be small. Rudderpedalen from Saitek to go there, but e.g. a replica Boeing 737 rudderpedalen will be larger, and there is, therefore, not in between! The wood panels for the MIP-table-and CDU-bay will have to be thinner to be elected, or may elect to aluminum ...
Not as much fun though. So keep in mind.My own dimensions are subject to change) are to be found in the examples:


The MIP is the MIP position and everything fits like a glove. To be on the dot. One millimeter less than the width of the MIP process to be a little... happiness indeed !


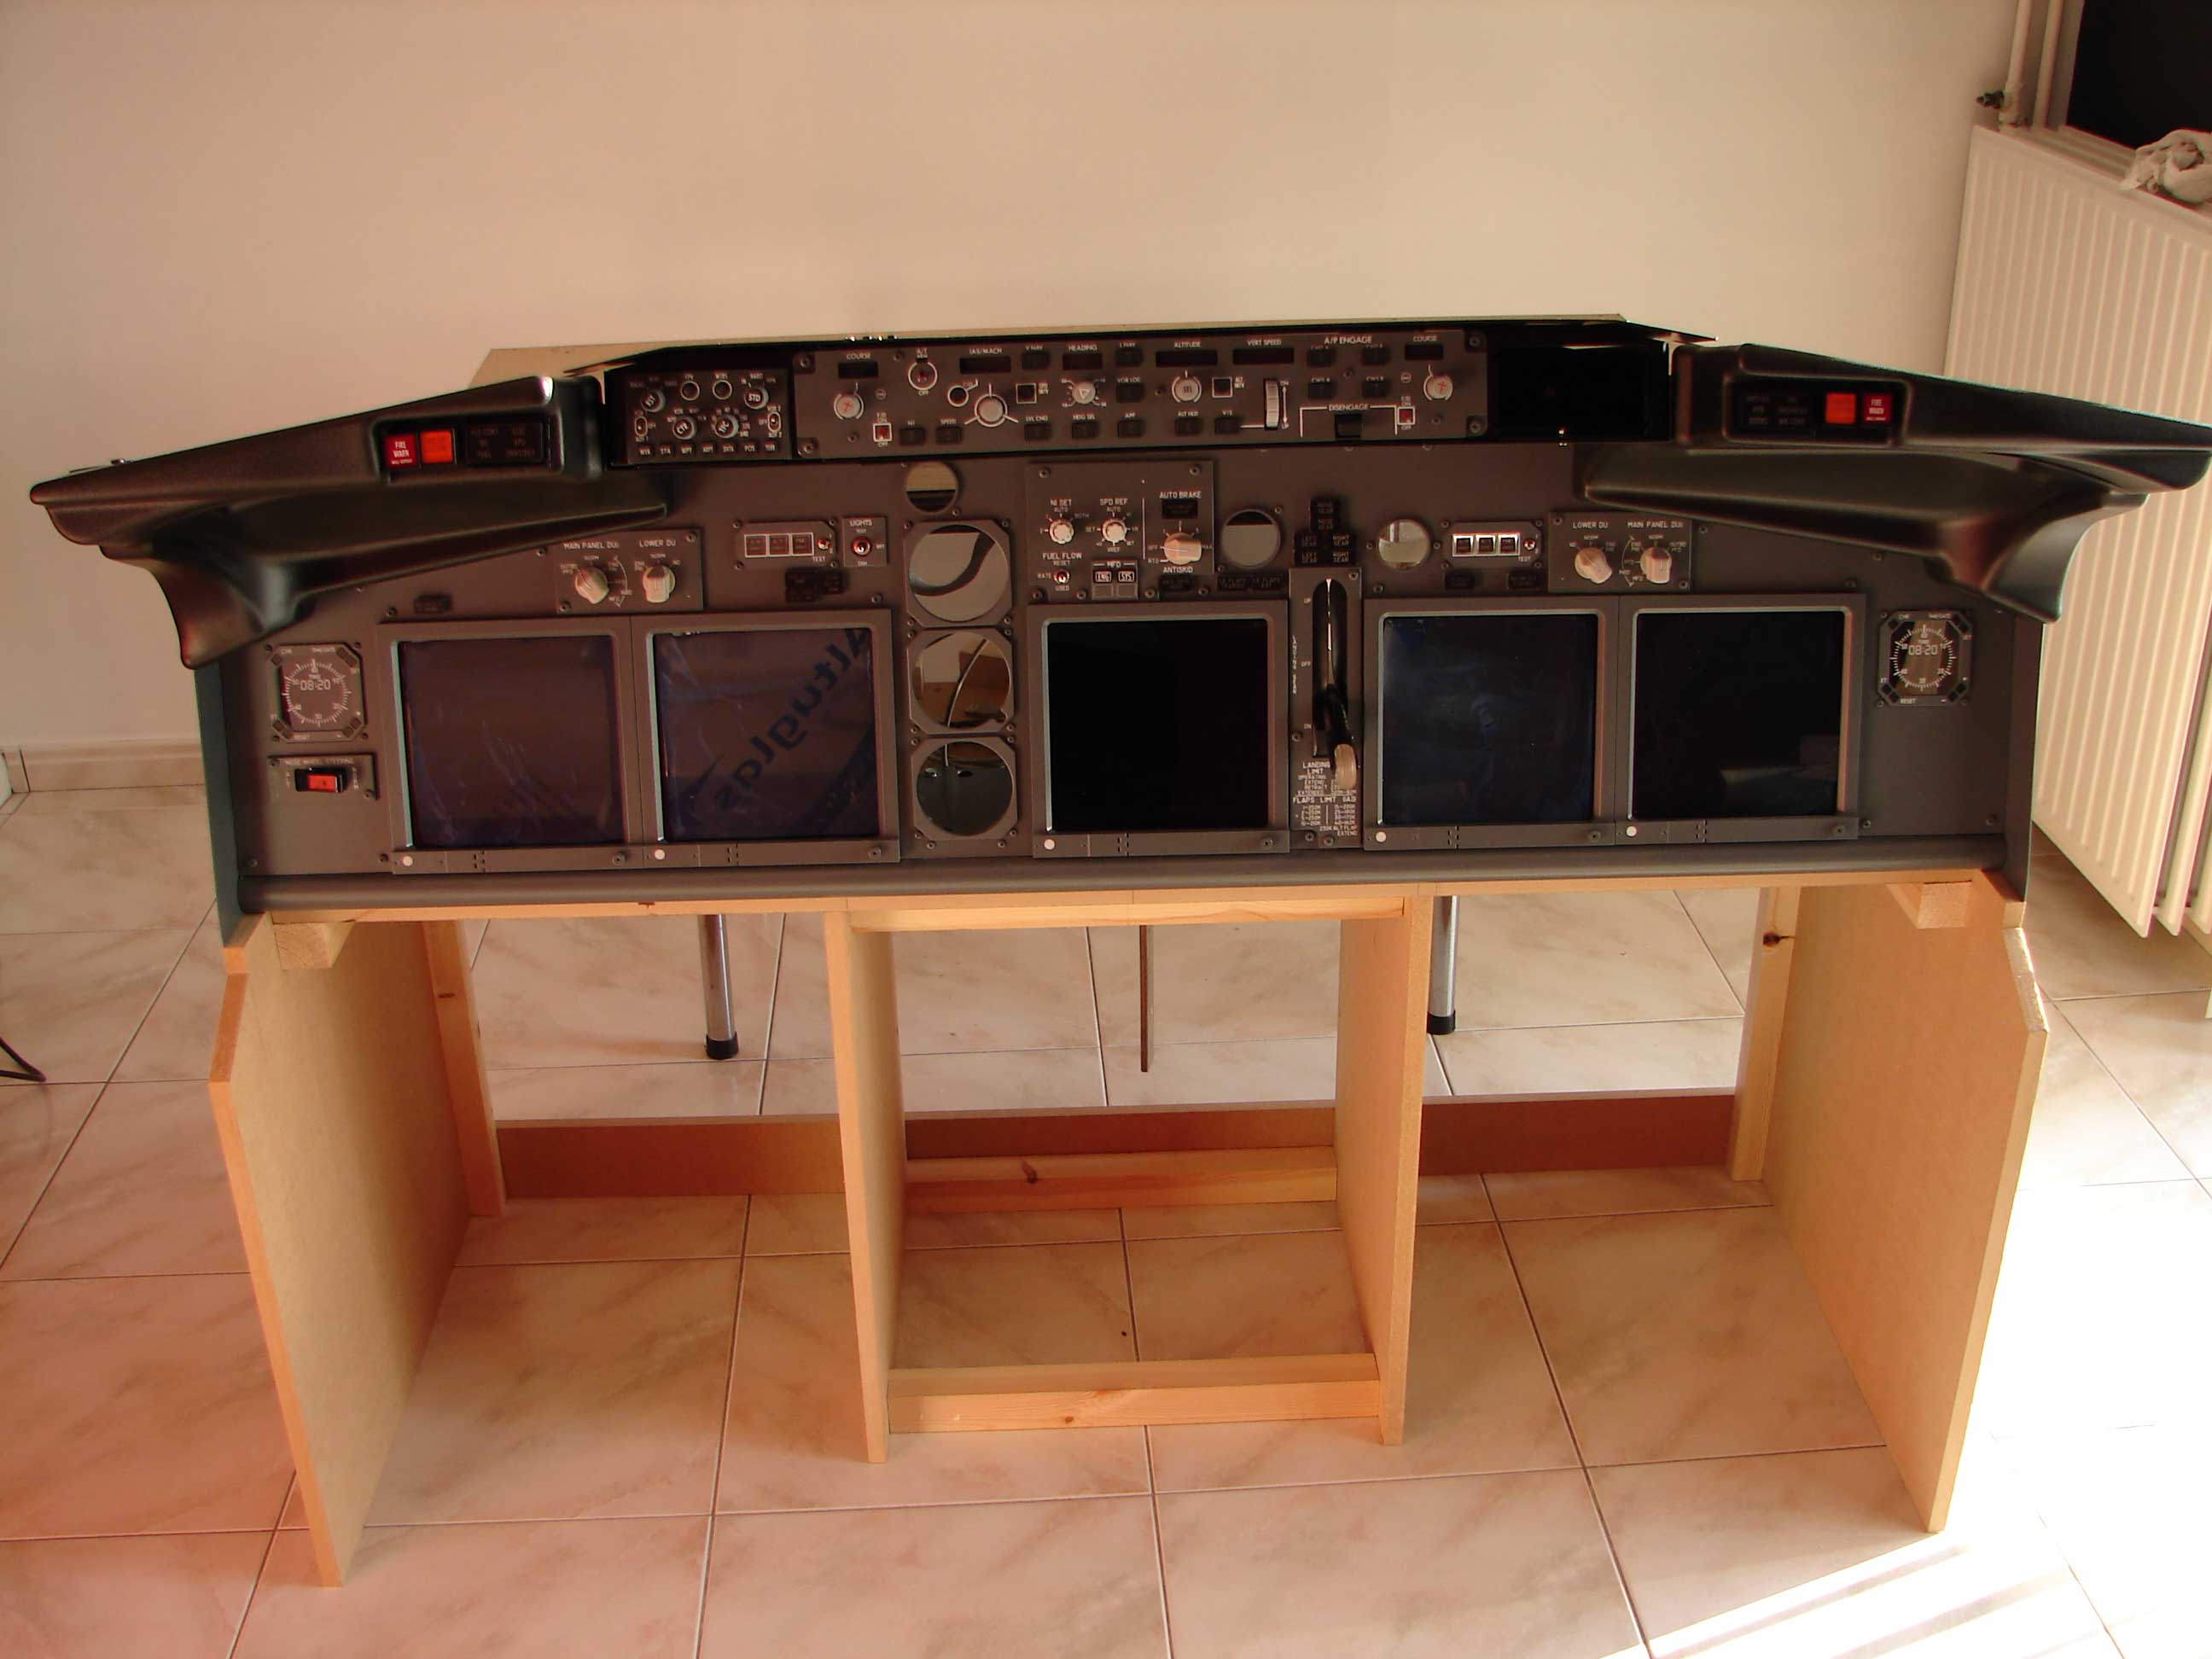
FlyEngravity has all the necessary cut-outs are made in the MIP-bottom and 19"screens are to be galvanized. In order to provide enough to sink it should be a part of the front of the MIP-mode cut out to be. The screens would be about 15 mm is necessary, and therefore are therefore not covered by the table. I also have to take into account the space that is cut out should be more than enough to be able to use the buttons on the front panel of the LCD's.


PAINTING
The Primerlagen
For the MIP, and Ruddercompartiment to the grey Boeing colour is to be painted, must be the elements of 2 x primer (primer layer) may be placed in it.
The material that I have used are :
- Sanding paper with P280 with schuurhandvat;
- Verfrollertje with thin hair (not schuimrollertje);
- In a medium-sized soft brush, a good quality (not hobbyborstel because they will lose some hairs);
- Levis And A Universal Primer;
- Porion houtplamuur (&P);
- Stekertje in order to make it to the houtplamuur;

At first, everything is lightly but thoroughly sanded with fine sand paper (P280).
Afterwards, everything needs to be cleaned of all dust. Then, there's the first coat of primer on it. This primer Levis and a Universal Primer that is specially designed for use with medium density FIBREBOARD and wood and is formulated in a water base. An advantage of this is that the paint does not smell. A drawback (maybe a little bit of an advantage) is that it dries very quickly. If so, too long time to roll with the roller, there may be several origins of dried paint that may remain on the paint surface. So it is not 100% correct...
This paint is also suitable for wood, PLASTIC, and metal.
Once everything is properly dry, after the first primer coat, all small holes of the countersunk screws dichtgesmeerd with houtplamuur. Also, to the left or to the right, openings, or gaps, that there was not to be. If it is hardened, it can be loaded the holes gladgeschuurd (P280). If the openings are not completely closed, a second smeerbeurt with houtplamuur.
There is a second, scour off with a thorough cleaning with a vacuum cleaner and a video-on-demand. Then a second coat of primer has to be applied.
In this painting, puts out a lot of the time you have. Especially with all the nooks and crannies such as, for example, the PARLIAMENTARY state : Polishing, purification of dust, paint, filling, sanding, filling, sanding, clean of dust, paint, open plamuurplekken, grinding, purification of dust, painting, etc. pfffff.
Please note that the pictures below are of the variety of planned holes for the cable routing and the installation of the lower panels and the subpanels.


Finished in Boeing grey
Work principle for it to be finished in Boeing grey, it is similar, such as the application of the primerlagen. Just how to determine the correct grey, Boeingkleur, it is a different story...
When there are many of websites on cockpitbouwers to visit (also the FlyEngravity), we can see that the color-coded Grey RAL 7011 everyone is used to the gray Boeingkleur. Although this is a catch and it is because of this, it is not at all correct.
The RAL colours are not 100% accurate, i.e., they may be lighter, darker or of a different kleurentint happened to it after mixing. I had already been warned by my kleurenspecialist.
Work on RAL7011, I have yet to paint mix, with the result that the color mixed all the way not matched (blue shade) with RAL 7011, from FlyEngravity. Itís your own fault... to be A warned man is worth a lot...

If you have everything in the cockpit will need painting, of course, there is no difference between the colours and in RAL 7011 is ideal. However, if you are RAL 7011 need to use with pre-painted parts such as the subpanels, then there might be a problem is that the two colors don't match (too light, too dark, and the other kleurentint).
Thus, the RAL colours are not quite right.
But grey RAL 7011 shuffled to the side, and the other way is to go look for a how to choose the right color.
I have a proper sample paint (the lower panel and the FlyEngravity), a-scans, using a special color. Any color that can be used on the PC, but it is a special device that is used to correct the color is to be determined. The code can it to scan the reading and look at a sample range of colours.
The color mixing, but in this case, there can be no derogation. This should be a perfect match for the color swatch. This color fit perfectly with the FlyEngravity-sample paint.
And now, some more information about different color codes. RAL, we have the first-hand experienced that it is less accurate. We will know then ACC and THEIR.
ACC and THEIR its a lot more accurate after the mixing process, and both of them have little or no deviation from the selected color swatch, click>color>mix).
Another important thing is that we must not forget that we have one of the other major scanner, it is possible to use, and that is the human eye. After the e-scan will be this particular scan is finally the right color to choose.
The ACC code that most closely corresponds to the " Boeing grey from FlyEngravity is ACC, R6.06.30 (Levi's). These colors after mixing, matching perfectly with each other.
For info: this is The genuine OEM Boeinggrijskleur, it would have been Federal Standard 595 Color FS 36118’.

Any gloss will fit you? The the grey RAL 7011, from FlyEngravity, it is a combination of 20% gloss and 80% matte.
In the store, it may be, that brilliance will not be as construct, and you can only choose between high gloss, satin, soft satin, and matte. And this last one is by far the most consistent with the FlyEngravity-ranges. So matte, gloss,.
This paint has been formulated to a water-based and it is not a synthetic. Water-based-have their advantages and disadvantages : dries out quite quickly and it may not for a long time the other will be rolled on the roller (the chances of getting on the sheets of paper in the roller and the advantage is that this paint does not smell.
It is required for the final primer coat done and after a light scour off with a sand P280.
Then leave it to dry out and a light scour off and after the final lacquer coat can be applied. Of the same material as in the substrate can be used.
The paint on the front panel of the CDU state, I have RAL 9002 Sigma Tigron Soft satin is used. This is the color that is white with a slight grey tint and has a compound composition.
Also, the ‘small parts’ such as the screws and cover must not be forgotten...
.


Translated by Yandex.Translate and Global Translator


